background preloader

Arts & Crafts

Facebook Twitter

Maxi Skirt Tutorial. Here is a maxi skirt I made and wore for Thanksgiving. It is so easy and inexpensive to make! Material: Fabric: You will need to pick out the fabric material and color you want. I used a stretch knit from Joann's Fabric. (Don't forget to use your coupons when buying your fabric!) Elastic band First, you will need to measure how much fabric you will need. Next, you will need to measure your waist for the elastic length. You should use elastic thread when attaching the skirt to the waistband, but I did not have any on hand, and forgot to buy some, so my skirt's waistband is attached with just plain old thread.

Once you have all your materials, it is time to sew! Since your fabric should already be cut to the length that you need, you don't need to do any cutting. When you get to the end, DO NOT back stitch! Separate the top thread from the bottom one, and pull on one (i pulled the top) to create your ruffles. Ruffle until you get the width of your skirt to be the same width as your elastic.

25 Handmade Gifts Under $5. If your gift list is long and your budget is small here are some great Handmade Gifts that you can make. Keep in mind that handmade items are not just beautiful but special… I love to give them and I love to receive them. In my opinion they are the best! Jersey Knit Bracelet Lovely!

This would make a perfect gift for any of your girlfriends. You can choose the colors and recycle t-shirts that you have around the house. Cheap and cute! Tutorial Paper Clip Earrings Tutorial This is a brilliant idea… and the possibilities are endless. Love it! Printed Candles Who doesn’t love a candle? Think about how many different stamps you could use to customize this project. tutorial Hot Chocolate Art! What a great gift for neighbors and teachers… I am personally a hot chocolate lover so this would make a great gift for me tutorial Tile Coaster You can buy these plain tiles at Home Depot for under a dollar. I’ve seen them with family pictures also… Way cute! Tutorial Bow Belt I was amazed how easy this tutorial was. So Pretty! 20 Awesome Do It Yourself Projects. Thursday, June 14, 2012 4:30 am, Posted by Chris Groves | Internet 20 Awesome Do It Yourself Projects Topics: At Home Project Ideas , Creative DIY Home Projects , Do It Yourself Projects for 2012 , Fun How To Projects , What to Do with Extra Stuff Are you bored and have a bunch of extra little items hanging around here and there?

Well we were in the same boat so we decided to round up 20 different awesome at home projects you can do. Anything from soda pop cap lids to spoons and more. You honestly don’t know some of the creative things you can do with what could possible be junk. If you know of any great at home Do It Yourself Projects please leave a comment to include your own and maybe we will add it to our list. And for the upcoming holiday season we want to give all you do-it-yourselfers a head start with these incredible Christmas DIY for 2012 1. More info: here | Buy: here 2. More info: here 3. 4. 5. 6. 7. 8. 9. 10. 11. 12. 13. 14. 15. 16. 17. 18. 19. 20. Incoming search terms: The Technique Zone: Acrylic Paint Transfer.

Supplies needed: Acrylic dabbers, photocopy of an image, water spritzer bottle, paintbrush, card stock, craft sheet and heat tool (optional) Take the lid off the dabbers and brush the paint onto the card stock, ensure you get a good coverage Take your photocopied image ( remember that you will get a reverse of the image, so don't use bold words), flip it over and place it in the acrylic. Lightly press it down making sure it's smooth and not wrinkled Leave to air dry for at least 15 minutes and then if you wish give it a blast with the heat tool Only move onto this step when you are sure your paint is completely dryTake your water filled spritzer bottle, spray the back of the paper no more than two squirts, you don't want it too wet Next start to rub the paper very gently with your finger Keep rubbing and extra spritzing if you need too Eventually you will get rid of all the paper, but it does take a bit of patience as you have to be careful not to wet it too much and rub the image away.

- StumbleUpon. 30 Easy And Cuddly DIY Ideas For Recycling Old Sweaters. Gift Ideas for Poor Creative Souls (13) Posted by: Cathy on Jun 11, 2012 Tagged in: Untagged Painting stones has to be one of the cheapest forms of art and a wonderful way to give someone an inexpensive but thoughtful gift. I have collated a great selection here which I hope you will like and will feel inspired by. Painted stones also make great paper weights or you could use them as place settings for a wedding party. All you need to do is collect a few pebbles, get out your acrylic paints and then varnish your stones to protect them. Have fun! For tutorials on how to market yourself online, please go here. Felted Stuffed Animals - Martha Stewart Sewing Projects.

Sun Jar. UPDATE: This post originally ran on March 23 2011, but with summer winding down we wanted to bring it back up for some late summer inspiration! 
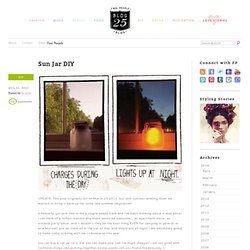
A fellow fp girl sent this to me a couple weeks back and i’ve been thinking about it ever since! I can think of a million reasons why these would be awesome… as apartment décor, as outdoor party décor, and – wouldn’t they be the best thing EVER for camping in general or at a festival? Just let them sit in the sun all day, and they’ll last all night!

I am absolutely going to make some to bring with me to bonnaroo this year. you can buy a sun jar here, but you can make your own for much cheaper! I am not good with technical things, like putting together a solar power cell, so i found the easy way :) what you need: a mason jar with a clear glass lid like this one from ikea, a solar garden light like the ones pictured above, which i found here, adhesive and glass frosting spray. last image.

Trending on FP.com: DIY Wrap Bracelet. You should all know by now that we are all about stacking bracelets on our wrists. The more, the better. In fact . . . the most, the best! With that being said, we’ll show you how to master a version of the ever so popular wrap bracelet. It’s so simple and addicting, you’ll soon be churning out these wristlets with your eyes closed. You’ll need (for a double wrapped bracelet) :* Lengths will vary depending on the size of your wrist (see comments for suggestions). Fold the length of leather cording in half to form a loop. Place the ball chain along the leather cording with the end of the chain meeting the end of the wrap.

Continue wrapping while checking it for fit around the wrist. When you have reached the end of the ball chain wrap the linen cording around the leather strands 2-3 more times. Thread the hex nut through the strands and tie a second knot. Trim with scissors and your wrap bracelet is finished!! The materials are listed for a double wrap bracelet. It’s a party! Ric Rac Flowers. Let me start out with a warning or sorry of some sort. The warning is because I have never done a Tutorial before, so I hope this is helpful and easy to follow. The sorry is for how horrible my nails look. I promise I did them after looking through these pics. WOW! I thought I would start off with a Flower, I too, just learned how to make. The prep time is seconds as opposed to other styles and Ric Rac trim is super easy to get at any craft supply store. Material: Time-Roughly 20 minutes about 28 inches of Ric Rac ( This will make a flower about 2 inches in diameter) Suggestion: The thicker the Ric Rac the better Felt (Any Color) One sheet will be fine depending on how many flowers you want to make.

Optional: Hair Clips, leaves or buttons Step One: Take the two pieces and hot glue them together. Note: You want to glue them together as if they are a mirror of one another. Step two: Lock in each curve of the first piece with the second. Say to yourself “over,under,over, under”. Pretty right? Homemade Sidewalk Chalk. By Michelle Vackar, Modern Handmade Child One of our favorite outside activities at our home is drawing with chalk on the driveway. You can play hopscotch, four-square, and of course draw and create silly stories. My daughters and I were talking one day as we played hopscotch about how to make chalk and I thought to myself, let’s try it!

It ended up being quite a lot of fun. What you will need: • Toilet paper or paper towel tubes • Scissors • Duct tape • Wax paper • Small bucket or disposable container to make the recipe • ¾ cup of warm water • 1 ½ cups Plaster of Paris • 2-3 tablespoons of tempera paint • Paper bag or a “mess mat” ** we made six tubes of chalk – we simply doubled the above recipe Step 1: If you are using paper towel tubes, cut each tube in half, so it is roughly the length of a toilet paper roll tube. Step 2: Cover one end of each tube with duct table to hold the contents within. Step 3: Cut as many pieces of wax paper as you have tubes. Rolled Paper Flowers. Welcome to flower week – five days of simple and delightful flower projects. 
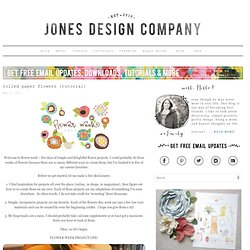
I could probably do three weeks of flowers because there are so many different ways to create them, but I’ve limited it to five of my current favorites.

Before we get started, let me make a few disclaimers: 1. I find inspiration for projects all over the place {online, in shops, in magazines}, then figure out how to re-create them on my own. Each of these projects are my adaptation of something I’ve seen elsewhere. In other words, I do not take credit for ‘inventing’ these blossoms. 2. 3. Okay, so let’s begin. Here’s what you’ll need: :: paper {either cover or text weight} :: florist wire :: scissors, pencil, glue gun STEP ONE: cut irregular circle This circle is approximately 8 inches, but you can do any size you wish.

STEP TWO: cut spiral Start at the outside edge and cut in a spiral fashion to the center. I like a sort of bumpy shape so that the petals end up a bit irregular STEP THREE: roll your blossom. Tinted Mason Jars. I’ve been experimenting with tinting mason jars to create a look like those old vintage ones that are difficult to find anymore in second hand stores.

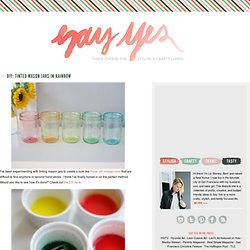
I think I’ve finally honed in on the perfect method. Would you like to see how it’s done? Check out the DIY here. Fill them with flowers, or illuminate an outdoor party filling them with battery operated tea lights or a strand of twinkle lights. I promise it’s easier than you think. Check out the whole tutorial right here on Momtastic copyright 2014 liz stanley // all rights reserved. Doily Lamp.