
Make your own jellyfish in a bottle. « BhoomPlay. ~ Note for Thai fans ~ เป็นโพสเก่าที่มีแฟนบล๊อกจากต่างประเทศขอมาให้เขียนเป็นภาษาอังกฤษนะคะส่วนแฟนบล็อกที่ยังไม่เคยอ่านเรื่องนี้เลย ฉบับภาษาไทยดูที่นี่ค่ะ The other day, while I was thinking to get something to put in the water bottle for Bhoom to shake for fun. I saw a plastic grocery bag next to me and then this idea popped up. I think.. well, give it a try. With some trials and errors, my little jellyfish comes alive just like I thought it would be. : ) When daddy and son first saw it, they’re surprised with their jaws wide open. Then, I asked my hubby to take pictures for this DIY Jellyfish in a bottle. Things you need to make your own jellyfish (Hope you can find all these in your kitchen) : 1.
. • Now you’ll get the head balloon part and the remaining will be its tentacles. When finished, you’ll get something like this (the left pile is all the pieces we cut off) • Put some water into the head part to make it be able to sink (see picture 7). Magazine Bowls. 3D animated origami instructions to make a peace crane, flapping bird, and football shirt. Page corner bookmarks. This project comes to you at the request of Twitterer @GCcapitalM.
I used to believe that a person could never have too many books, or too many bookmarks. Then I moved into an apartment slightly larger than some people’s closets (and much smaller than many people’s garages) and all these beliefs got turned on their naïeve little heads. But what a person can always look for more of is really cool unique bookmarks. Placeholders special enough for the books that are special enough to remain in your culled-out-of-spacial-necessity collection.
Page corner bookmarks are cute, practical and deeply under-represented in the world.* They’re easy to make, easy to customize, and will set you apart from all those same-same flat rectangular bookmarks. If you like this tutorial, here are a couple others that might be up your alley. For the monster-loving adults in the room, try some googly-eyed paper monster wine charms. What you’ll need: Putting it all together: 1) Follow steps 2 and 3 from above. Fall Leaf Place Card Holders. Little guiding stars. Since the new year has started I’ve been trying to think of ways to be more kind to my self.
Especially when that nasty gremlins try to creep in and stump me. I remembered this origami star video on You Tube and had to get them involved in my plan. I thought it would be fun to make a whole bunch with kind words and “you are….” phrases inside. I made 60 of them, enough to last me the whole year if I open one a week, plus a few extra just in case. I used 12 x 12 inch scrapbook paper and cut 1/2 x 12″ strips, then followed the video HERE*. *UPDATE! Be Sociable, Share! Crazy paper thing. DIY Sharpie Tie Die. I love this Sharpie tie die DIY from The Art Girl Jackie blog!
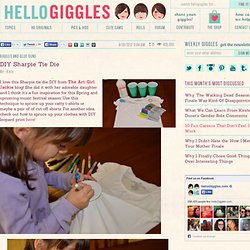
She did it with her adorable daughter and I think it’s a fun inspiration for this Spring and upcoming music festival season. Use this technique to spruce up your ratty t-shirts or maybe a pair of of cut off shorts. For another idea, check out how to spruce up your clothes with DIY leopard print here! What You Need: Pre-washed white or light colored t-shirtRubbing AlcoholLiquid dropper or medicine dropperSmall plastic cup(s)Rubber bandsVariety of colored Sharpies Do It! Choose a spot to start and put your cup in right side up and secure a rubber band around the cup rim holding the shirt tightly in place.Pick your colors and create a small design in the center of the stretched circle. Photos and DIY via The Art Girl Jackie. Water Balloon Luminaries.
A fun and easy project with a beautiful payoff.
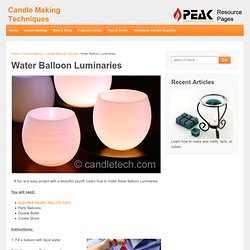
Learn how to make these Balloon Luminaries. You will need: High-Melt Paraffin Wax (IGI 1260)Party BalloonsDouble BoilerCookie Sheet Instructions: 1. How to Make Clothing Buttons from Shrink Plastic… This tutorial is an old one of mine that’s too good not to share again.

Since posting the first time, I’ve had lots of questions about these buttons which will hopefully be answered in this revised post. Equipment Some handy notes: 1. The buttons. Single hole, hole punch (like this one here). 2. 3. Okay.. lets get started! Tracing tips: You can use either coloured pencils or permanent pens. Words must be writted backwards in order to be readable. Shrinking the buttons: To shrink the buttons, you can use an oven or a heat gun (the kind used for embellishing). After the buttons have twisted and twirled, and are LYING FLAT, it’s time to take them out.
Note: If the skrinking is taking too long, you may need to turn your oven up.