
Mönstrat - Trikå - Ellex Textil & Design. Sewing Tips: Installing a Basic Zipper. First of all, I loved hearing about your potty stories that you shared with me here.
I kept laughing and laughing. I love that we all have so much in common. So many of you are going through the potty training blues with either your own kids, a grandchild, a niece/nephew, and/or a friend’s child etc. Hang in there…..and let me know how it goes. Especially the stories that may not be funny at the moment but you can laugh at later! So Sew Me. Lovisaemy - 1. rensa skrivbordet. 2. klipp till en rektangulär tygbit. jag är inte så noggrann så jag mätte med hjälp av ett A3-papper (samma bredd men två papper långt) 3. lägg sedan rätsidan mot varandra. mät längs med sidorna ca 12 cm från påsens öppning, där klipper du ett litet jack rakt in, ca 1 cm långt. nåla sedan ihop på sidorna, från jacket och ner till påsens botten.
Textilhuset - Grossistföretag för sömnad, hobby & handarbete. Stickoskapa: Sy förvaringsboxar av bordstabletter. Som bäst inreds kommande ungens egen vrå i sovrummet med byrå och skötbord.
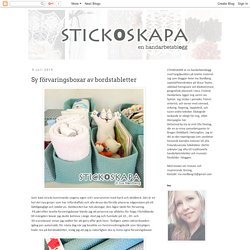
Det är en hel del nya grejer som har införskaffats och alla dessa ska förstås placeras någonstans på ett lättillgängligt och städat vis. Skötbordet har två våningar, den lägre tänkt för förvaring. På jakt efter textila förvaringsboxar kände jag att priserna var alldeles för höga i förhållande till mängden boxar jag skulle behöva. Länge stod jag och fumlade på 10-, 20- och 30-eurosboxar innan jag istället för att göra affär gick hem. Tydligen sattes idéverkstaden igång per automatik, för nästa dag när jag besökte en heminredningsbutik som lämpligen hade rea på bordstabletter, insåg jag att jag ju naturligtvis ska sy mina egna förvaringsboxar. Ynka 1,95 euro kostade vanliga textila bordstabletter i måtten 35x45 cm, rimligt. Så, hamstringen inleddes, jag köpte alla turkosa bordstabletter som fanns, totalt 9 stycken. Vik tabletten på mitten, så att stadkant följer stadkant och fåll möter fåll.
Saker jag sytt. Sewing Embroidery Hoop Organizer. Creating my way to Success: Magnetic Pockets a tutorial - 5 steps in 15 mins. Does your fridge look anything like this?

I get endless vouchers and notes that get stuck on the fridge with magnets, but look very messy and cluttered. So I decided to pretty them up a bit! So instead of this: I can have this: Much neater and prettier! It's a nice simple project that just uses scraps of material and a magnet for each pocket. So here's how to make your own magnetic pocket for the fridge to hold all those coupons, vouchers and notes, in just 5 steps and 15 minutes Step 1 Cut your fabric a little wider than you want your pocket and 4 times the length. (I cut mine 11 x 40cm (4.5 x 16") Fold in half lengthways with right sides together: Step 2 Stitch down both long sides: Step 3 Turn the pocket right sides out and press: Also press the raw edges of the opening inside the pocket like this: Step 4.
Tutorial Quick Envelope Pillow Case. Easy Peasy DIY Rag Quilt Tutorial. This weekend I did a little quilting project.
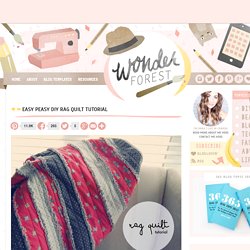
It was super easy to do and can absolutely be done by the "beginner" seamstress. It is a flannel rag quilt made from strips of fabric instead of your typical squares.... and it's sooo soft! The most time consuming part is cutting all of the fabric, so if you have a spare afternoon why not give this a try? I seriously finished this in a couple hours, so it's probably the least complicated quilt ever. It's the perfect project if you're just learning how to sew as well. First, you'll need a few things: - Flannel fabrics. That's it! I know there are a lot of readers who are not into sewing but want to start, so this would be perfect for you. Like this? Sewing 101: fabric boxes. It seems no matter what I do, I can never get a handle on all the tiny odds and ends that accumulate around my house.
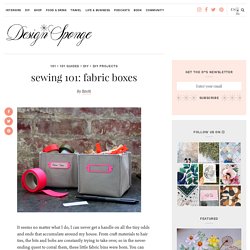
From craft materials to hair ties, the bits and bobs are constantly trying to take over, so in the never-ending quest to corral them, these little fabric bins were born. You can make one of these soft boxes in almost no time, and in almost any size, so you can customize them to perfectly fit whatever you need to hold. Top each one off with a label holder (also customizable in any shade of the rainbow, thanks to nail polish), and you’ll have a leg up on clutter . . . for a little while, at least. — Brett Bara Read the full how-to after the jump . . .
Materials a sturdy fabric, such as canvasthread to matchsewing machine, iron and basic sewing supplieslabel holdersnail polish (optional) 1. I couldn’t find label holders in a color I liked, so I decided to customize my own by painting them with neon pink nail polish.