

Frounchess Bag Tutorial! Delusions of Grandeur: DIY. "A store-bought belt can obscure even the sloppiest of home-sewn waistbands.
" ~Ancient Chinese proverb As promised, here is the tutorial for the tulle skirt I sewed for Thanksgiving! I share this with you along with one major caveat: At no point during the making of this skirt did I actually know what I was doing. This will be painfully obvious to those of you with real sewing skills, so please feel free to use this as the most basic of guides and to improve on it any way possible.
And I'm sure there are many ways. Credits: My inspiration for this skirt came from a skirt in Anthro's winter line, and from this Etsy seller. What you'll need (total cost of materials was approximately $30): 1. 2. 3. 4" satin ribbon for waistband. 1 yard. 4. 5. Steps: 1. *Note - pleating each layer individually will result in a very full skirt (like mine). 2. 3. 4. 5. Once your circle skirt liner is sewn, it will look something like this: 6. 7. And voila! .... Easy Sewing Projects for Beginners. So you've got to grips with your sewing machine, and you're itching to make something.
Which sewing patterns are easy enough for beginners? I've gathered together a few suggestions for things you might want to try, but first a few tips for choosing an easy project. I'm a big advocate of diving into sewing fearlessly, but for your very first project you might want to ease yourself in gently: * While you're still making friends with your sewing machine, it's advisable to choose a project with simple straight lines. You may want to avoid curved lines, gathering, pleating etc for now. * Zippers and buttonholes are a little tricky at first, so go for a project that doesn't need a fastening, and save the fun for another day! * When buying fabric, a medium-weight cotton would be good for a first project as it lies flat, presses well and won't slide all over your machine. . * Patterned fabric not only looks pretty but can hide dodgy stitching!
Easy Sewing Projects for Beginners. - StumbleUpon. DIY Embroidered Sunglasses. What do you do when the probability of scoring a pair of Ulyana Sergeenko‘s embroidered sunglasses is, at best, 1 in a million?
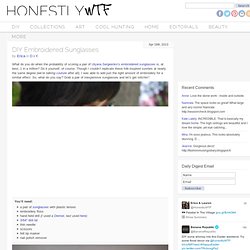
Do it yourself, of course. Though I couldn’t replicate these folk-inspired sunnies at nearly the same degree (we’re talking couture after all), I was able to add just the right amount of embroidery for a similar effect. So, what do you say? Grab a pair of inexpensive sunglasses and let’s get stitchin’! You’ll need:a pair of sunglasses with plastic lensesembroidery flosshand held drill (I used a Dremel, last used here)3/64″ drill bitthin needlescissorsfelt tip markernail polish remover Start by drawing out a pattern – feel free to copy mine!
Use the hand held drill or Dremel to drill the holes. Thread the needle with embroidery floss – make sure the head of the needle is small enough to fit through the holes. Finish off the color with a double knot on the backside. Continue cross stitching with the second color and then the third color. Repeat on the other side. Sewing Tip: Shirring/Smocking with Elastic Thread. Shirring is an old technique, I know.
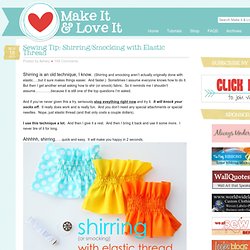
(Shirring and smocking aren’t actually originally done with elastic…..but it sure makes things easier. And faster.) Sometimes I assume everyone knows how to do it. But then I get another email asking how to shir (or smock) fabric. Gwenny Penny: Side-Tie Pillow Tutorial with Ameroonie Designs. Hi there Gwenny Penny readers!
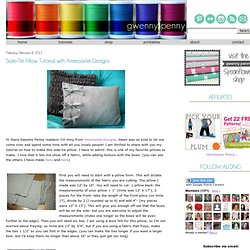
I'm Amy from Ameroonie Designs. Gwen was so kind to let me come over and spend some time with all you lovely people! I am thrilled to share with you my tutorial on how to make this side-tie pillow. I have to admit- this is one of my favorite pillows to make. Gwenny Penny: Side-Tie Pillow Tutorial with Ameroonie Designs. Sewing A Fly Front
Fly fronts can be very intimidating.

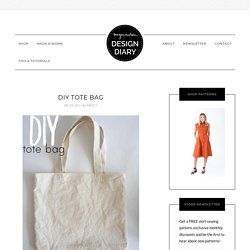
The directions are often hard to follow and the illustrations downright cryptic. Today I’m going to show you step by step, with lots of photos, how to sew a fly front. This type of zipper installation is usually seen on jeans, pants and shorts. DIY tote bag. Sign up to the Megan Nielsen Patterns Newsletter and get access to our library of FREE sewing patterns!
Store Newsletter Get access to our library of FREE sewing patterns, exclusive monthly discounts and be the first to hear about new patterns! Never miss a blog post! Enter your email address to receive Design Diary blog posts right to your inbox. Easy & neat centered zipper. Though I do prefer an invisible zipper, sometimes it just isn’t practical.
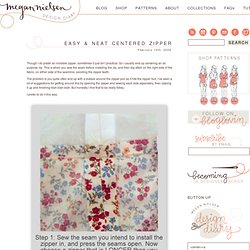
So I usually end up centering an all purpose zip. This is when you sew the seam before installing the zip, and then top stitch on the right side of the fabric, on either side of the seamline, avoiding the zipper teeth. The problem is you quite often end up with a bubble around the zipper pull as it hits the zipper foot. I’ve seen a lot of suggestions for getting around this by opening the zipper and sewing each side seperately, then zipping it up and finishing blah blah blah. Elm street life: DIY: Bow clutch sewing tutorial.
And fiiiinally... the tutorial you've been waiting for.
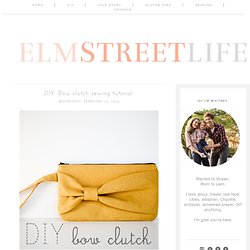
This is my first real sewing tutorial - which scares me a bit, because I've never actually taken a sewing class, so I don't know all the terminology. What I do know is that I've learned to sew lots of things by reading tutorials, so hopefully I can make this simple enough that even you beginners can feel confident making a bag. And yes, a bag with a zipper! It can be done, I promise.There are plenty of photos, so hopefully that will help. If you have any questions, please leave them in the comments section and I'll be happy to clarify.
**Also, please note except where I say, "Sew close to the edge," I am using a 1/2" seam allowance throughout. Zipper Card Pouch. Have you ever had too many cards that your wallet can handle?
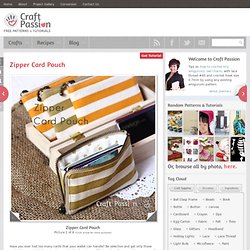
Be selective and get only those cards that you might be using in a particular shopping mall but end up they were the wrong one? Or, may be just forgot to “update” the cards in the wallet on your next trip? Can’t find the cards you thought you have already put into your wallet? Sounds familiar….. Joyful Ruffle Neck Top – Tutorial. Last week I showed you the top I made for my MIL’s B-day, remember? Well today is My Mom’s B-day! So Feliz Cumpleaños Mamá!! And as part of the celebration, I will show you how to make this top! Making Her Clothes Last (Part Two: the Bottoms!) Here is the other half I promised!

I love this post, because everything in it was SO EASY to do!! I wish that I had more outgrown clothes of hers to play around with! Here is the first one; this little overall dress that Paige wore all of one time. Pleated tote (beach bag) tutorial. Before we went away, I decided that a new bag for the beach was a must – something big and roomy to hold books, magazines, sunscreen, hats, and all that other good stuff. Squeezebox Top Tutorial by Welcome to the Good Life. WOO HOO! Call me a big nerd but my heart's pounding because i'm so excited and honored to be here!!! My name is Sarah and i keep a blog over at Welcome to the gOOd life. it's a diary written by me (and sometimes by my hilarious husband) of the good and the ugly as a wife, a stay at home mom, raising two kids under three-just a year apart, and also my weekly DIY sewing projects.
Sew for big folks. Alina's Adventures sew for big folks All of the links below are to free sewing tutorials and patterns offered by kind creatives all the over the web. Organized in alphabetical order by category- scroll down to see the plethora of categories and links. Paper-Tape Dress Form. David Coffin. Festive Attyre: 1910's corset pattern and instructions. Stepping Thru Crazy: Men's Button-Up Refashion... into Ladies Tank! Hetterson: Monthly sewing tutorial ~ The (EPIC) scallop. Urban Renewal. CraftyPod. My Kanzashi Hairpin. Flat pattern hair band. Make a t-shirt headband. Of all the headbands I've made, I think this is my new favorite. It's like wearing sweats on your head, without the dumpy look.
Circle skirt calculator – for the drafting of full, half and 3/4 skirts. With bonus grading worksheet! Easy Woven Wrap Bracelet. Tutorial: how to sew a simple maxi dress. The Plan. Fabric. How to Sew - sewing patterns and tips for beginners. 10 Free Tote Bag Patterns and Tutorials. Totes make great handmade gifts. Reversible Purse. Travel Accessories: Roll-up Makeup Brush Case. This handy case is not only great for travel, it's also dandy for everyday storage of your make up brushes. We used one of the four pretty laminates from Anna Maria's Loulouthi collection as our inside fabric choice so if any traces of make up rub off your brushes and onto the case, it can be quickly wiped clean.
Laminates are traditionally made in the wider 54-55" width. Anthropologie Pratia Tank Top Tutorial. V and Co how to: shag pillow. Sewing Tutorial: Piggy Pillow. Free Sewing Patterns. Sew everything. Free Clothes Patterns. Personal style, sewing, fashion and fabric — insatiable need. Out Of Order: DIY Tutorial - Full Skirt.
"a little help from my friends" scrappy string quilt tutorial. Out Of Order: DIY Tutorial - Full Skirt.