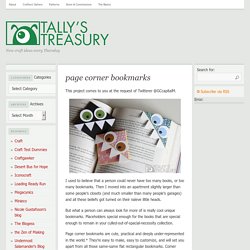

Page corner bookmarks. This project comes to you at the request of Twitterer @GCcapitalM.

I used to believe that a person could never have too many books, or too many bookmarks. Then I moved into an apartment slightly larger than some people’s closets (and much smaller than many people’s garages) and all these beliefs got turned on their naïeve little heads. But what a person can always look for more of is really cool unique bookmarks. Placeholders special enough for the books that are special enough to remain in your culled-out-of-spacial-necessity collection. Page corner bookmarks are cute, practical and deeply under-represented in the world.* They’re easy to make, easy to customize, and will set you apart from all those same-same flat rectangular bookmarks. If you like this tutorial, here are a couple others that might be up your alley. For the monster-loving adults in the room, try some googly-eyed paper monster wine charms. What you’ll need: Putting it all together: 1) Follow steps 2 and 3 from above. Lauren Elise Crafted - Blog - Crafted DIY: Silhouette Mason Jars.
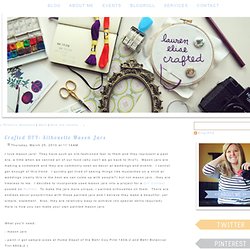
I love mason jars!

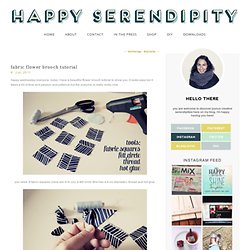
They have such an old-fashioned feel to them and they represent a past era, a time when we canned all of our food (why can't we go back to this?). Mason jars are making a comeback and they are commonly seen as decor at weddings and events. I cannot get enough of this trend. I quickly get tired of seeing things like mustaches on a stick at weddings (really this is the best we can come up with people?) But not mason jars...they are timeless to me. What you'll need: - mason jars - paint (I got sample sizes at Home Depot of the Behr Coy Pink 140A-2 and Behr Botanical Tint 480A-2 ) Fabric flower brooch tutorial « Happy Serendipity. Happy wednesday everyone. today i have a beautiful flower brooch tutorial to show you. it looks easy but it takes a bit of time and passion and patience but the outcome is really really nice. you need: 8 fabric squares (mine are 4×4 cm), a felt circle (this has a 4 cm diameter), thread and hot glue. fold the squares into a triangle. then fold the outer corners to the middle. it should look like this. sew the corner together and you’ll get 8 little “blossoms”. with a bit of hot glue on the felt circle i attached coordinating fabric so it would match with the blossoms. with the hot glue i attached all 8 blossoms onto the felt circle. and because the center doesn’t look so nice a red button was placed in the middle.

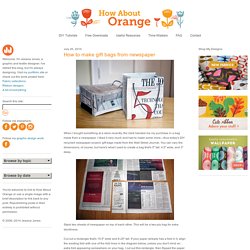
Love Cartography: Heart Maps. How to make gift bags from newspaper. When I bought something at a store recently, the clerk handed me my purchase in a bag made from a newspaper.

I liked it very much and had to make some more—thus today's DIY recycled newspaper project: gift bags made from the Wall Street Journal. You can vary the dimensions, of course, but here's what I used to create a bag that's 5" tall, 4.5" wide, and 3" deep. Stack two sheets of newspaper on top of each other. This will be a two-ply bag for extra sturdiness.
Cut out a rectangle that's 15.5" wide and 8.25" tall. Fold a flap 1.25" down from the top. Cut two pieces of cardstock or chipboard to 4.25" x 1", then glue them on the widest two panels just under the top fold. Put glue on the outside of the 0.5" tab and bring the left-most panel over to form the body of the bag, aligning the cut edge of the panel with the folded edge of the flap.
Upend the bag so the 2" flap is now up. Put glue on both flaps and fold them inward to form the bottom of the bag. Pop Up Card . Just Piece of Paper . Amazing Flower. Easy Cd Case ....NO Glue .... For Everybody.... Seven Flowers. Awesome Pop Up. Unbelievable Paper Transformer.