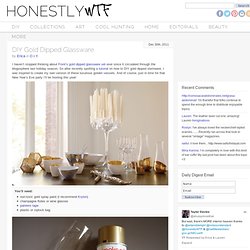

Glowing jar project – varázslat a lakásban (EN/HU) DIY Gold Dipped Glassware. I haven’t stopped thinking about Front‘s gold dipped glassware set ever since it circulated through the blogosphere last holiday season.

So after recently spotting a tutorial on how to DIY gold dipped stemware, I was inspired to create my own version of these luxurious golden vessels. And of course, just in time for that New Year’s Eve party I’ll be hosting this year! You’ll need:non-toxic gold spray paint (I recommend Krylon)champagne flutes or wine glassespainters tapeplastic or ziplock bag Rip off a 6 inch piece of tape. Center the tape over the base of the glassware, rubbing the bottom edge against the glass. Bring one side of the tape across the middle of the glass. Bring the other side of the tape across so the two pieces meet at a point. Lightly spray multiple and even coats of paint onto the glass from a couple feet away. How to Make Crayon Monogram. Stencil with freezer paper (harry potter tee)
Yes, I am a nerd.

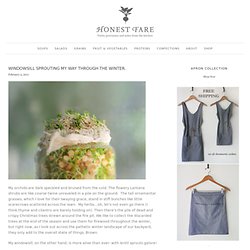
I came up with a brilliant idea for a Harry Potter t-shirt and I couldn't resist. "Expecto Patronum! " However, you can make whatever kind of design you want with a freezer paper stencil. It doesn't have to be Harry Potter related. (Although it would be awesome if it was.) I learned about the joys of freezer paper back in my early college days. Brilliant idea for a wall: LEGO IT. Windowsill Sprouting my way through the Winter. My orchids are dark speckled and bruised from the cold.

The flowery Lantana shrubs are like coarse twine unraveled in a pile on the ground. The tall ornamental grasses, which I love for their swaying grace, stand in stiff bunches like little scarecrows scattered across the lawn. My herbs…oh, let’s not even go there (I think thyme and cilantro are barely holding on). Then there’s the pile of dead and crispy Christmas trees strewn around the fire pit. Chain-Chomp. This is Chain-Chomp from the Mario Brothers games. I made this because my middle daughter begged me to. LOL. When writing out the pattern for it, I tried to make it as plain as possible, but I'm still learning how to write out patterns for someone other than myself to read, so bear with me.
If anything is confusing, please let me know and I'll do my best to explain or change it. If the cube portion of the pattern just isn't working for you, you can always make a cube by crocheting 6 squares that are 3 to 4 inches in size and sew them together to form a cube. Materials: WW black, grey, white and red yarnsG HookSmall amount of white feltThread to match the feltYarn NeedleFiberfil This pattern requires a little more advanced work than most of the patterns I have to date. Gauge isn't really important, but your hook, yarn and natural tension should combine to create a moderately tight stitch. Using black yarn, make two half domes as follows: Rnd 1: 6 sc in magic ring. (6) Using red yarn: Ch 16.
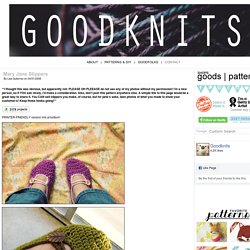
Crotchety Crocheting Fool. Tangled Online Magazine. Your finished boots! Mary Jane Slippers « ohmygoodknits! By Lisa Gutierrez on 04/01/2008 **I thought this was obvious, but apparently not: PLEASE OH PLEEASE do not use any of my photos without my permission!

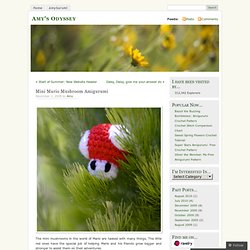
I’m a nice person, so if YOU ask nicely, I’d make a consideration. Also, don’t post this pattern anywhere else. A simple link to this page would be a great way to share it. Mini Mario Mushroom Amigurumi « Amy's Odyssey. The mini mushrooms in the world of Mario are tasked with many things.

The little red ones have the special job of helping Mario and his friends grow bigger and stronger to assist them on their adventures. However, not all the mushrooms are sure of their fate. This mini Mario Mushroom is questioning whether it is really his destiny to help people grow large. He is off on a journey of self discovery, to see whether he can find a more fulfilling place in the world. So far he has become enamoured with the idea of Christmas, and plans to spend the next month as an ornament on a Christmas tree. He is very grateful for my hospitality and has shared with me the secret of how the mini mushrooms are created. My patterns are written down as I create my amigurumi, but let me know if there is anything missing. Techniques Materials * Yarn: Red, White, and Scrap length of Black for the eyes (but try all different colours for your mushrooms!) Pattern Mushroom Start with Red Yarn.
#40432. 8-Bit Mario Blanket - Made from Granny Squares. What to do with your new ring? Water Marble Tutorial. Supplies: orange stick or... Water Marble Tutorial.

Supplies: orange stick or toothpick, shot glass or cup (the smaller the circumference, the less polish you end up wasting), room temp. water, nail polish, tape (optional, but it helps with the clean up) I like to begin by prepping my nails with base coat and one coat of polish.