

Painted Feathers. I’ve always loved the idea of painting fake feathers, and with festival season underway it seemed like the perfect time to do it.

I originally thought of these purely as decorations but then it occurred to me that they’d be a great finishing touch for a festival outfit. This is a great activity to do outside on a warm sunny day, and once you start it’s slightly addicting! What you need: fake feathers, paint (I used acrylic paint), and a paint brush. I got this paint from Utrecht and I love it.
I added a little bit of water to the paint before applying to the feathers, and they absorbed the paint almost like watercolor. After the entire feather was covered I added some dots and lines with white paint. Get as creative and colorful as you want with the feathers! I wanted to add in some of the smaller brown feathers to my arrangement, so for those I kept it simple and painted them in colorful ombre shades. Soap Bubble Snakes. Summer is here and our family is SO excited!
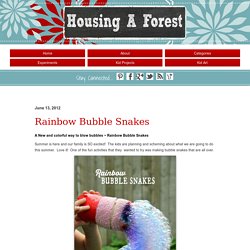
The kids are planning and scheming about what we are going to do this summer. Love it! One of the fun activities that they wanted to try was making bubble snakes that are all over. The best part is they are easy to make and use things that I had laying around my house. Perfect! Start by cutting the bottom of the water bottle off. Stiches. Glitter Eggs. Apr 7 Glitzy Easter Placecards By Ashley Page Norton Easter is right around the around and these egg and nest placecards come together super fast.
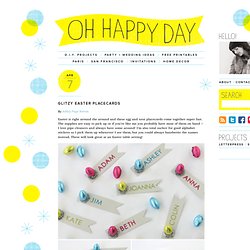
The supplies are easy to pick up or if you’re like me you probably have most of them on hand – I love pipe cleaners and always have some around! I’m also total sucker for good alphabet stickers so I pick them up whenever I see them, but you could always handwrite the names instead. Click through for materials & instructions… (more…) Apr 18 DIY Party: Confetti Egg Game This post is by my friend Rebecca Wright who will now be doing a column on Oh Happy Day.
Make A Cloud. The Farm Chicks website has moved.
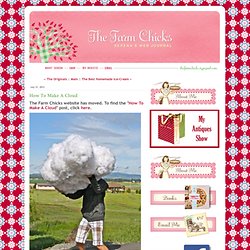
To find the "How To Make A Cloud" post, click here. Mini Bow and Arrows Set. It's so fluffy!

SCORE 162 Stop it! SCORE 1279 If the disney princesses had instagram... SCORE 229 The only person you are destined to become... Wind-Up Paper Butterflies. I had a baby so I’ve invited some fave guests to take over for me while I spend time with the little guy.
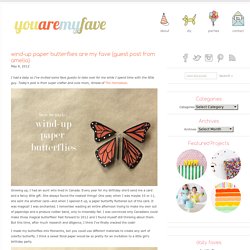
Today’s post is from super crafter and cute mom, Amelia of The Homebook. Growing up, I had an aunt who lived in Canada. Every year for my birthday she’d send me a card and a fancy little gift. She always found the neatest things! One year, when I was maybe 10 or 11, she sent me another card—and when I opened it up, a paper butterfly fluttered out of the card. I made my butterflies into Monarchs, but you could use different materials to create any sort of colorful butterfly. Materials: You’ll need heavy cardstock, 24 gauge wire, silicone rubber bands (I found mine in the hair aisle at Walgreens) needle-nose pliers, scissors, tape, a paintbrush, a black marker, and a white ink pen. Step 1: Measure and cut your wire. Step 2: Find the center of the longer wire. Step 5: Find the center of the shorter wire, and wrap it around the base of the paintbrush.
Wooden Gems. Try This: Wooden Gems Today's tutorial will set you back a couple of bucks and ten minutes, and in the end, you'll have a handful of little gemstones ready for whatever projects your imagination can scheme up.
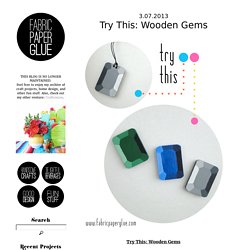
Read on for the easy step-by-step and few ideas for how to put these little beauties to use. MATERIALS: wooden rectangles, pencil, fine tip paint brush, craft paints in colors of your choosing, black, and white ONE: Begin by sketching the facet lines as shown. They don't have to be perfect. TWO: Mix up six shades of the color of your choosing using black and white paint.
THREE: Use the fine tip brush to carefully paint inside your sketched facet lines. Try out some other colors and use them in all sorts of ways...jewelry, keychains, napkin rings. The Illusionist's heart. Developing Paper With Red Wine. DIY Glow Sticks. Copy a Key with Spray Paint. Styrofoam Printing. I loved this idea because not only can you recycle these horrid polystyrene containers, but the process is really simple.
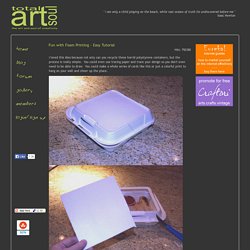
You could even use tracing paper and trace your design so you don't even need to be able to draw. You could make a whole series of cards like this or just a colorful print to hang on your wall and cheer up the place. Materials needed: Foam or polystyrene container pencil paint or ink small roller 1. 2. 3. 4. 5. Happy printing! Original image courtesy of themetapicture.