
Creative Soul Spectrum: Led Zeppelin T-Shirt Makeover. So, I've had this awesome Led Zeppelin t-shirt sitting among my t-shirt stash for years and years.
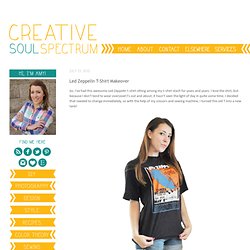
I love the shirt, but because I don't tend to wear oversized t's out and about, it hasn't seen the light of day in quite some time. I decided that needed to change immediately, so with the help of my scissors and sewing machine, I turned this old T into a new tank! To start, I used one of my favorite tanks as a guide to making the right fit. If you use this method, make sure your tank is perfectly centered on top of your T. Using a sewing crayon, mark where you are going to cut. To get a more feminine look, the wide sides, bottom hemline, and neckline had to go. Pin the sides of the shirt together (right sides facing) and sew. Next, I transformed the sleeves into a funky little embellishment on the side of the shirt. To get the final effect is really easy; unfold the fabric, hold it on both sides, and stretch it.
Pin these pieces underneath the arm holes and then sew them in place. What can you do with an old t-shirt:D : I Love To Cook. Gift Idea: A Simple DIY Scarf. I created this super simple DIY scarf, inspired by a scarf in Elsie's closet from a past season. This scarf is great for adding a pop of color to a neutral outfit. I think these would make great gifts for all my girlfriends. The best part is, this project only took about 30 minutes to make!
1. Supplies: 2 yards gauze fabric, lace trim, sewing pins, scissors, sewing machine. 2. ReStyled Men's Button Up: Two Ways. Yesterday I shared my ReStyled backpack, and today I wanted to share how I ReStyled two men's button up shirts.

I love how cozy an over-sized button up can be but I wanted to add a little personality to mine. First I thrifted two men's shirts, then here's what I did: Supplies: Men's button up shirt, lace, scissors, sewing machine. Begin by fitting the sides to fit you correctly. If you're worried about messing up the measurements, move inch by inch to create the perfect fit. Fishbone stitch. This is a kind of filling stitch which is ideal for making leaves or feathers.
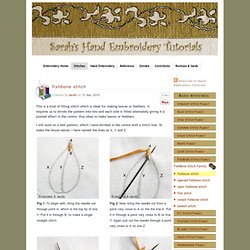
It requires us to divide the pattern into two and each side is filled alternately giving it a plaited effect in the centre, thus ideal to make leaves or feathers. I will work on a leaf pattern, which I have divided in the centre with a stitch line. To make the lesson easier, I have named the lines as X, Y and Z. Tags: embroidery tutorial, filling stitch, fishbone stitch, flat stitch, hand embroidery, leaf stitch, oepn fishbone stitch. Clutch Makeover DIY. So what do you think? It's different, I know. The lace says flirty and feminine. The ombre-esque paint job says fun and artsy. The bold stripes say sporty and casual. The white patent leather says classy and sophisticated. I finally screen printed with Mod Podge.
I finally did it!

I screen printed with Mod Podge. I’ve talked about this before, always wanted to do it, and I finally did. Let’s not talk about the fact that I want to use wallpaper with Mod Podge too and haven’t done it yet – no, let’s not even go there. Baseball String Bracelet. DIY Home Depot Bracelet. Messy chunky beach waves... Easy tutorial! I'm one of those people who was cursed with stick straight thin hair that hates to curl.
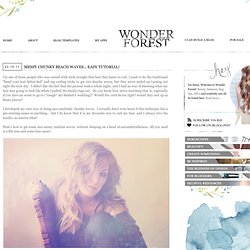
I used to do the traditional "braid your hair before bed" and rag curling tricks to get nice beachy waves, but they never ended up turning out right the next day. Bottle Cap Earrings. We’re not talking about shooting up any saloons, but rather hitting up your local watering hole for some brewskies and thus some supplies for your next DIY project!
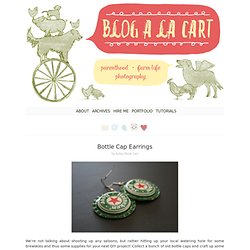
Collect a bunch of old bottle caps and craft up some upcycled earrings. Trashion at its best! Diy {bird nest necklace} I have been seeing a lot of bird nest jewelry around lately.
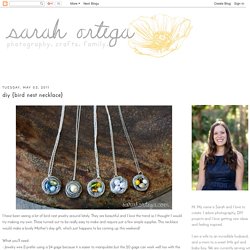
They are beautiful and I love the trend so I thought I would try making my own. These turned out to be really easy to make and require just a few simple supplies. ...love Maegan : Fashion, DIY, Home, Lifestyle: No Heat SJP BIG CURLS w/ Twisted Buns ...also known as Bantu Knots ~ Los Angeles.
Craft Tools: Metal Stamping. Show her some love!
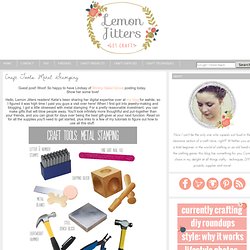
Hello, Lemon Jitters readers! Katie's been sharing her digital expertise over at my blog for awhile, so I figured it was high time I paid you guys a visit over here! When I first got into jewelry-making and blogging, I got a little obsessed with metal stamping. For a pretty reasonable investment, you can make gifts that will blow people away. You'll look infinitely more thoughtful and put-together than your friends, and you can gloat for days over being the best gift-giver at your next function. . *1. . *2. 3. . *4. . *5.
Fabric Button Earrings. I love the idea of using fabric buttons to decorate mundane things.
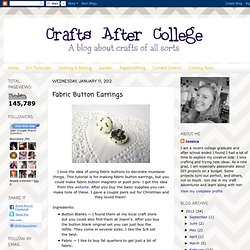
This tutorial is for making fabric button earrings, but you could make fabric button magnets or push pins. I got this idea from this website. After you buy the basic supplies you can make tons of these. A Super Easy DIY Beaded Leather Bracelet. Upcycle: Pillowcase to top tutorial.
I teased some post a go asking what could I make with a pillowcase, ribbon and some lace?
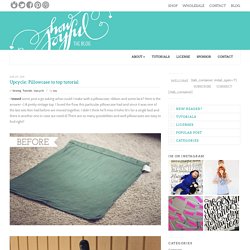
Here is the answer =] A pretty vintage top. I loved the flow this particular pillowcase had and since it was one of the last sets Ken had before we moved together, I didn’t think he’ll miss it hehe (it’s for a single bed and there is another one in case we need it) There are so many possibilities and well pillowcases are easy to find right? TUTORIAL] Book Page Necklace. I introduced this necklace a while back and sold a couple at the facebook sale, but since my shop is going in a different direction, I've decided to share the tutorial for this necklace. MATERIALS NEEDED: 30" of chain 2 pages from an old book 1 piece of poster board Glue 1 quarter Scissors Varnish Matches Pearls Jump rings Lobster Claps [1] Cut two pieces of chain, 15 1/2, and 18 inches long. [2] Attach the two chains at both ends with small jump rings: [Should look like this] [3] Rip out 2 pages from an old book.
Circle Knit Shirt Tutorial. Post by Raechel of www.raechelmyers.com So. Urban Jungle Slouchy Beanie. THE WEEKENDER. Watermark Tee by Sweet Verbana. Newspaper Nails. DIY - Tutorial - How to make a leather bow cuff bracelet. You will need : - A piece of leather, approx. 22cm x 10cm (approx. 8.7" x 4") - Scissors - Leather glue or super glue - Thread - A snap button. Personalized Sand Imprint Flip Flops by FlipSideFlipFlops. DIY Fashion-Forward Bracelets. When money is tight, but fabulous fashion is a necessity, try out your crafting skills to make something new and fantastic. These bracelets are sure to impress and look quite expensive, but all they require is some gold chain and friendship bracelet yarn, both of which you can find at a craft store like Michael’s Art Supply.
Annie Spandex » How To Make Tank Tops Out Of T-Shirts (Without Touching A Sewing Needle) Headband tutorial. DIY Shrinky Dinks for Adults. Morse Code Wrap Bracelet. My obsession with these wrap bracelets came just in time for this season of gift giving. They are stylish and fun to wear, they come together quickly and can be easily personalized.