
THE SUN WAS HIGH: DIY // Galaxy Jeans. I don't want to enter in a "I liked galaxies before it was cool to like them" monologue, but I've always been obsessed with outer space!

My brother and I used to visit the local library and borrow tons of books about galaxies, spaceships and planets. The obsession stuck and now, even my design portfolio is filled with space-inspired pieces. 30 Foods You'll Never Have To Buy Again. DIY - MAKE YOUR OWN WAX FOR HAIR REMOVAL. I was chatting with someone on my flight back from my vacation.

She lived in another country where salons are hard to come by or if they are around, they aren't very good. So, sometimes a girl has got to depend on herself. You can make one on your own so easily. So when I described it to her, she loved it and she said I just have to put it up online. So here goes: Wax recipe Ingredients 2 cups sugar ¼ cup water ¼ cup lemon juice Method Pour the sugar, water and lemon juice in a saucepan, and heat it over a low flame. THE SUN WAS HIGH: DIY. While browsing for DIY ideas, I came across a few collar projects, but they all involved sewing doilies to your shirt/dress, cutting the collar from old shirts or crocheting your own neck candy.
Therefore, I decided to make my own DIY tutorial on how to make a detachable collar out of old doilies I found at a thrift store for 1$ apiece. Since it's detachable, this kind of collar doesn't involve commitment: you can wear it with any of your dresses or tops. Plus, you don't need mad sewing skills (unless you're particularly rough with your lace/crochet accessories! In this case, I would recommend sewing the edges so they won't fray!). Approx. cost: 1$ Total time: about 10 minutes Cleaning & caring: hand-wash with gentle soap (and you do it by hand! Gather your stuff. DIY Gift Ideas: 29 Handmade Gifts. Mr. Kate DIY.
Jewelry Display. Yesterday, I stopped by the Lulu Frost studio for an exciting DIY session with the lovely Lisa Salzer and her crafty team.
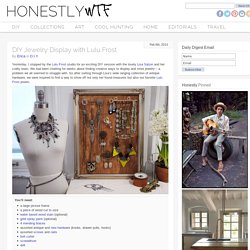
We had been chatting for weeks about finding creative ways to display and store jewelry – a problem we all seemed to struggle with. So after sorting through Lisa’s wide ranging collection of antique hardware, we were inspired to find a way to show off not only her found treasures but also our favorite Lulu Frost jewels. Woven Charm Bracelet. You might remember our woven chain bracelet tutorial, one of our favorite DIYs to date.
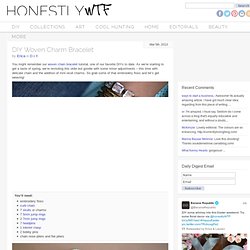
As we’re starting to get a taste of spring, we’re revisiting this oldie but goodie with some minor adjustments – this time with delicate chain and the addition of mini skull charms. So grab some of that embroidery floss and let’s get weaving! You’ll need: Start by cutting 8 strands of embroidery floss, with each strand measuring four times the length of the curb chain. Knot all the threads together, leaving about an inch and a half of slack.
Pull the strands through the link and over the top of the left side. Pull it from under the same link and through. Drap the set over the top left and now lay the other set on top. Embroidered Sunglasses. What do you do when the probability of scoring a pair of Ulyana Sergeenko‘s embroidered sunglasses is, at best, 1 in a million?
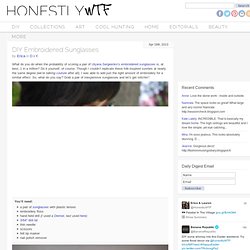
Do it yourself, of course. Though I couldn’t replicate these folk-inspired sunnies at nearly the same degree (we’re talking couture after all), I was able to add just the right amount of embroidery for a similar effect. So, what do you say? Grab a pair of inexpensive sunglasses and let’s get stitchin’! You’ll need:a pair of sunglasses with plastic lensesembroidery flosshand held drill (I used a Dremel, last used here)3/64″ drill bitthin needlescissorsfelt tip markernail polish remover Start by drawing out a pattern – feel free to copy mine!
Use the hand held drill or Dremel to drill the holes. Thread the needle with embroidery floss – make sure the head of the needle is small enough to fit through the holes. Finish off the color with a double knot on the backside. Continue cross stitching with the second color and then the third color. Repeat on the other side. Marbled Glassware. When graphic designer and artist Joanna Bean Martin shared with us her technique for marbling the bottoms of glassware with nail polish, we couldn’t wait to try it ourselves.
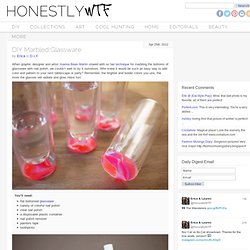
Who knew it would be such an easy way to add color and pattern to your next tablescape or party? Remember, the brighter and bolder colors you use, the more the glasses will radiate and glow. Have fun! You’ll need:flat bottomed glasswarevariety of colorful nail polishclear nail polisha disposable plastic containernail polish removerpainters tapetoothpicks Mask off the bottom of the glass with painters tape. Fill a disposable, plastic container with water. Layer the colors one on top of the other. Submerge the bottom of the glass into the polish. Allow to dry completely before applying a layer of clear polish. Once everything has dried, remove the painters tape and touch up with nail polish remover and a cotton swab.