
Natural Dyes From Plants - Pioneer Thinking. Did you know that a great source for natural dyes can be found right in your own back yard!
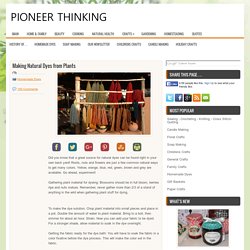
Roots, nuts and flowers are just a few common natural ways to get many colors. Yellow, orange, blue, red, green, brown and grey are available. Go ahead, experiment! Gathering plant material for dyeing: Blossoms should be in full bloom, berries ripe and nuts mature. Remember, never gather more than 2/3 of a stand of anything in the wild when gathering plant stuff for dying. To make the dye solution: Chop plant material into small pieces and place in a pot. Getting the fabric ready for the dye bath: You will have to soak the fabric in a color fixative before the dye process. Color Fixatives: Salt Fixative (for berry dyes) 1/2 cup salt to 8 cups cold water Plant Fixatives (for plant dyes) 4 parts cold water to 1 part vinegar Add fabric to the fixative and simmer for an hour. Dye Bath: Place wet fabric in dye bath. NOTE: It’s best to use an old large pot as your dye vessel. Shades of ORANGE Shades of PINK. DIY Transparent Clutch – HonestlyWTF.
Phil Oh spotted this elegant Charlotte Olympia Pandora clutch during Paris Fashion Week and we spotted a DIY.
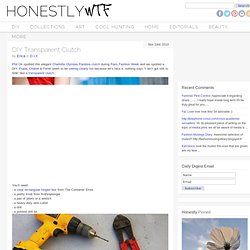
Prada, Chanel & Fendi seem to be seeing clearly too because let’s face it, nothing says “I ain’t got shit to hide” like a transparent clutch. You’ll start by drilling a hole at the top of the plastic box. Use a drill bit that is one size larger than the diameter of the bolt on the knob, otherwise the plastic might crack. Open the lid and slowly drill a hole in the center of the box with very light pressure. Headband Makeover {How to Make a Bow} Mrs.
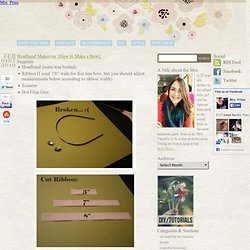
Priss Headband Makeover {How to Make a Bow} Feb01st2010 Supplies: Headband (mine was busted)Ribbon (I used 7/8″ wide for this size bow, but you should adjust measurements below according to ribbon width)ScissorsHot Glue Gun (If you’re wondering, I’m gazing down at my toilet.) Other tutorials: Bib Clips: A Simple DIY for Moms Anthropologie Floral Necklace Anthropologie Bonheur Necklace Tags: bow crafting crafts diy headband tutorial Categories: DIYs and Tutorials Me Being Crafty Personal Related Posts Dainty Flowers for Your Hair – Yeahhh, it’s another tutorial.I came up with these flowers one day when I was in a crafty mood...DIY – Anthropologie Inspired Flag Bunting NecklaceI absolutely love this necklace, but with the $70 price tag I was like, ummmmmm…...Anthropologie Bonheur Necklace TutorialA few months ago (okay, six), I posted a photo of an Anthropologie-inspired necklace I... 50 Comments Thus Far.
DIY Sweat-sacoche diy-laptop-sweat – the Trendy Girl. Starmoss: Doo.Ri Tights. What you’ll need: Patterend lace tights (or leggings), very thin needle, thread, scissors, and a set of beads varying from sizes to colours to shapes.

I chose two neutral colours (white and cream/gold), one complimentary (blue), one pot of sequin for the sparkle and a satin pearl pot for texture. Wearing the tights will be the easiest way to apply the beads. Find a patch on the lace where the texture is heavier (on the pattern – the weave is stronger there and should hold the beads better), and slide needle through where you want to start.
DIY Flower Halo ? HonestlyWTF. You’ll start by cutting 2 circles from the piece of felt at approximately 2″ in diameter.
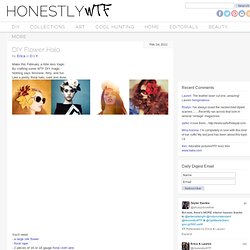
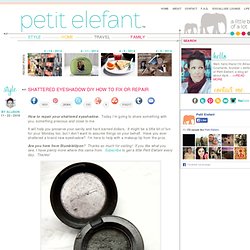
Form the wires of your halo by molding and bending each piece into a half circle. Lay the two half circles opposite of each other to create a single circle, laying it over the top of your head to check the fit. Wrap floral tape over 2 sections of overlapping wire at 11 o’clock and 3 o’clock. Trim any overlapping pieces with the wire cutters. (Click images to enlarge) Using the wire cutters, cut the stem off the flower making sure the back is flat. The possibilities are endless with this as you can wrap flowers around half or the entire perimeter of the halo, reinforcing with glue. How to: repair a shattered eyeshadow. How to repair your shattered eyeshadow.
Today I’m going to share something with you, something precious and close to me. It will help you preserve your sanity and hard earned dollars. Cheap & Chic DIY: 2 Ways to Reinvent a Thrift Store Blazer. How many times have you found the perfect blazer at a thrift store, only to find that it just doesn’t fit right?

While the oversized boyfriend jacket is in right now, the fits of jackets have changed since the 60′s to 80′s – making it tough to rock thrift store blazers without doing some modifications. Don’t worry, though – it’s easier than you think to make that too-wide vintage blazer fit like it was made for you!