
DIY Ribbon Storage Box. Not only is Aldo commemorating their 40th anniversary this year, they’re also celebrating their long term commitment to reduce waste.

By adding handles to their eco-friendly shoe boxes and turning them into bags, the goal is to reduce bag consumption by 40% this year and 70% by the end of next year. So when Aldo asked us to repurpose their special edition shoe box into something functional, we embraced the challenge. Reuse, repurpose, recycle . . . no problem. You’ll need: Eight Ways to Wrap a Gift. The holidays are here.

Let us link hands with loved ones, join our voices in song and laughter, and share in the warmth and glow of PRESENTSPRESENTSPRESENTS!!! Oh, what? I mean the spirit of the season. All kidding aside, even though the holidays should not be about materialism and consumption and the gimme-gimmes, it is entirely likely that you’re going to want to give someone a gift of some sort during the holidays. In which case, you might also want to wrap it. For some reason, in my family, I am always assigned the job of present-wrapper. 38 Uses for Tin Boxes. I LOVE Pinterest!

I have found a handful of amazing ideas using recycled (or upcycled) Altoid tin boxes over this past year, and I am so excited to try some of them. Check out all of these awesome ideas! Some are simple, some are super crafty, some are incredibly brilliant. How To Turn A Beer Bottle Into A Glass. Must do! @ Adorable Decor : Beautiful Decorating Ideas!Adorable Decor : Beautiful Decorating Ideas! Universal wrapping paper.
Don't Drink it Though. The Ultimate Movie Drinking Games List! How-to make the Infinity Convertible or Wrap/Twist Dress. **disclaimer: I am not a professional designer or tailor by any means.
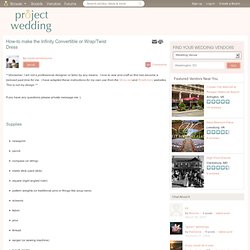
I love to sew and craft so this has become a beloved past time for me. I have adapted these instructions for my own use from the Shira.net and Rostitchery websites. This is not my design.** If you have any questions please private message me :) Supplies. Limoncello Recipe. Limoncello While searching for a good recipe for Limoncello, I found a lot of conflicting information.
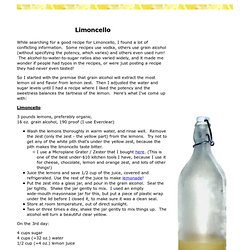
Some recipes use vodka, others use grain alcohol (without specifying the potency, which varies) and others even used rum! The alcohol-to-water-to-sugar ratios also varied widely, and it made me wonder if people had typos in the recipes, or were just posting a recipe they had never even tasted! So I started with the premise that grain alcohol will extract the most lemon oil and flavor from lemon zest.
Then I adjusted the water and sugar levels until I had a recipe where I liked the potency and the sweetness balances the tartness of the lemon. How-To: Henna Tattoos. Henna tattoos are perfect for summertime.
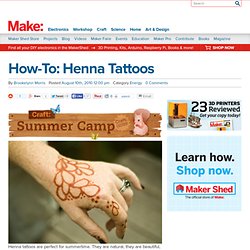
They are natural, they are beautiful, and they are temporary! Because one batch of henna goes a long way, henna tattoos are a great activity for parties and are especially fun for kids at a sleep over. Poured mason jar candle » Something Turquoise {daily bridal inspiration} I am so excited to share today’s DIY with you!

For one, because I have a new DIY logo… and two, because I absolutely love making candles! Last christmas I made a candle for every single lady in my family and a few of my close friends, which came to around 45 candles… which was so much fun! Shopping at thrift and vintage stores to find cool and unique glass containers… melting the wax, coloring it, and wrapping them all up… I want to do it all over again! Most favorited all-time - page 4. DIY. Trash to Couture original DIY tutorials Click on the links below the pictures to see the page.

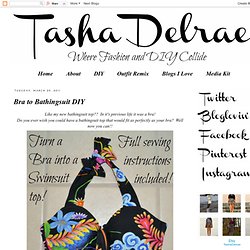
Bra to Bathingsuit DIY. Like my new bathingsuit top??
Features - This Into That. "Take your favorite pair of denim cut-offs that are in need of a makeover before summer officially hits.

Flip your shorts over and prepare to seam rip the back pocket off. Put some muscle into it! Lay your pocket facedown on the backside of some leather skin and trace its outline with chalk. Place your leather pocket where the denim once was and sew it in place. DIY // Faux Gauges / Plugs. If these don't say "statement" I don't know what do!
I have to say I surprisingly love these! I had the urge to make something out of polymer clay and lately I've been loving the look of real gauges, but the thought of the pain immediately turns me away! So I decided to combine polymer clay and gauges / plugs to create a rockin' pain free look! I love the way it actually looks like its going right through your ear, its like magic! Materials: Earrings you don't use, polymer clay, sharp knife or clay cutter, cutting board. 1: Separate two balls of polymer clay, smaller than the size of a golf ball. 2: Roll them both out into cones that create a point at the end. 3: Bend them down like so. 4: Cut a chunk of polymer clay from your earrings. Simple Ideas That Are Borderline Crafty (35 Pics)
His + Her Sharpie Mug DIY. DIY Hand Stitching, part 2. Last week, I started a DIY Hand Stitching series and began with how to hand stitch your own handwriting. I stitched onto paper and showed a method for transferring the pattern by poking or drawing dots as a guide on the surface. The same technique can be used when stitching a simple pattern onto fabric but when you stitch more than one color or there's a lot of intersecting lines (like these), it's much easier to use a piece of tear away backing. I'll show you how-- it's really neat! You will need: Fabric (linen, muslin & thick cottons), Needle (i use a #5 Embroidery Needle), Embroidery Thread, Scissors, Pencil, Thumbtack or Piercing Tool, Masking Tape or Low-Tack Tape, Tear Away Backing (available at fabric & sewing stores), Emboidery Hoop (optional) 1> Cut a piece of tear away backing, a bit bigger than your pattern.
Homemade Laundry Soap!! Sick of buying laundry soap?? Me too. This stuff is awesome because it is way stronger then the store bought laundry soap. You only have to use 1 Tablespoon per load. This recipe makes a huge cookie jar full of soap and is going to last a life time, well maybe not quit that long. Make-up Magnet Board. We all know with craft blogs that original ideas are often hard to come by, we find ideas we love and make them our own but we didn't come up with the idea ourselves. Perfect Summer Bangle. This to That (Glue Advice) 25 Handmade Gifts Under $5.
If your gift list is long and your budget is small here are some great Handmade Gifts that you can make. Tutorials by Lee. One Pearl Button: Project Restyle 1: Old Sheets Become a New Rug! Do stuff! & Ten minute no-sew recycled t-shirt bag! The &How Many&?& Knitting Tool. Re-purposing: Tshirts into 5-strand-braided-headbands. Art 1. Optical Design. 6 Easy Chunky Knits. How to Make A Decorative Chrysanthemum Mirror. Chrysanthemums are some of my favorite flowers.
I especially like the varieties with the petals that fade from dark, saturated color in the center of the flower, to a lighter color near the outer edge of the flower.