
Crafts of Christmas Past: Fairy Walnut Presents - Curly Birds. Join me on pinterest Become a facebook fan I made these fairy walnut presents last year for my girls and their cousins.
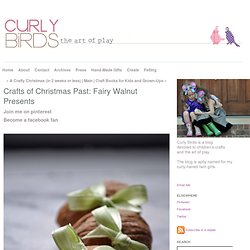
Needless to say, they were a big hit! Eyeballs By Day, Crafts By Night. I have been quite the lazy blogger lately, and for that I am sorry…I have been doing all kinds of little projects and finally just getting around to documenting them all!
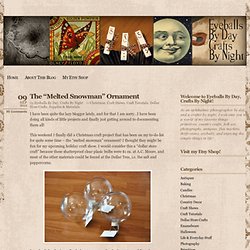
This weekend I finally did a Christmas craft project that has been on my to-do list for quite some time – the “melted snowman” ornament! I thought they might be fun for my upcoming holiday craft show. I would consider this a “dollar store craft” because these shatterproof clear plasic bulbs were $1 ea. at A.C. Moore, and most of the other materials could be found at the Dollar Tree, i.e. the salt and peppercorns. Brown Sugar Casted Chocolates. Brown sugar is the perfect medium for casting poured chocolate in a homemade mold.
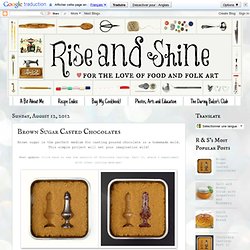
This simple project will set your imagination wild! Press any convex object of choice firmly into packed brown sugar, pour melted chocolate chips into the mold and wait for it to set up. You can flavor your chocolate with spices, citrus zest- or even salt and pepper! I am picturing chess pieces, stones, vintage buttons, little hands and feet...all in different shades of chocolate... DIY surf wax candle. My favorite summer days are those spent driving with the windows down, surf boards stacked on top of the car, staying all day at the beach, and coming home salty, tired, and ready to do it all again the next day.
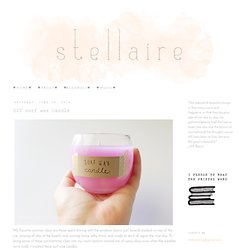
To bring some of these summertime vibes into my room (and to remind me of sunny days even when the weather turns cold), I created these surf wax candles. Rough gems: Home & Kitchen. Raw gemstones: Home & Kitchen. DIY Decadent Crystal Necklace. In the past few weeks I’ve encountered many instances in which I have been referred to as a DIY Jewellery blogger.

DIY Upcycled Vintage Plates. My collection of vintage china is growing at a concerning rate.
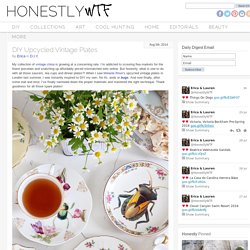
I’m addicted to scouring flea markets for the finest porcelain and snatching up affordably priced mismatched sets online. But honestly, what is one to do with all those saucers, tea cups and dinner plates?! When I saw Melanie Rose‘s upcycled vintage plates in London last summer, I was instantly inspired to DIY my own. No ifs, ands or bugs. And now finally, after some trail and error, I’ve finally narrowed down the proper materials and mastered the right technique. You’ll need:vintage platesclear waterslide decalsclear urethane coat or clear acrylic coatscissorssmall bowlwarm waterpaper towels Start by printing images onto the glossy side of the waterslide decal papers. Place the decal in a bowl of warm water for about 15 seconds. Place the decal onto the plate, with the liner still attached. Color Enhancing Shampoos & Rinses: Natural Alternatives. Looking for cheaper alternatives to washing your hair (or something with more natural ingredients)?
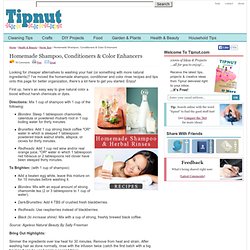
I’ve moved the homemade shampoo, conditioner and color rinse recipes and tips onto this page for better organization, there’s a lot here to get you started. Enjoy! First up, here’s an easy way to give natural color a boost without harsh chemicals or dyes. Directions: Mix 1 cup of shampoo with 1 cup of the following: Blondes: Steep 1 tablespoon chamomile, calendula or powdered rhubarb root in 1 cup boiling water for thirty minutes.Brunettes: Add 1 cup strong black coffee *OR* water in which is steeped 1 tablespoon powdered black walnut shells, allspice, or cloves for thirty minutes.Redheads: Add 1 cup red wine and/or real orange juice, *OR* water in which 1 tablespoon red hibiscus or 2 tablespoons red clover have been steeped thirty minutes.
Upcycle and Re-purposing. DIY Friendship Necklace. As soon as Lauren and I saw this editorial in Flare Magazine, we knew we had to recreate these awesome, friendship bracelet-like necklaces.
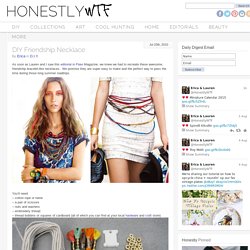
We promise they are super easy to make and the perfect way to pass the time during those long summer roadtrips. To make a 2-tone necklace, cut a long piece of rope and wrap two different colors of embroidery thread around its own bobbin. Tie a starter knot along with the two colored threads you are using, leaving at least 3 inches of slack, Tape down the slack to a flat surface or safety pin it something that will help keep it in place (feeling nostalgic yet?).
Lay the color that isn’t being used (shown here in purple) in your left hand, along with the rope, and hold them taut. Take the active color (shown here in red) in your right hand, pass it over the rope, loop it under and back through the opening. To alternate colors, simply put the inactive color (red) in your left hand and the new active color (purple) in your right. DIY Ombré Denim. Dip dyed ombré denim has been popping up here and there and not only do we love the look, it’s super easy to do yourself! We’ve combined Tory Burch‘s dip dyed jeans and Miss Unkon‘s ombré 501s as inspiration for a pink infused DIY that could be done in a jiffy. Start by rinsing your shorts with water. A bottle of RIT liquid dye amounts to 1 cup; you’ll dye your shorts with the lightest shade first and darkest shade last. Pour 1/3 of the cup of dye into 2 gallons of hot water and mix. When dyeing dark denim, you will want to use less water for a darker dye.
DIY Lace Earrings. Dolce & Gabbana‘s Spring ’11 collection undoubtedly furthered our already fanatical obsession with lace.

Honestly, how dreamy is the collection?! DIY - Fashion. DIY Color Block Moccasins. Our love of Minnatonka moccasins and obsession with Balenciaga‘s Fall 2010 shoes made this DIY we created for Foam Magazine a no brainer.
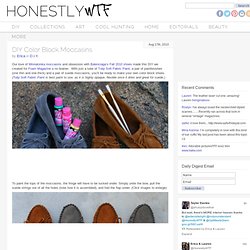
With just a tube of Tulip Soft Fabric Paint, a pair of paintbrushes (one thin and one thick) and a pair of suede moccasins, you’ll be ready to make your own color block shoes. (Tulip Soft Fabric Paint is best paint to use, as it is highly opaque, flexible once it dries and great for suede.) To paint the tops of the moccasins, the fringe will have to be tucked under. Simply untie the bow, pull the suede strings out of all the holes (note how it is assembled), and fold the flap under. (Click images to enlarge) Start by making a test patch near one of the holes, as this part will be covered and it’s a great way to get comfortable with your brush and paint.