
How to transfer a photo to fabric. Did you know you can transfer photos to fabric without using iron-on sheets?

I love this technique. It's simple to execute and the end results are really pretty. It's another method for hand printing! I made some fabrics the other day and used them to add pockets to one of my wool skirts. Do you want to learn to transfer photos to fabric? Supplies Needed: Fabric (I used white quilting cotton), Gel Medium (I used this kind from Liquidex), Paint Brush and the image you want to transfer.
How to transfer a photo to fabric: 1. Note: Don't be alarmed if your transfer isn't completely perfect. Well there you go! 101 Crafty Gifts. How To: Haunted House Silhouettes. By Jeffery Rudell With some jobs, when you’re burned out it’s best to take a break, to get away from the office and focus on something else.

With creativity, however, I’ve found the opposite helps: for me the only cure for burnout is more challenges rather than fewer. One such challenge came my way a few years ago, when I had an opportunity to decorate an entire house for Halloween. The homeowner had a strict $100 budget and insisted that nothing be attached to the house in a manner that would damage the exterior shingles. The place was newly purchased, and the homeowner had yet to install any window treatments beyond inexpensive paper “contractor blinds” on all of the windows. The challenge was at first daunting, not least because I was doing the project pro-bono, the materials budget was tiny, and the restrictions seemed stifling.
Materials 100-yard roll of inexpensive black paper My roll was 36″ x 3600″ and cost $74.White chalk pencil ScissorsPDFs of silhouette images: Directions. Stencil a t-shirt. Stenciling a T-Shirt Here's an easy/cheap way to stencil your own design on a t-shirt.

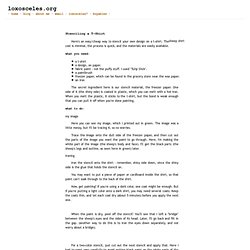
The cost is minimal, the process is quick, and the materials are easily available. what you need: a t-shirta design, on paper.fabric paint - not the puffy stuff. I used "Tulip Slick".a paintbrushfreezer paper, which can be found in the grocery store near the wax paper.an iron The secret ingredient here is our stencil material, the freezer paper. What to do: Here you can see my image, which I printed out in green. Trace the image onto the dull side of the freezer paper, and then cut out the parts of the image you want the paint to go through.
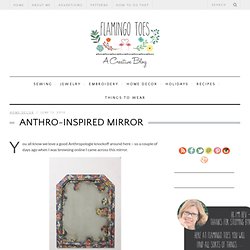
Iron the stencil onto the shirt - remember, shiny side down, since the shiny side is the glue that holds the stencil on. Anthro-Inspired Mirror. You all know we love a good Anthropologie knockoff around here – so a couple of days ago when I was browsing online I came across this mirror.

Oh I definitely need that. Hold the presses – did that say $498??? Huh. We can do better than that. :) So after scouring the thrift shops, cutting myself on mirror glass, and overcoming an unreasonable fear of Mod Podge, here is my version! (Bear with me here – taking a picture of a mirror is a bit tricky. Ready for the tutorial? Origaminizing. Origami For Everyone. Page corner bookmarks. This project comes to you at the request of Twitterer @GCcapitalM.

I used to believe that a person could never have too many books, or too many bookmarks. Then I moved into an apartment slightly larger than some people’s closets (and much smaller than many people’s garages) and all these beliefs got turned on their naïeve little heads. But what a person can always look for more of is really cool unique bookmarks. Placeholders special enough for the books that are special enough to remain in your culled-out-of-spacial-necessity collection. Page corner bookmarks are cute, practical and deeply under-represented in the world.* They’re easy to make, easy to customize, and will set you apart from all those same-same flat rectangular bookmarks.
If you like this tutorial, here are a couple others that might be up your alley. For the monster-loving adults in the room, try some googly-eyed paper monster wine charms. What you’ll need: Putting it all together: 1) Follow steps 2 and 3 from above. Pioneer Thinking - Reflexion de Pionnier - Pensamiento de Pionero. How To Make A Stylish Photo Frame For Several Photos.
Here is a simple yet stylish photo frame that can accomodate quite many photos at once. The idea is very simple. Fasten twines on the empty frame and hang photos using clothes pins on them. You can use a frame you bought or a frame you made by yourself. To make it you just need to find some wood strips, sand them, paint or stain them and fasten together with the staples and nails. Yes, everything is as simple as it sounds. How To Make a String Tree Wall Mural Home Hacks. Wall-E Art. Crafting MacGyver: Circular Logic.
How To: Make Your Own Round Art Gallery.