
Painting a Cartoon Artwork in a Simple Way. THREADLESS TEETORIALS: HALFTONE TEXTURE IN... Teetorials are tips and tricks for adding those special touches to your designs.
They’re brought to you by our very own Threadless staff designers, Alex, Jillian, Speedy Joe, & designers from the Threadless community. This Teetorial comes courtesy of our pal and fellow graphic designer Phil Tseng. Before you start, find a good grunge/distress texture image big enough to cover your design. Once you have your image, convert it into black & white in Photoshop or Photoshop-like program.
You will also want to adjust the Brightness/Contrast of the image—you don’t want too much gray in your image or else it’ll end up being a big halftone mess in the end. Once you have your texture image ready, switch over to Illustrator and create a new layer above all the other layers. Paste your texture image into this new layer. To convert the image into halftones… with the image selected go to Effect > Pixelate > Color Halftone… In the Color Halftone dialogue box, set all the channels to 45 degrees.
FUTURA' Cinema 4D tutorials: 45 projects to up your 3D skills. Since its release, Cinema 4D has become one of the most popular 3D modelling, animation and rendering applications.
Developed by Maxon, Cinema 4D is capable of procedural and polygonal/subd modelling, animating, lighting, texturing, rendering, and common features found in 3D modelling applications. These Cinema 4D tutorials will help you to master the basics of 3D art, and put you well on your way to becoming an expert. Nail the basics Introduction to Cinema 4D The brilliant team at Greyscalegorilla have made over 200 hundred tutorials in the last four years, some of which are intro videos that go over the basics of Cinema 4D. 80 top-quality typography tutorials. The web is brimming with typography tutorials, but many are low quality and others are very out of date.
So we’ve trawled the internet to uncover the diamonds in the rough, in the form of 50 top-quality typography tutorials, to bring your knowledge and skills up to speed. Get Creative Cloud Perhaps you’re looking for a good introduction to the fundamentals of typography? Or perhaps you want to develop and push your type abilities further? Either way, you’re sure to find just what you’re looking for on this list, which includes typography lessons in the form of traditional text-and-image tutorials, animations and video, and even games.
We’ll be adding to this list as time moves on, so make sure you bookmark this fantastic resource, and come back from time to time to see what’s new in the world of typography tutorials. We'll start by looking at tutorials to help you with mastering the fundamentals of typography – skip through to another page if you're after something more advanced. 01. 02. Create a Tasty 3D Typographic Illustration in Photoshop. If you’ve got a sweet tooth, then we’ve got a mouth-watering treat for you.
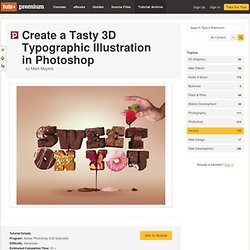
In this tutorial we will show you how Photoshop CS6 Extended’s new 3D tools can be utilized to create a typographic illustration. We will also use plenty of free stock images and make full use of Photoshop’s non-destructive features, such as Adjustment Layers and Masks. Let’s get started! Tutorial Assets You’ll find some files in the "source" folder. Step 1 Create a new canvas 14.85cm wide x 10.5cm high with the Resolution at 300dpi. Step 2 Grab the Type Tool (T) and add the first character at 160pt in this font, then click the color chip in the Character tab and recolor it to # 5d1e0f.
Step 3 Choose 3D > New Extrusion from Selected Layer. Step 4 If you ever used CS5′s 3D Repousse Tool, you’ll know how far it was from being user-friendly. Step 5 You’ll see the Properties panel on the right. Step 6 Duplicate your first 3D text layer. Step 7 Now use the 3D Tools to rotate/move each character. How to Make Any Font a Handmade Font. Design and technology are getting more and more refined, allowing graphic designers to streamline and speed up their process.
However, people are still enamored with handmade art, lettering and illustration. I have deep respect for those fantastic artists who can create beautiful works with a pen, pencil, brush, or piece of chalk. To me, handmade art is both appealing and inspiring. As a result of our fascination with handmade art and lettering, there are many fonts on the market that come ready-made with a handmade look that can provide a fun, easy, and attractive way to "hand-letter" our designs. Today I'm going to demonstrate a quick and easy way to make any typed lettering look handmade in Adobe Illustrator. What you'll need: Basic to intermediate knowledge of Adobe Illustrator (I'll be designing in CS4.)Any fun font of your choice.
We'll be creating the effect on the word "PEACE. " Create a new document in Illustrator.Pick a font and create your lettering. Great! Wow!