
OpenHAB Beginner's Guide Part 2: ZWave, MQTT, Rules and Charting. Advertisement Free doesn’t always mean “not as good as paid”, and OpenHAB is no exception.
The open source home automation software far exceeds the capabilities of any other home automation system on the market – but it’s not easy to get set up. In fact, it can be downright frustrating. Download this entire article as a PDF. Feel free to share it with your friends and family. In part 1 of the guide, I walked you through installing OpenHAB on a Raspberry Pi, introduced the core concepts of OpenHAB, and showed you how to add your first items into the system. Adding ZWave devicesAdding a Harmony Ultimate controllerIntroducing rulesIntroducing MQTT, and installing an MQTT broker on your Pi, with sensors on an ArduinoRecording data and graphing it Introduction to Z-Wave Z-Wave has been the dominant home automation protocol for years: it’s reliable, has been extensively developed, and works over a much longer range than any other smart home products. Free online course on building a simple Raspberry Pi OS from the University of Cambridge.
This summer, the University of Cambridge Computer Lab has been home to a small group working on projects with the Raspberry Pi.

Alex Chadwick is one of those people, and he’s produced this: a free course on building a very simple operating system for the Raspberry Pi in assembly language. The course opens with some explanations about what assembly language is – and, importantly, what an operating system really is; you’ll learn some new concepts and possibly some new terms, and then you’ll dive headlong into practical work. You will work through sessions which teach you how to enable and manipulate one of the board’s LEDs, then learn some graphics theory and start generating lines, text and random numbers. Eventually you’ll be manipulating text to display computed values, and learning how to build your own command line interface. Open source software and hardware tutorials, Raspberry Pi hints and tips, learn electronics and LPIC practice exams.
How to Customize XBMC 12 Frodo with All the Bells and Whistles. Kodi (formerly known as XBMC) is a great entertainment center software.

But, here’s the deal: Like many other open source projects, it is driven by a very technical community, and it is not necessarily user-friendly enough for the average person to use and customize. Fortunately, with a bit of time and the right skin, you can set things up properly and make Kodi (XBMC) very user-friendly and rock solid. I have spent countless hours crawling forums and websites, trying to get the live TV setup, premium online content, automatic light control, and all the other settings right.
Note: These step-by-step instructions have been tested with Kodi v15, but they should also be compatible with v16 (codename Jarvis). Support for GPIO-driven interrupts. Maddin1234 wrote:Ok, perhaps MY process is sleeping, but then POLL has to run to thedoor and wake me up when someone is there.I didn't have a look into poll.c, but from the name I guess it is polling. poll(), and the similar select(), are the standard system calls for checking and/or waiting for one or more files to become ready for I/O.
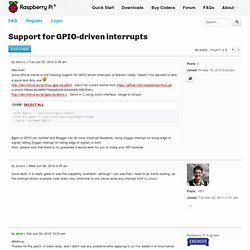
With a timeout value of zero, poll() simply checks whether each of the files is in the requested state and returns immediately. So you can use it to make your own polling loops. But with a non-zero timeout value, and if none of the requested conditions are already met, poll() puts the current process in an (interruptible) sleep state until some asynchronous event elsewhere on the system changes the state of one of files, or causes the timeout to expire. Neither the user process nor the kernel is wasting any CPU during the period when it is waiting for the pin to change state. Raspberry Pi. WiringPi provides some helper functions to allow you to manage your program (or thread) priority and to help launch a new thread from inside your program.
Threads run concurrently with your main program and can be used for a variety of purposes. To learn more about threads, search for “Posix Threads” Program or Thread Priority int piHiPri (int priority) ; Tutorial: Interrupt-Driven Event-Counter on the Raspberry Pi. --D.
Thiebaut (talk) 19:57, 23 July 2013 (EDT) Install the WiringPi Library Get the WiringPi library from drogon.net Follow the directions on the Web site to download to the Pi. In my case the Pi is connected to my Mac through an ethernet cable, so I downloaded the tgz archive from and sftp it over to the pi. I renamed the actual library to wiring.tgz, which is easier to type than its actual name. (download wiringPi-cbf6d64.tar.gz) sftp pi@169.254.0.2 sftp> pwd Remote working directory: /home/pi sftp> put wiring.tgz Uploading wiring.tgz to /home/pi/wiring.tgz wiring.tgz 100% 108KB 107.8KB/s 00:00 sftp> quit. Serial Library. WiringPi includes a simplified serial port handling library.

It can use the on-board serial port, or any USB serial device with no special distinctions between them. You just specify the device name in the initial open function. To use, you need to make sure your program includes the following file: #include <wiringSerial.h> Five Basic Raspberry Pi Projects. At $35, the Raspberry Pi is almost an impulse purchase.

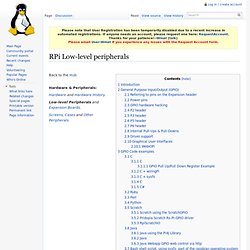
Once its in your hands, its basic nature calls out for it to be used in some great projects. While its always tempting to jump in and build something completely mindblowing, it pays to start with a few easy projects and learn the system before jumping in to the deep end and experiencing frustration. Easy Project Criteria We classified easy, basic Raspberry Pi projects as ones that required a limited amount of programming expertise and required only hardware that might be owned already. We definitely recommend a monitor, keyboard and mouse when working with the Raspberry Pi as it makes things much easier, especially when just starting out. 1. RPi Low-level peripherals. Back to the Hub.
Raspberry Pi - run program at start-up. Anyway, I wanted to get my Raspberry Pi to start no-ip dynamic dns service when it started-up, so I wouldn't have to remember to start it every time it was powered up.
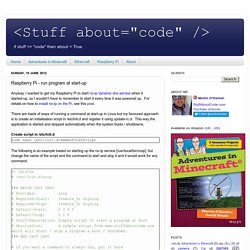
For details on how to install no-ip on the Pi, see this post. There are loads of ways of running a command at start-up in Linux but my favoured approach is to create an initialisation script in /etc/init.d and register it using update-rc.d. This way the application is started and stopped automatically when the system boots / shutdowns. Create script in /etc/init.d sudo nano /etc/init.d/NameOfYourScript. The Only Raspberry Pi XBMC Tutorial You Will Ever Need. Windows Installation. Windows installation is very simple and works on Windows 2000 / XP, Vista and Seven.
First, fetch the Windows installer from this link here and extract the contents to a folder. Next up, run the program called “setup.exe”, you may receive a UAC prompt if running Vista or later. This is because the Raspbmc installer needs to run as an Administrator on your system to write to the SD card at block device level. You will now be presented with an interface such as this: Your SD card should be shown on the list. WARNING: This program enumerates ALL removable devices on the system, data loss can occur and I will not be responsible if you image the wrong device. Bcm2835: C library for Broadcom BCM 2835 as used in Raspberry Pi. This is a C library for Raspberry Pi (RPi). It provides access to GPIO and other IO functions on the Broadcom BCM 2835 chip, as used in the RaspberryPi, allowing access to the GPIO pins on the 26 pin IDE plug on the RPi board so you can control and interface with various external devices.
Raspberry pi – Setting up auto-login and auto-loading the gui. Home > How To, Raspberry pi, Technology > Raspberry pi – Setting up auto-login and auto-loading the gui Setting up Auto-Login In the GUI left click in the bottom left hand corner on the blue cross to display the options menu (Like the start button in windows) Go up to “other” and then scroll down the list until you get to “terminal” and left click You should now see the “terminal” window which is just like a cmd box in windows and enter the following command.
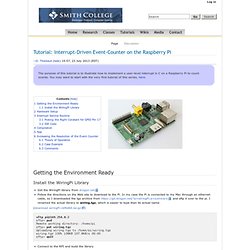
GPIO Library. Update: 14th May, 2013 wiringPi version 2 has been released and now has its own website ( to look after it. Learning System. S Raspberry Pi Lesson 11. DS18B20 Temperature Sensing @Raspberry_Pi #raspberrypi. January 29, 2013 AT 8:28 am Adafruit’s Raspberry Pi Lesson 11. DS18B20 Temperature Sensing @ The Adafruit Learning System. The Occidentalis Linux distribution for Raspberry Pi (and Raspbian as of Dec 2012) includes support for the DS18B20 1-wire temperature sensor. These sensors come in a small three pin package like a transistor and are accurate digital devices.In this lesson, you will learn how to use a DS18B20 with the Raspberry Pi to take temperature readings.Since the Raspberry Pi has no ADC (Analog to Digital Converter), it cannot directly use an analog temperature sensor like the TMP36, making the DS18B20 a good choice for temperature sensing.
Learn more! OAdafruit’s Raspberry Pi Lesson 10. Stepper motors fall somewhere in between a regular DC motor (Lesson 9) and a servo motor (Lesson 8]). Learn more! Adafruit’s Raspberry Pi Lesson 9. This lesson describes how to control both the speed and direction of a DC motor using Python and a L293D chip.
Learn more! Learn more! Learn more. Owners of a Raspberry PI, what do you use it for? : AskReddit.