
Install Cubian · cubieplayer/Cubian Wiki. In this tutorial you will learn how to install Cubian to your Cubieboard on both micro-SD card and NAND.
Download Currently you can download Cubian at Install to Micro-SD card Linux Unzip the img If the img filename end with bz2 bzip2 -d PATH_TO_CUBIAN.bz2 If it ends with 7z apt-get install p7zip-full 7z x PATH_TO_CUBIAN.7z Write to your device dd if=PATH_TO_CUBIAN of=/dev/YOUR_DEVICE bs=4096; sync Windows users Download Image writer.Link1 Link2Unzip the img Please use 7-zip to unzip the IMG fileRename the img Our Image writer only recognize file with a raw extension, so rename the image file.Press windows and R,run cmd.exe and then execute the DOS command rename PATH_TO_CUBIAN PATH_TO_CUBIAN.raw. Tutorials:common:lubuntu_wifi_configuration [Cubieboard Docs] About this Article Author: aaron — aaron@cubietech.com — 2013/11/12 13:52 Abstract This tutorials is about Lubuntu Desktop/sever wifi configuration on CB1、CB2 and CB3(Cubietruck).
![tutorials:common:lubuntu_wifi_configuration [Cubieboard Docs]](http://cdn.pearltrees.com/s/pic/th/configuration-cubieboard-87331899)
Cubieboard1 and Cubieboard2 Lubuntu Desktop/sever USB WLAN card driver module:8188eu and 8192eu. Cubietruck support Wifi wireless connection with antenna on-board,driver module is bcmdhd. " Cubieboard Lubuntu Sever.
NRF24L01. How to Control a Lamp With Voice Commands and a Raspberry Pi - Tuts+ Mac Computer Skills Article. Voice control is not just for smart phones and B-movies anymore.
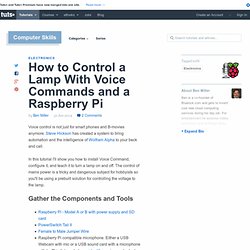
Steve Hickson has created a system to bring automation and the intelligence of Wolfram Alpha to your beck and call. In this tutorial I'll show you how to install Voice Command, configure it, and teach it to turn a lamp on and off. The control of mains power is a tricky and dangerous subject for hobbyists so you'll be using a prebuilt solution for controlling the voltage to the lamp.
Gather the Components and Tools Raspberry Pi - Model A or B with power supply and SD cardPowerSwitch Tail IIFemale to Male Jumper WireRaspberry Pi compatible microphone. Hook Up the Components Before you plug anything into power, hook up the external hardware to the Pi. Connect the microphone or webcam to the Pi USB portConnect the external speakers to the Pi. Back-up a Raspberry Pi SD card using a Mac.
I’ve re-installed my Pi’s SD card storage more times than I care to recall.
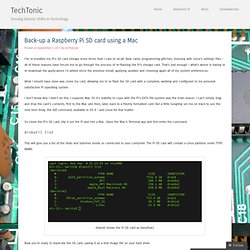
New cards, programming glitches, messing with Linux’s settings files – all of these reasons have forced me to go through the process of re-flashing the Pi’s storage card. That’s bad enough – what’s worse is having to re-download the applications I’d added since the previous install, applying updates and choosing again all of my system preferences. What I should have done was clone my card, allowing me to re-flash the SD card with a complete, working and configured to my personal satisfaction Pi operating system. I don’t know why I didn’t do this. I suppose Mac OS X’s inability to cope with the Pi’s EXT4 file-system was the main reason: I can’t simply drag and drop the card’s contents, first to the Mac and then, later, back to a freshly formatted card.
Diskutil list This will give you a list of the disks and volumes inside or connected to your computer. Raspberry Pi settings. Raspberry Pi, Arduino and Firmata - Middlesex Racket. Our aim is to talk to an Arduino board from a Raspberry Pi using Firmata.
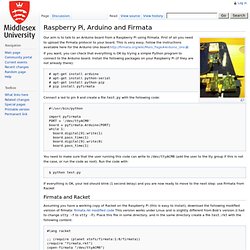
First of all you need to upload the Firmata protocol to your board. This is very easy, follow the instructions available here for the Arduino Uno board: » Speech recognition on Raspberry Pi with Sphinx, Racket and Arduino Franco Raimondi. In this post I put together a number of things to control two LED from a Raspberry Pi with voice recognition (via Sphinx), Firmata and Arduino.
Before you start, you may want to have a look at this other post on how to connect a Raspberry Pi and an Arduino board using Firmata and Racket: First of all, we need to install PocketSphinx on Raspberry Pi to do speech recognition. I am using a standard USB camera with microphone (supported by Raspberry Pi) and I’m following the instructions available here: In essence, this is what I’ve done (as root on the Raspberry Pi), please see the link above for additional details: Et voila’, you are now ready to test your PocketSphinx installation. Go to pocketsphinx-0.8/src/programs and run: . If you are lucky, you should get some text back… I don’t have space here (and time) to go into the details of (pocket)sphinx. In the next step we need to connect the output of PocketSphinx with Racket. . » Speech recognition on Raspberry Pi with Sphinx, Racket and Arduino Franco Raimondi. Raspberry Pi - configure wireless using the command line - useful on Model A with only one USB port.
The Raspberry Pi is a low cost, low power computer ideal for learning computing and electronics projects.
It is available in a model B which is the most popular version with 512Mb ram, two USB ports and built in Ethernet, or as a model A which is a "lite" version with only 256Mb ram, one USB port and no networking. Whilst in most circumstances it's worth paying a little extra for the Model B there are some times when the Model A is a better fit. In particular the model A uses less power so is good as a battery powered computer. Arduino Vs. Raspberry Pi: Which Is The Right DIY Platform For You. If you’re at all familiar with do-it-yourself (DIY) electronics, you’ve probably heard about the comparable merits of Arduino and Raspberry Pi.
You may have even, like I did, assumed they were competing hardware platforms solving similar problems. Actually, Arduino and Raspberry Pi are quite different. 5 Free eBooks On Raspberry Pi. 1.
Getting Started with Raspberry Pi The introduction of the book says, "What can you do with the Raspberry Pi, a $35 computer the size of a credit card? All sorts of things! If you're learning how to program, or looking to build new electronic projects, this hands-on guide will show you just how valuable this flexible little platform can be. This book takes you step-by-step through many fun and educational possibilities. 2. The introduction of the book says, "Learn Raspberry Pi with Linux will tell you everything you need to know about the Raspberry Pi's GUI and command line so you can get started doing amazing things. 3.
OpenEnergyMonitor. Real-Time Energy Monitor with Arduino and LabVIEW. We present the candidature of Mr.
Michele Mancini for the TiDiGino Contest. Cubieplayer/Cubian. Cubietech Cubietruck. Cubietruck is the third generation of the famous Cubieboard, and is the most full-featured board to date. The board helpfully states "CUBIETRUCK". Current status Mostly supported. See Tips, Tricks, Caveats below for more details. Images HW-Pack Manual build For building u-boot, use the "Cubietruck" target.The .fex file can be found in sunxi-boards as cubietruck.fex Everything else is the same as the manual build howto.
Fel mode There is a button marked 'FEL' next to the full-size usb ports, which triggers FEL mode. The Cubietruck is the only board to date that has a properly implemented VGA connector with DDC. For now though, you need to edit the FEX file still. There is one issue with VGA though. Gigabit Ethernet.