
Ça va faire du bruit chez les framboise314 : comment configurer le son sur le Raspberry Pi Certains lecteurs du blog se sont manifestés pour dire qu’ils n’avaient pas de son sur leur Raspberry Pi. Richard (Tilalo) m’a envoyé ce mail : Salut François, J’ai lu sur ton blog que des utilisateurs n'(avaient pas de son. En cherchant sur les forum, j’ai trouvé ça : à Tilalo pour cette info, et pour les anglophobes, vous trouverez ci-dessous la traduction de l’article en question, ainsi que celle de qui liste les différents problèmes rencontrés sur le Raspberry Pi. Tout d’abord cet article de Jose P Pinilla et Holguer A Becerra Comment activer le son en HDMI et en Analogique sur un Raspberry Pi (Raspbian-Wheezy) Avant de lancer startx : Utilisez le SuperUser (après chaque reboot) ou utilisez sudo avant chaque commande Installez l’utilitaire de mise à jour du Firmware Mettez le Firmware à jour Dans config.txt : décommentez « hdmi_drive=2″ Ajoutez le module audio module au noyau et :
License keys - Raspberry Pi Store The cookie settings on this website are set to 'allow all cookies' to give you the very best experience. Please click Accept Cookies to continue to use the site. Raspberry Pi Store Advanced Search | Search Tips Home Categories New Products Sort by: License keys Current Top Sellers Other Items in License keys Prices include VAT. Raspberry Pi (Trading) Ltd., Mitchell Wood House, Caldecote, CB23 7NU. For cancellations and returns, contact store@raspberrypi.org. Self-Contained Projector Rig #piday #raspberrypi @Raspberry_Pi May 16, 2014 AT 4:00 pm Self-Contained Projector Rig #piday #raspberrypi @Raspberry_Pi Filmmaker and interactive video artist Tim Bartlett (who recently created the Kentile Floors Sign Illuminated project) shared with us a handy way to build an efficient video projection rig around your Raspberry Pi. Self-Contained Projector Rig: I was recently asked to provide a video projection for the Proteus Gowanus ball, and assembled my most compact, self-contained projector rig to date. Check out his step-by-step instructions and setup your own video looping Pi projection rig here! Featured Adafruit Tutorial! Adafruit’s Raspberry Pi Lesson 6. Each Friday is PiDay here at Adafruit! No comments yet. Sorry, the comment form is closed at this time.
Création d’un utilisateur pour le Raspberry-Pi | Blog de Hotfirenet Tout dépend de ce que vous voulez faire avec votre raspberry-pi, mais si celui-ci est visible sur le net je vous conseille fortement de créer un nouvel utilisateur et de supprimer l’utilisateur pi par défaut ou du moins de changer son mot de passe. Pour créer un nouvel utilisateur sur le raspberry-pi une commande suffit: sudo adduser nomUtilisateur En sachant que nomUtilisateur est le nom de votre utilisateur Le processus de création d’un utilisateur fait sa sauce. Jusqu’à ce qu’il vous demande un mot de passe. Alors toujours pareil, si le raspberry-pi est amené à être accessible depuis internet je vous conseille de mettre un vrai mot de passe. Avec au moins 8 caractères alphanumérique et un peu de caractères spéciaux. Ne soyez pas surpris si vous ne voyez pas le mot de passe que vous tapez. Si les mots de passe sont identiques, une nouvelle étape va vous demander plusieurs informations. Donner les droits super admin (root ou sudo ) à cet utlisateur Il suffit de rajouter après: Ceci:
Howto Raspberry Pi : OpenELEC on Raspberry Pi, get a great XBMC experience on your Raspberry Pi *** Updated April 5 2013 ***Major changes: Get a fully functional XBMC Media Center on Raspberry Pi ! The Raspberry Pi is a very cheap and interesting small computer created by the Raspberry foundation for educational purposes. Therefore, it comes with a GPU able to decode HD Video, a great community works on this device and allow us today to use it as a real XBMC Media Center. Major sources: To help you setting up Openlec on your Raspberry Pi, don't hesitate to take a look at following pages: My others XBMC related posts and guides: OpenELEC Raspberry Pi FAQ: OpenELEC WIKI for Raspberry Pi: OpenELEC Forum for Raspberry Pi: If you have any issue, this is the place to go! Official XBMC Website and Forum: eLinux.org full description of available advanced values for Raspberry Pi: Interesting posts for Raspberry Pi:
Self-Contained Projector Rig | Tim Bartlett I was recently asked to provide a video projection for the Proteus Gowanus ball, and assembled my most compact, self-contained projector rig to date. It involves Velcroing a Raspberry Pi computer to my homemade projector mount, which can be clamped anywhere with standard film grip gear. When plugged in, 1080p video plays in a loop. Getting the video to start and loop automatically was fairly simple, but required several stops on the internet: I used this script to loop video files in a folder. I added -r four lines from the end, as suggested in one of the comments. omxplayer -r $entry > /dev/null Then I made the script (named videoplayer.sh) executable with the command:sudo chmod +x /home/pi/videoplayer.sh To run the video loop, if you’re in the same directory, typenano . That worked, but I had to reboot the Raspberry Pi to get it to stop. ! To run the script on boot:sudo nano /etc/rc.local Before the final “exit 0” line, insert this line: /home/pi/videoplayer & Change the path accordingly.
SD Formatter 4.0 for Windows Download You ("Licensee") are granted a license for the Software defined in this End User License Agreement ("Agreement") on condition that you agree to the terms and conditions of this Agreement. If Licensee does not agree to the terms and conditions of this Agreement, promptly return the Software to SD Card Association (SDA). Article 1 License Licensee is granted the right to use the software, including the information provided from this downloading site, users manuals, and any other media provided to Licensee (collectively "Software"), but all applicable rights to patents, copyrights, trademarks and trade secrets in the Software are not transferred to Licensee. Article 2 Use by a Third Party Licensee may not use, copy, modify, transfer or allow any third party, whether free of charge or not, to use, copy or modify the Software, except as expressly provided for in this Agreement. Article 3 Restrictions on Copying the Software Article 4 Computer of Use Article 6 Indemnification
Index of / RPi Video Looper 2.0 I have a brand new version of the Raspberry Pi Videolooper that solves a lot of the common issues I'm emailed about. Hopefully this solves problems for a lot of you. You can download the new image here: How to set up the looper Copy this image to an SD card following these directionsIf you want to use USB, change usb=0 to usb=1 in looperconfig.txt on the SD card (It is in the boot partition which can be read by Windows and Mac).If you want to disable the looping autostart to make copying files easier, change autostart=1 to autostart=0 in looperconfig.txtIf you aren't using a USB (NTFS) put your video files in the /home/pi/videos directory with SFTP or by turning autostart off. Features Source code The source code can be found on github here. This is perfect if you are working on a museum or school exhibit. Consider donating to further my tinkering since I do all this and help people out for free. Places you can find me
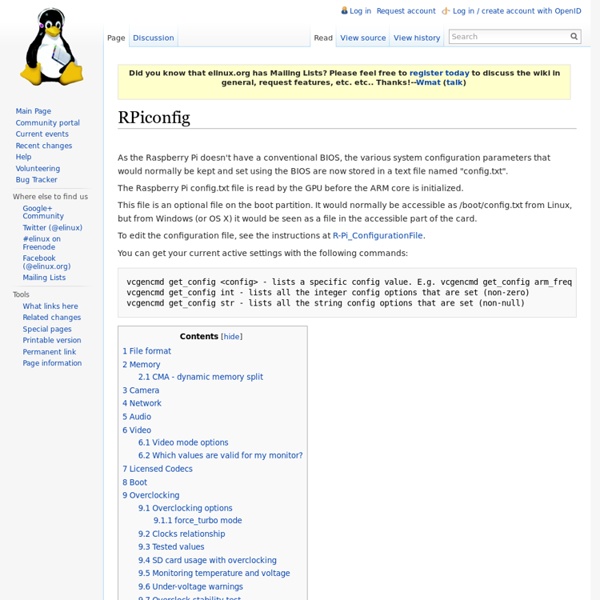
R-Pi configuration file How to edit the boot configuration file for Raspberry Pi While booting up, the Raspberry Pi reads some configuration parameters from the SD card. These parameters are stored in a file named config.txt and located in the /boot partition at /boot/config.txt. You can edit this configuration file from a Mac, from a Linux PC, or from within the Raspberry Pi itself. Depending on the partitioning scheme of your SD card, the /boot partition may not be visible to Windows PCs. This configuration file contains instructions which are necessary to setup the display. This method is most useful if you cannot see anything on the display of the Raspberry Pi. Shut down your Raspberry Pi, remove the power and remove the SD card.Put the SD card in your Mac's card reader and wait for the card to appear on the Desktop.Open the card in Finder.Look to see if there is a file called config (or possibly config.txt).If this file exists, open it with TextEdit. sudo nano /boot/config.txt sudo reboot
Benchmark du RaspberryPI « Bienvenue sur www.mbardot.com Voici quelques test effectués sur mon RaspberryPI, les résultats sont fait sans overcloking Pour effectuer les tests: Récupération du programme de Test: merci à wget tar xvzf UnixBench5.1.3.tgz cd UnixBench/ . éventuellement il faut installer gcc: apt-get install gcc Les résultats: Pour la tempétature: /opt/vc/bin/vcgencmd measure_temptemp=39.0′C Après un petit overclocking: cat /boot/config.txt arm_freq=900core_freq=450sdram_freq=450 /opt/vc/bin/vcgencmd measure_temp temp=40.6′C Comments are closed. What is the optimum split of main versus GPU memory? RAM is very crucial for Linux performance for couple of reasons: Caches. Linux runs without free memory for most of the time. If some memory is not used by applications, it is used for caches which speeds things up. So no memory is ever wasted. If applications needs more memory, caches are freed so caches won't ever prevent applications needing more RAM from running. So you always want to have as much ARM memory as possible. 256MB version For older RaspberryPi, with 256 MB of RAM, 4 splits are available: 240/16 - The most RAM size ARM can get (240MB) with mimial GPU memory. 512MB version New versions of RaspberryPi has 512 MB of RAM. 496/16 and 448/64 - like 240/16 and 192/64 split for 256MB respectively but with 256MB more RAM available for ARM. Dynamic splits New versions of firmware package removes most of start_*.elf files, leaving only start.elf and start_cd.elf (also fixup*.elf files where added). **512MB of RAM**: 16M-448M **256MB of RAM**: 16M-192M