
5 Easy to Follow Hair Tutorials - StumbleUpon. No matter how comfortable or confident I become in my hair styling abilities, I always seem to be on the lookout for easy style ideas to add to my daily routine.
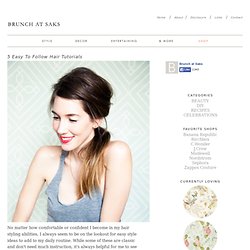
While some of these are classic and don't need much instruction, it's always helpful for me to see how other's achieve their look. Button Statment Rings. It’s September and that means it’s time to add another statement piece to your collection…. obviously!

I heart almost every piece Nicole Richie designs for House Of Harlow 1960, especially her oversized rings. As amazing as these rings are they’re also an easy DIY. My friend Jenni, from I Spy DIY, did a project a few months back where she transformed buttons into earrings. #SuperFab This got me thing…let’s transform buttons into statement rings! Buttons, buttons everywhere!! Materials: Buttons, Clippers, Glue, Rings With Flat Tops (available at the jewelry supply store) Use your clippers to remove the shank from the back of the button. Once you’ve made the back of the button flat, use an ample amount of glue to secure the ring to the back of the button.
Here’s another hint: If you can’t find a flat ring base, Ring Pops are a fun alternative. Once the base has dried, glue on the button. DIY Braided Bead Bracelet - Honestly WTF - StumbleUpon. It’s been awhile since our last bracelet DIY.

I don’t know about you, but our wrists have been begging for another colorful addition for months now. So after playing with some materials that were already on hand, we’ve created a tutorial for a braided bead bracelet, which is a not so distant cousin of the hex nut and wrap bracelet. Because honestly, you can never have too many . . . You’ll need: Cut the waxed linen cord into a 26″ and 19″ piece. Tie a knot about half an inch down from the loops. Start braiding the strands. Push the bead against the base of the braid, and cross the left strand over the middle. Keep a finger at the base of the braid, holding the beads in their place and keeping the braid tight.
Finish the bracelet with another inch of braided cord, measuring it against the wrist. Thread on a two hole button – two strands through one hole and one strand through another. Trim the end. Design Crush & Tipped Out - StumbleUpon. DIY! 7 new stylish ways to de-clutter your beauty closet - StumbleUpon. DIY storybook paper roses. 20 Creative Guest Book Ideas For Wedding Reception. Silk-Dyed Eggs {aka TIE-Dyed!}
I posted this tutorial a few years ago and it has become somewhat of a tradition to bring it back every year!
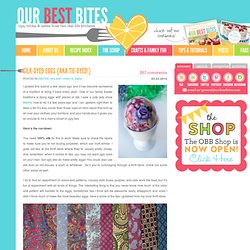
One of our family Easter traditions is dying eggs with pieces of silk. I saw a cute lady show Martha how to do it a few years ago and I ran upstairs right then to steal a tie! It’s way cooler than those cups of neon liquid that end up all over your clothes, your furniture and your hands plus it gives you an excuse to rid a man’s closet of ugly ties.
Here’s the run-down: You need 100% silk for this to work. I try to find an assortment of colors and patterns. Usually it will tell you if it’s 100% silk right on the main label of the tie, but a lot of them don’t, and if that’s the case, check that little tiny end, it’s usually hiding there. The first step is to deconstruct the tie. Next you cut a piece large enough to cover an egg. Now, notice how I tied the eggs in the above photo- with the tie on the top of the long side of the egg. I wish eggs came like this at the grocery store. Surf's Up: Beach-Ready Beauty for Everyday. HAIR COLOR HOW TO: Hair Chalking. Get ready to paint the town, I mean, your hair red....green, hot pink, or any color you like.

- Wonder Forest -: Messy chunky beach waves... Easy tutorial! I'm one of those people who was cursed with stick straight thin hair that hates to curl.
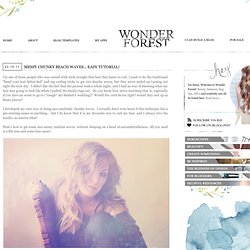
I used to do the traditional "braid your hair before bed" and rag curling tricks to get nice beachy waves, but they never ended up turning out right the next day. I didn't like the fact that the process took a whole night, and I had no way of knowing what my hair was going to look like when I pulled the braids/rags out. Do you know how nerve-wracking that is, especially if you have an event to go to (*cough* my brother's wedding)? Would the curls be too tight? Would they end up in funny places? I developed my own way of doing nice randomly chunky waves. Here's how to get some nice messy random waves, without sleeping on a head of uncomfortableness.
I absolutely LOVE the randomness of these curls. Have you seen this method done before? DIY - MAKE YOUR OWN WAX FOR HAIR REMOVAL. I was chatting with someone on my flight back from my vacation.

She lived in another country where salons are hard to come by or if they are around, they aren't very good. So, sometimes a girl has got to depend on herself. You can make one on your own so easily. So when I described it to her, she loved it and she said I just have to put it up online. So here goes: Wax recipe Ingredients 2 cups sugar ¼ cup water ¼ cup lemon juice Method Pour the sugar, water and lemon juice in a saucepan, and heat it over a low flame.