
DIY Paper Basket with Leather Handles. I’m always looking for ways to make my home feel like it has a bit more history — like it’s full of treasured items collected over a decade of travels, life experiences and adventures.
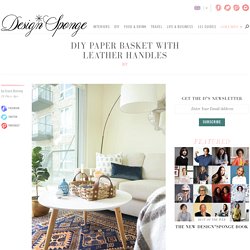
But of course, when you’re on a budget, sometimes you’ve got to be strategic, so I try to incorporate pieces made by hand with celebrated or inherent imperfections, such as woven baskets, that effortlessly incorporate the lived-in look without blowing the budget. To further the look in my living room, I’ve woven up a seagrass-inspired, paper basket with leather handles, as a solution for corralling books and treasures on my cocktail table. The leather handles are quite hearty, so the basket would also be fantastic put to use as a breakfast-in-bed tray or anything else one might dream up! —Erin of Francois et Moi Materials: • Kraft paper (either several paper bags or a roll of mailing paper) • 1/8” thick tempered hardboard cut into two 9.5” x 15” rectangles.
Create the Basket 1. 2. 3. 3. 4. 5. 6. 7. 3D Paper Owl from mmmcrafts. The gifted Larissa from mmmcrafts is here sharing her amazing talents with an unbelievable 3D paper owl.
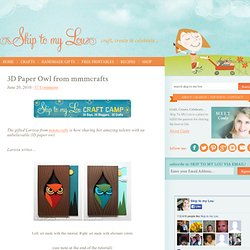
Larissa writes… Left: art made with this tutorial, Right: art made with alternate colors (see note at the end of the tutorial) Hey, Craft Campers! Zentangle. DIY Project: Toilet Paper Roll Wall Art. Not every day you can find a clever way to reuse something from the bathroom..now you can take a break because someone came with very a simple and beautiful idea that lets you reuse toilet paper rolls.
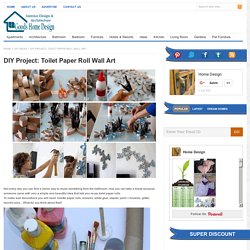
To make wall decorations you will need: toilette paper rolls, scissors, white glue, stapler, paint + brushes, glitter, laundry pins…What do you think about that? Crush paper roll Cut into approximately 5 equal parts don’t have to be exact place the rolls on a flat surface creating a desired pattern. spend time trying different compositions and patterns. glue where rolls are touching, hold with laundry pins to dry. How to transfer a photo to fabric. Did you know you can transfer photos to fabric without using iron-on sheets?

I love this technique. It's simple to execute and the end results are really pretty. It's another method for hand printing! I made some fabrics the other day and used them to add pockets to one of my wool skirts. Fabriquer un sac en papier. Gift bags made from newspaper is a great idea for birthday parties or weddings! We saw this on a site that was we think was in Vietnamese?? Anywho -here’s our best try at translation along with the photo tutorial. Supplies: Glue, Scissors, Paper Doiles, Newspapers, and Wire Ribbon Step 1: Cut into rectangular sheet of paper and then press twice the leading newspapers in the Middle as shown on the picture Step 2: Use glue fixed two edge paper overlap Step 3: Fold one end securely to the bottom of the bag Step 4: You fold the side edge short and long edges paste twice in photos to form bottom bag Step 5: Wait for the glue to dry.
Magnetic Ironing Mat DIY. I don't think I'm alone in saying that ironing is not one of my favorite tasks.
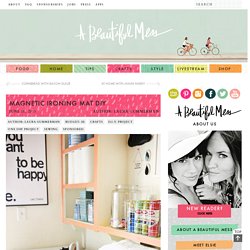
I try to use a steamer on everything I can or just spritz things with water to ease wrinkles, but sometimes you just can't get around bringing out the ol' iron for a job. I think part of not wanting to iron is the fact that a full size ironing board usually takes up all of the space in a laundry room (if you even have a separate room for laundry). Tin Can Lanterns Tutorial. I love summer and I love that I finally have a backyard to have parties in!
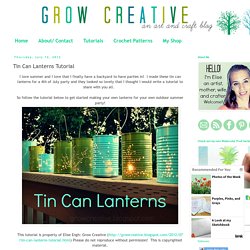
I made these tin can lanterns for a 4th of July party and they looked so lovely that I thought I would write a tutorial to share with you all. So follow the tutorial below to get started making your own lanterns for your own outdoor summer party! Materials: recycled tin cans hammer nail bailing wire pliers spray paint ( I used Krylon Indoor/Outdoor Paint) tea light candle Step 1: Remove labels and glue from the cans.
DIY Faux Stained Glass Bottles. Earlier this year Mandi created a really beautiful faux stained glass panel for her kitchen window.
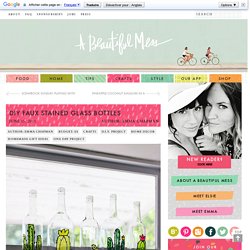
I just loved the effect and have wanted to create some kind of stained glass project myself ever since. Mønstret perlepung. Denne perlepung syede jeg i sommerferien, da jeg var i sommerhus sammen med familien og kæresten.
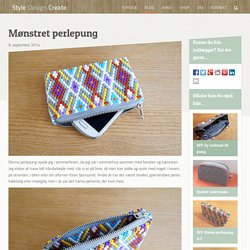
Jeg elsker at have lidt håndarbejde med, når vi er på ferie, så man kan sidde og sysle med noget i haven, på stranden, i bilen eller om aftenen foran fjernsynet. Andre år har det været broderi, grønlandske perler, hækletøj eller malegrej, men i år var det hama-perlerne, der kom med. Pungen er en af de større, jeg har lavet. DIY Hama Bead Bunting - Paper and Pin. So recently I shared my love of Hama beads (or fab off-brand IKEA ‘Pyssla’ beads) but lately, my obsession has grown to new heights with this colourful and oh-so-cute DIY Hama bead bunting!
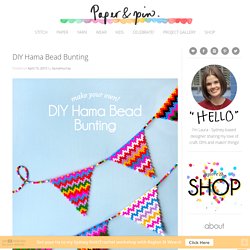
Now, fair warning, arranging the beads into these cute chevron stripes does take some time but there’s definitely something cathartic about it and the final product is worth the time! Smitten studio // sarah sherman samuel » Blog Archive » DIY garment rack. We have a serious shortage of closet space around here and in the new house it is going to be even less, so I made myself a garment rack that I wouldn’t be ashamed to have out on display.
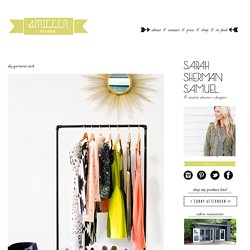
Now my favorite items won’t get lost in the wardrobe abyss. Here are the supplies needed if you want to try this out for yourself. Supplies: 1: 1/2″ Steel conduit pipe. (if you buy it from a hardware store like Ace or Do it Best, they will cut them down to the size you’d like and also thread them for you) 2: Flat black spray paint 3. 2 floor flanges 4. 2 elbow joints 5. 24 wood screws 6. 4 casters (only 2 shown) 7. wood base (I used an old armoire drawer front but most any wood would work. Then all you need is to put it all together. Sewing 101: fabric boxes. It seems no matter what I do, I can never get a handle on all the tiny odds and ends that accumulate around my house.
From craft materials to hair ties, the bits and bobs are constantly trying to take over, so in the never-ending quest to corral them, these little fabric bins were born. You can make one of these soft boxes in almost no time, and in almost any size, so you can customize them to perfectly fit whatever you need to hold. Top each one off with a label holder (also customizable in any shade of the rainbow, thanks to nail polish), and you’ll have a leg up on clutter . . . for a little while, at least. — Brett Bara Read the full how-to after the jump . . . Materials a sturdy fabric, such as canvasthread to matchsewing machine, iron and basic sewing supplieslabel holdersnail polish (optional) 1. DIY Hexagon Ring Dishes - Homey Oh My! It recently occurred to me that I don’t have a single ring dish in the apartment, and that crazy realization happened after I spent forever looking for a ring I couldn’t remember where I last placed. Will making a bunch of small clay dishes to sprinkle around the apartment 100% prevent me from putting my rings on random surfaces?
Maybe, maybe not, but I gotta at least try. These dishes are cute anyway to keep around, and while they’re intended for rings, they can be catchalls for anything tiny that would be annoying to lose! Also, five might be overkill for one household, but I actually ended up making 10 total, reason being because I messed up the first five, then made five more hoping at least three would turn out alright, then I liked how all five turned out, so this turned into a real ring dish party. 3D Paper Owl from mmmcrafts. Marble Dipped Vase. Contributor post by Rachel of the Crafted Life After seeing a few marble diys on Pinterest, I finally decided to take the plunge and try it out for myself. It only takes water and nail polish to do, so why not, right?! Ric Rac Rose.
I love these easy-to-make Ric Rac Roses! Isn’t it beautiful? You can make these and use them in hair, on jewelry, on clothing, as embellishments on anything! And with The Ribbon Retreat’s large selection of Ric Rac, your possibilities are endless! DIY Gold Tube Bracelets. I have very vivid memories of walking into a bead store for the first time, almost 15 years ago, and being overwhelmed by the million and ten ideas that filled my mind. I was immediately hooked on the concept of transforming simple and unexpected elements into something beautiful and wearable.
That moment was the catalyst for my eventual path into jewelry design and craft – my higher calling, if you will. DIY Heart Friendship Bracelet. DIY Braided Bead Bracelet. It’s been awhile since our last bracelet DIY. DIY Macrame Bracelet. Growing up by the beach in Southern California, the ability to knot a macrame bracelet was practically a right of passage. Although those days are long behind us, we’ve never forgotten the ever-so-simple square knot technique. This time, however, we’re replacing hemp and wooden beads for more updated elements like colorful nylon cord and glossy metal charms.
DIY Concrete Love Hearts Necklace. For the past couple of weeks I've been well and truly landed firmly on the concrete DIY band wagon. We’re Nuts About These DIY Hex Nut Accessories! Earlier this month, we stocked up on hex nuts from the hardware store and created earrings, a bracelet, and a pendant. Well, we’re at it again with hex nuts and, this time, the tutorials are even quicker, simpler, and just as stylish! Bracelet Materials:- suede cord (18 inches) – 14 small hex nuts.