
ONE little MOMMA: How to Sew an Infinity Scarf - Tutorial. I've tried before, but this year is the first time I've mastered sewing an infinity scarf.

They really aren't very hard to sew - as long as you follow a tutorial! Because it's definitely scarf season, I thought I'd show you how I have made mine. That way, when you are in a fabric store and find something you can't leave without, you'll have an easy project to buy fabric for. (I have a bad habit of finding beautiful fabric that I have no use for!) To sew this infinity scarf, you will need about 2 2/3 yards of fabric (This will make two scarves). Cut your fabric to 80"x 22". Once you have your tube sewn, you'll turn it right side out.
Next, take one open end of the tube and begin to pull/fold it up and around itself. As you can see in the photo, your fabric tube will now be shorter, and only raw edges will be next to each other. Match the original seam that you sewed on the inside of the scarf - both layers will have one. The last step is to close that hole. And that is it! 5353 pattern. Summer Series - Project #2. Maybe you guys are like me, and don't actually follow tutorials at all.
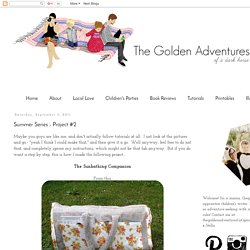
I just look at the pictures and go - "yeah I think I could make that," and then give it a go. Well anyway, feel free to do just that, and completely ignore my instructions, which might not be that fab anyway. But if you do want a step by step, this is how I made the following project... The Sunbathing Companion From this: To this: Just add your sunbathing self to this pic! This project is a little more challenging than the last, though still really a beginner project (because what am I?
You will need: Cut the 1st towel into the following pieces (you should have a medium sized piece left over) The instructions (sorry they're so hard to read on this one): Draw both edges together and pin - leaving 1cm(ish) between the edge of the pillow seam and your new seam, so that the towel lies flat (see the pic below for further clarification... Then sew! I think velcro will work much better than domes, but either would be fine... DIY-Basic Pattern Tutorial: The Bodice. Pannband -
Heeeeeeejsan igen.
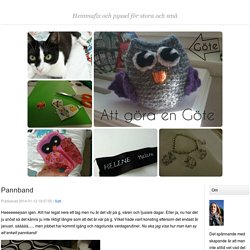
Allt har legat nere ett tag men nu är det väl på g, våren och ljusare dagar. Eller ja, nu har det ju snöat så det känns ju inte riktigt längre som att det är vår på g. Vilket hade varit konsting eftersom det endast är januari. sååååå...... men jobbet har kommit igång och någolunda vardagsrutiner. Nu ska jag visa hur man kan sy ett enkelt pannband! Enkelt är bäst. Började med att sy ihop långsidan. (Genom detta hål skall du sedan "vända ut" kortsidan för att sy den. När långsidan är sydd så vänder vi tyget ut och in. Nu skall vi vända kortsidan genom hålet vi lämnat på långsidan.
Nåla hela vägen runt om du inte redan gjort det. Det kan vara lite pilligt att sy men det går! Så här ser det ut när du sytt runt helt kortsidan. Taaadaa! Klart :) Julkalender lucka 18 - Pannband eller buff. Lucka 18 bjuder Jenny Thörne oss återigen på en fin tut, denna gång på hur man syr ett fodrat pannband.
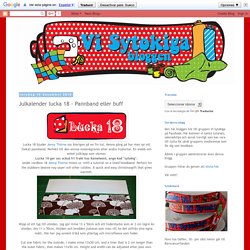
Perfekt till den envisa mössvägraren eller andra fryslortar. En snabb och enkel julklapp som värmer. Lucka 18 ger oss också fri frakt hos Kameleont, ange kod "sytokig". Under cardbox 18 Jenny Thörne treats us with a tutorial on a lined headband. Perfect for the stubborn beanie nay-sayer och other coldies. Klipp ut ett tyg till utsidan, jag gör mina 13 x 50cm och ett foderstycke som är 2 cm lägre än utsidan, dvs 11 x 50cm.
Cut one fabric for the outside, I make mine 13x50 cm, and a liner that is 2 cm longer than the outer fabric, that makes 11x50 cm. Lägg tygstyckena räta mot räta och sy ihop längs båda långsidorna. Put the pieces right sides together and sew the long edges together. Vräng nu pannbandet till rätan. Turn right sides out. Vill man ha sin lapp fastsydd limmar/nålar man fast den på rätsidan av yttertyget nu. Vik sedan ihop pannbandet på mitten med fodret på innerst. Klart! Tutorial: Sy ett pannband i vuxenstorlek.