
Using CSS Image Sprites for Image Links and Rollover Effects. Many designers use various techniques for linking images on a website, and making those images change upon hover. From image maps, to slicing each image individually – the page load time and usability of these techniques aren’t as optimal as using CSS image sprites. Here is a quick way to create a functional and user-friendly set of links that load much more quickly! As an example, we will create links and a hover effect for this set of social icons. Notice the above is a SINGLE image, rather than three separate images. You may choose to link these at this point, and not have them change when visitors hover. So create your “hover” images and place them under your default images like this. Here is the code we will use for this effect. Step 1: Use your own images. First, replace the image links with your own image URLs.
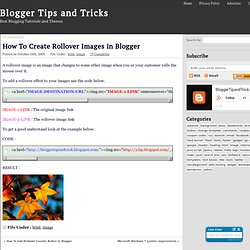
Step 2: Size and position your “display windows.” Change the in the first section to accommodate your images. Blog Tip: Image Rollovers with CSS Opacity (screencast) W3Schools Online Web Tutorials. Photoshop Tutorials, Flash Tutorials and More! P2L Tutorial Search. How To Create Rollover Images in Blogger ~ Blogger Tips And Tricks. Posted on October 16th, 2009 File Under : html, image19 Comments A rollover image is an image that changes to some other image when you or your customer rolls the mouse over it.

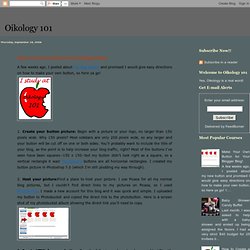
To add a rollover effect to your images use the code below. IMAGE-1-LINK : The original image link IMAGE-2-LINK : The rollover image link To get a good understand look at the example below. Goodies. Make Your Own Button for Your Blogger Blog! A few weeks ago, I posted about my new button and promised I would give easy directions on how to make your own button, so here ya go!

1. Create your button picture: Begin with a picture or your logo, no larger than 150 pixels wide. Why 150 pixels? Most sidebars are only 200 pixels wide, so any larger and your button will be cut off on one or both sides. You'll probably want to include the title of your blog, as the point is to help increase your blog traffic, right? 25 Places to Find Awesome Stock Photos — Free and Cheap! Online file sharing, content management, collaboration. Compare Website Packages at Yola.com. Big Cartel Pricing and Sign Up. We give you the useful tools you actually need, and leave the bells and whistles out.
You could say simplicity is our biggest feature. Indicates a premium feature not available on our free Gold plan. Quick setup Get a simple store online in minutes and get back to doing what you love. Upload images, set a price, and let us handle all the complicated stuff. Order management Search or download your full order history, view specific order details and history, print packing slips, and track which orders have been shipped. Five images per product Your customers want to see what they’re buying, so show off your products with big and beautiful photography.
Inventory tracking Always know how many products you’ve sold, how many are left in stock, and have products automatically marked as “Sold Out” when they’re gone. Digital products. Follow Peter. What are you working on? Japonizer -和風壁紙素材ツール. 換掉blogger Favicon的方法~IT Farmer 資訊農夫. Related Posts with Thumbnails.
Add FaceBook Like Button For Blogger ( BlogSpot ) And Customize It. Few days ago, face book surprised us by launching a lot of social plugins, one of them, actually the most popular one yet is the famous like button, In this tutorial you’ll learn how to add it to your blogger blog. and you’ll learn how to customize change the verb, like or recommend.change it’s color.change it’s font. Step 1. adding it to your template. The button code, where to add it ? Log into your blogger account, then go to Layout >> Edit Html. And after it, paste your button code What, If you didn’t find the code above in your template, The try to find the following, And paste the button code Before it. click Save Template and you are done. Step 2. In the above code you can customize 3 parts. and i’ve colored them to make it easy for you to recognize, in the above code change the following parts, I wish you all like it and please leave your comments if you need any help, to see demo for it please click here.
Comments will be closed off on this post 365 days (1 year) after it is published. Blogger技巧_讓外部連結在新視窗開啟 - 逍 遙 窩~資訊分享站. Blog Tip: Horizontal Navbar with Images (screencast)