
(2) Crochet SMOOTH EDGES - Learn the Trick Now. (2) Straight edges in double crochet every time. (2) Use the Chainless Starting Stitches to Give Your Crochet a Perfectly Straight Edge! Switchback Join Tutorial. In not one but TWO of my recent projects I’ve come up against that ubiquitous trait of circular crochet: The Lean.
Crochet stitches, for the most part, tend to lean in the direction of the dominant hand – so if you’re a right-handed crocheter, your stitches will lean right, and if you are a lefty, they will lean left. When working back and forth in rows, this balances itself out… but when working circularly (and therefore not turning) the lean gets compounded and you end up with a spiral pinwheel of joins and increases. Which can be quite pretty, but not if you are trying to keep the seam in one place, or use your first stitch as a marker for the center of a circle. I was trying to do both! Turns out, there are a few interesting fixes for this problem. I like this method, but I wanted something more tailored to working in flat circles. The Exception That Proves The Rule. Last month we were talking about a Mystery of Slanted Seams and Crochet Stitches & I showed some examples of our research based on double crochet stitches (DC).

As a rule, crochet stitches are formed by a combination of steps that involve “Yarn Over Hook” (YO) & pulling yarn through the specified loops/stitches, we call this method Classic. The exception to this rule is a Self-Compensated method of crocheting when one of the YO steps is replaced by “Hook Over Yarn” (HO). Please check out our >> previous article << for more explanations about differences in these 2 methods of crocheting. Today I would like to compare the Classic & Self-Compensated single crochet stitches (SC) worked in the round with joins. Joining method used in the examples below: ch-1 to beg; sc in same st as join; sc in each st around; join with sl st in top of beg st (not a ch).
To make a Classic SC – Insert the hook in next stitch, YO & pull working yarn through the stitch; YO & pull through 2 loops on the hook. Double Crochet Hack - mamacheemamachee. This is a way to clean up the edges of our double crochet squares (or rectangles).
I was familiar with two ways to turn my work when working double crochet rows. You either count your beginning ch as a stitch or you don’t. Here is a picture of my edge when NOT counting my beginning ch as a stitch: The edge is bumpy and blah. Tutorial: Straight HDC Seam. When making a hat, my preferred stitch is the half double crochet; the only problem with working hdc in the round is the running or diagonal seam that is created when rounds are joined.
I’ve been playing around with stitch placement on the last few hats I’ve made and I think the resulting seam is much neater looking. *NOTE* – The method described below will only work if the starting chain of each round does not count as a stitch. There are two steps to getting a straighter seam on a crochet HDC hat. The first step comes when working the increase rounds; most patterns are written in this format: {make 2 hdc in first stitch, hdc in next stitch} repeat around Since the HDC naturally slants to the right, working increases at the beginning of the set is going to accentuate the slant, so you will want to reverse the instructions, placing the increase at the end of the set like this: How to Always Crochet Straight Edges in Rows - Photo and Video Tutorial - Nicki's Homemade Crafts.
This post includes affiliate links.

This crochet tutorial is all about getting straight edges in rows every time. This includes a full video tutorial with easy to follow formulas to you will never have problems again. Of course, this crochet tutorial is mainly for crochet beginners, but should be bookmarked for others more advanced crocheters too. Especially for reference if they will ever teach how to crochet to someone else. I noticed that this subject “getting straight edges” has been brought up a lot lately in lots of facebook groups, that I was determined to teach you my method and formula to always get it right.
How To Crochet a Clean Edge Along a Rough Edge. Maybe it's a blanket border.
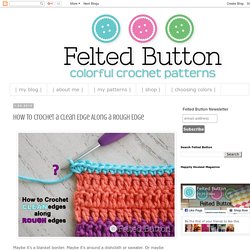
Maybe it's around a dishcloth or sweater. Or maybe along the edge of a scarf or cowl. But anytime you are instructed in a pattern to "work stitches evenly along edge" you are faced with a challenge. Where do you put your hook? How do you keep the stitches along the back from looking uneven and horrible? Here is an example of working into a rough edge. This example shows the back of a blanket with similar color-changing stripes, the same as above, but the rough edge was "prepared" before working into it. Working a border across the top and bottom edges is easy peasy as you have actual stitches to work into--especially if you work into the little back bump of the foundation chain so you leave two loops to work into there--but that's for another post. :) These two rough edges are not so easy, however.
With the same color of yarn as will be used in the first round of the edging, slip stitch LOOSELY along the rough edges. Crochet Learn to Pick Up Stitches Evenly Across. How to crochet an even edging on your crochet project. Seamless Crochet Rounds. Seamless Crochet Rounds Here at cre8tioncrochet.com we will be adding a new weekly feature.

Every week we will post a new helpful hint or trick to help you along in your crocheting. This week will be how make hats (or any item made in the round) seamlessly and how to seamlessly change colors. There are three seamless crochet methods that I use. Invisible Finish Off Crochet. I HATE when you can see where a finished piece was ended.

Almost as much as I hate seams (you can find my seamless crochet methods here). This is my method for finishing a piece of work, especially useful in hats, so that you can not easily tell where the last stitch was completed and secured. Hope you enjoy. Complete the last stitch in pattern. Do NOT join with sl st if working in the round. Cut tail approx 6″ long and pull up on hook so that tail is free Thread tail onto embroidery needle. Then stitch into the top of the last stitch you completed. This is the finished result.
You may also enjoy my other helpful hints and tricks Seamless Rounds. The Invisible Seam - Free Crochet Pattern - Meladoras Creations. This Free Crochet pattern teaches how to work in the round without leaving that big hole at the end of a round.

Please enjoy this Invisible Seam Crochet pattern and tutorial! Find more crochet stitches here on the category Crochet Stitches. The Double Crochet Stitch Controversy (Or How to Get Straight Edges) Well there I just crocheting along making a DC (US sc) square thinking I had it down pat.
Then some wise soul teaches me something useful! Let me explain, this is the way I’ve always done the dc (US sc) stitch, 1) Chain the number of stitches required plus 1. 2) Insert your hook into the 2nd chain from the hook. Yarn over and pull a loop through. 3) Row two: Insert your hook into the second chain from hook. This is the result. How to Keep Straight Edges in Crochet. How to Crochet a Straight Seam Working in the Round. Creating a Half Double Crochet Straight Seam in the Round. Straight and Invisible Half Double Crochet Seam in Round Tutorial. How to crochet the Perfect Straight Seam when going in rounds (Photo & Video Tutorial) - Nicki's Homemade Crafts.
This post includes affiliate links. This tutorial is a very detailed guide how to crochet the perfect straight seam when going in rounds. This can be very helpful when crocheting beanies, hats or even bags. So, this tutorial can be ideal for any crochet projects that need to be made in rounds. As I get so many emails and messages about how to crochet the perfectly straight seam when crocheting in a round, I decided to make a photo and video tutorial for it. When mentioning that during my last Facebook LIVE event (Wednesday’s, 5pm PST) I got a huge response saying that can’t wait for it and really need it.
Have I always done it the right way? I will tell you this: I was taught the wrong way before as well. Interestingly, this simple trick can be used for any patterns that create diagonal seams which seem so annoying at times and just do not look great when making beanies or hats specifically. Knowing this simple trick to create the perfect straight seam can be so helpful. You may also like: Smoother Edges For A Square. Smoother Edges For A Square – Working Borders Made Easy! This Smoother Edges for a square tutorial and pattern in part of the New Year, New Skill Crochet-A-Long. If you’re just now learning about this fun event, head on over to Underground Crafter to see what skills you missed in the first half of the event, or visit the CAL Central Facebook group.
SKILL: Beginner / Easy Basic stitches, simple shaping and finishing. Concentration required. Yarn: Weight – DK (11 wpi) 3 : Light – I used cotton yarn Color – 2 colors approx 25/30-gram each Hook: 4,00 mm Size: approx. 6 inches. How to Keep Straight Edges in Crochet. How to Keep Straight Edges in Crochet.