
DIY Ruffled Cake Toppers. Today is another exciting day here at The Sweetest Occasion as I welcome our second DIY Contributing Editor, Jenny Batt!
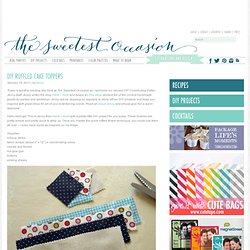
Jenny writes the blog Hank + Hunt and keeps an Etsy shop stocked full of the coolest handmade goods for parties and weddings. Jenny will be stopping by regularly to show off her DIY prowess and keep you inspired with great ideas for all of your entertaining needs. Read all about Jenny and please give her a warm welcome! Hello darlings! This is Jenny from Hank + Hunt with a pretty little DIY project for you today. Supplies: lollipop sticks fabric scraps (about 3” x 12”) in coordinating colors needle and thread hot glue gun buttons pinking shears Trim your fabric scraps into 2.5” x 10” with your pinking shears. Fold the fabric strip in half lengthwise. Pull the thread taut, producing the gather. Once fully gathered, tie the two ends together and well knot. Separate the two layers of fabric and attach a lollipop stick with hot glue. Judah Method - Bleaching Experemnet on Behance.
DIY storybook paper roses. DIY storybook paper roses You’re going to love today’s DIY project so much that you’re going to want to start tearing pages out from old books tonight!
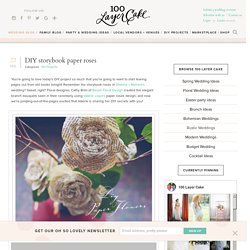
Remember the storybook roses in Shanna + Richard’s wedding? Sweet, right? Floral designer, Cathy Brim of Bloom Floral Design created the elegant branch bouquets seen in their ceremony using Valerie Lloyd’s paper roses design, and now we’re jumping-out-of-the-pages excited that Valerie is sharing her DIY secrets with you! <img class="alignnone size-full wp-image-17711" title="diy-paper-flowers-1" src="<a pearltreesdevid="PTD650" rel="nofollow" href=" class="vglnk"><span pearltreesdevid="PTD651">http</span><span pearltreesdevid="PTD653">://</span><span pearltreesdevid="PTD655">www</span><span pearltreesdevid="PTD657">.
Craft Supplies:Paper Grosgrain Ribbon, ½ Width cut to 4 inch lengths 16 Gauge Wire cut to 15 inch lengths Glue Gun Glue Sticks (low temp) Scissors Wire Cutters Step 1: Gather materials. Step 2: Cutting. Step 3: Shaping. Stacked End Table Shelf. Crafterhours: Tee to Tank: A Tutorial by Jen from Upcycled Education. This is one of my favorite t-shirt refashions of all time.
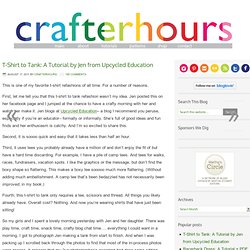
For a number of reasons. First, let me tell you that this t-shirt to tank refashion wasn’t my idea. Jen posted this on her facebook page and I jumped at the chance to have a crafty morning with her and watch her make it. Jen blogs at Upcycled Education– a blog I recommend you peruse, especially if you’re an educator– formally or informally. She’s full of good ideas and fun finds and her enthusiasm is catchy. Second, it is soooo quick and easy that it takes less than half an hour.
Third, it uses tees you probably already have a million of and don’t enjoy the fit of but have a hard time discarding. Fourth, this t-shirt to tank only requires a tee, scissors and thread. 41 Easy Things To Do With Mason Jars. How to Make Cherry Blossom Lights. DIY Sharpie Dinnerware. Update: I am so excited that so many people are loving and trying this project!
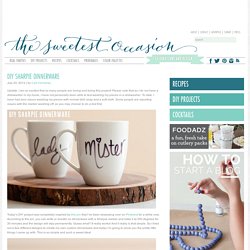
Please note that as I do not have a dishwasher in my home, I have not personally been able to test washing my pieces in a dishwasher. To date, I have had zero issues washing my pieces with normal dish soap and a soft cloth. Some people are reporting issues with the marker washing off, so you may choose to do a test first. 30 Design Ideas to Make Your Small Bedroom Look Bigger by Micle Mihai-Cristian. Interior design By Freshome.com - Interior Design & Architecture Magazine on Oct 30, 2012 If you are looking for inspiration on how to decorate a small bedroom, prepare to be overwhelmed with fantastic ideas.

After publishing these contemporary bedroom design ideas guaranteed to “rock your world”, these charming Swedish modern bedrooms and these holiday-inspiring ocean-view bedrooms, it is time to have a look at practical solutions for small homes. For today we gathered 30 photos of small bedroom interiors, each of them displaying a clever layout. So take your time and go through each and every photo from the list below, analyzing details and slowly configuring your dream bedroom.
20 Awesome Do It Yourself Projects. Thursday, June 14, 2012 4:30 am, Posted by Chris Groves | Internet 20 Awesome Do It Yourself Projects Topics: At Home Project Ideas , Creative DIY Home Projects , Do It Yourself Projects for 2012 , Fun How To Projects , What to Do with Extra Stuff Are you bored and have a bunch of extra little items hanging around here and there?
25 DIY Handmade Gift Tutorials Part 2. I love handmade gifts!
I love to give them, I love to receive them, I love to make them. In our home May is a crazy month! We have Mother’s Day, our Anniversary and not just one but 2 birthdays. DIY Glitter Vases. Inspired by many reader requests for a DIY tutorial to recreate the glittery mason jar vases from this New Year’s Eve party, today we’re playing with glitter.
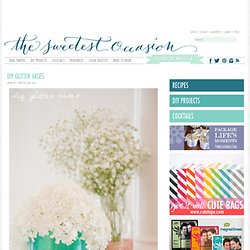
A whole lot of glitter! I whipped up two different versions of these glitter vasses, both of which are quick and easy. They’re perfect for parties, weddings or just to add a touch of sparkle to your dining room table. I seriously love how they turned out! Supplies - Glass containers (preferably with smooth, straight sides)Glitter (I used Martha Stewart Crafts glitter in Wintermint and Bronze from Michaels)Foam brushPainter’s tapeModPodge.
Dip Dyed Nautical Rope Bracelets DIY Fashion. Perusing Lonny Magazine last week, I spied these adorable dip-dyed braided rope bracelets by Tanya Aguiniga retailing for $85 and thought, really, what an easy DIY this has to have been done already.
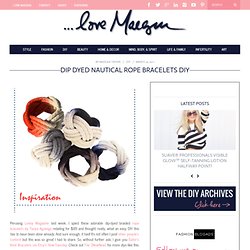
And sure enough, it has!! Amazing DIY & Crafts Ideas #2. Cupcake pin cushion via (dollarstorecrafts) Magazine rolled up bowl Mosaic Ornaments from CDs Pallet – just stain and take out some slats.
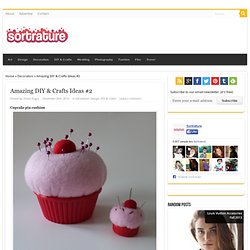
Write out your favorite song lyrics or favorite chapter of a book. Dipped pinecone placecard holder Painted vases Puzzle shelf. Backlit Canvas Art. Do you have one project that you've been longing to do, but just haven't found the time yet?
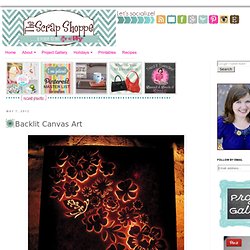
This is it for me. Craft Ideas / this is pretty cool.