
Learn.GitHub - Normal Workflow. Make and view changes made, then stage and commit them. So you have a Git repository and everything is all setup. What now? Generally, it is not going to be much different than working with any other source control system. The only real difference should be the staging process. The workflow will generally go something like this: modify files see what you’ve changed stage the changes you want to commit commit your staged changes rinse, repeat That is the most complex case.
Modify files commit your changes repeat Easy peasy. The simple case The first thing we’re going to do is modify some files. . $ git clone $ cd simplegit For this first example we’ll modify the README file to add ourselves as an author on the project. First, we simply edit the file. A prompt for a commit message will open in our editor (the $EDITOR environment variable or ‘core.editor’ git config variable - by default it uses ‘vim’) that looks like this: _ # Please enter the commit message for your changes.
Git Reference. Git reset is probably the most confusing command written by humans, but it can be very useful once you get the hang of it.
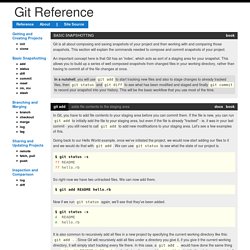
There are three specific invocations of it that are generally helpful. git reset HEAD unstage files from index and reset pointer to HEAD First, you can use it to unstage something that has been accidentally staged. Let's say that you have modified two files and want to record them into two different commits. You should stage and commit one, then stage and commit the other. Creating a new repository. You can create a new repository on your personal account or any organization where you have sufficient permissions.
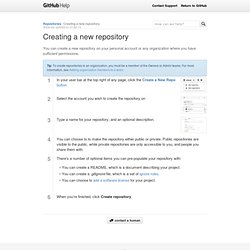
In your user bar at the top right of any page, click the Create a New Repo button Select the account you wish to create the repository on. Create A Repo. If you've found yourself on this page, we're assuming you're brand new to Git and GitHub.
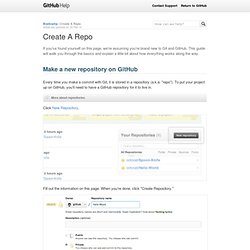
This guide will walk you through the basics and explain a little bit about how everything works along the way. Make a new repository on GitHub Every time you make a commit with Git, it is stored in a repository (a.k.a. "repo"). Git. You can get a Git project using two main approaches.
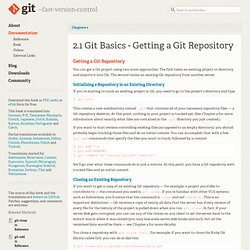
The first takes an existing project or directory and imports it into Git. The second clones an existing Git repository from another server. Working On Forked Projects Using GitHub. On Friday, I finally became active on GitHub, something I’ve waited far too long to do.

My first action was to fork Jeremie Miller’s Locker project. In the process of doing that, I captured some notes about working on projects at GitHub, which I’m posting here in case others might find them useful. I know I’ll be referring to this post until these commands become second nature. First things first, you’ll need to have a GitHub account, associated with your SSH public key for authentication.
I had done that previously, according to GitHub’s helpful instructions. With that out of the way, we can get on with the business of forking a project. Fork A Repo. If you've found yourself on this page, we're assuming you're brand new to Git and GitHub.
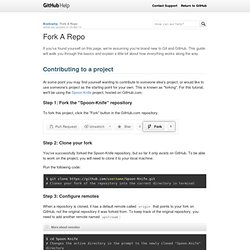
This guide will walk you through the basics and explain a little bit about how everything works along the way. Contributing to a project At some point you may find yourself wanting to contribute to someone else's project, or would like to use someone's project as the starting point for your own. This is known as "forking". For this tutorial, we'll be using the Spoon-Knife project, hosted on GitHub.com. Step 1: Fork the "Spoon-Knife" repository To fork this project, click the "Fork" button in the GitHub.com repository. Step 2: Clone your fork You've successfully forked the Spoon-Knife repository, but so far it only exists on GitHub. Run the following code: git clone Clones your fork of the repository into the current directory in terminal Step 3: Configure remotes More about remotes. Generating SSH Keys. We strongly recommend using an SSH connection when interacting with GitHub.
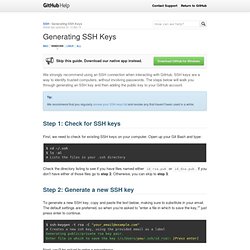
SSH keys are a way to identify trusted computers, without involving passwords. The steps below will walk you through generating an SSH key and then adding the public key to your GitHub account. Step 1: Check for SSH keys First, we need to check for existing SSH keys on your computer. Open up your Terminalyour Terminalyour Git Bashthe command line and type: cd ~/.sshls -al# Lists the files in your .ssh directory Check the directory listing to see if you have files named either id_rsa.pub or id_dsa.pub. Step 2: Generate a new SSH key To generate a new SSH key, copy and paste the text below, making sure to substitute in your email. Ssh-keygen -t rsa -C "your_email@example.com"# Creates a new ssh key, using the provided email as a label# Generating public/private rsa key pair.# Enter file in which to save the key (/Users/you/.ssh/id_rsa): [Press enter]