
3DS Max And Vray Tutorials for The Masses and A Whole Lot More. CG Education. Switchers For Randomizing PatternsBy Neil BlevinsCreated On: Dec 10th 2013Updated On: Feb 17th 2014Lets say you have a bunch of rocks in a scene, and you want to give each rock a slightly different color to add variety.
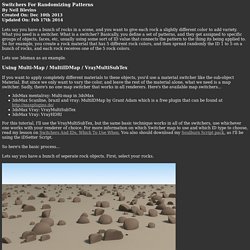
What you need is a switcher. What is a switcher? Basically, you define a set of patterns, and they get assigned to specific groups of objects, faces, etc, usually using some sort of ID value that connects the pattern to the thing its being applied to. So for example, you create a rock material that has 5 different rock colors, and then spread randomly the ID 1 to 5 on a bunch of rocks, and each rock receives one of the 5 rock colors. Lets use 3dsmax as an example. Using Multi-Map / MultiIDMap / VrayMultiSubTex If you want to apply completely different materials to these objects, you'd use a material switcher like the sub-object Material. So here's the basic process... Lets say you have a bunch of seperate rock objects. Run my iDSetter Script.
Set Low to 1 and High to 5. HDR Sky Lighting for Interiors. Notes on noise..
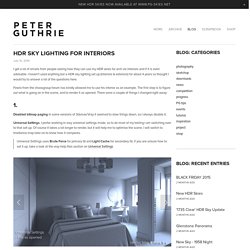
For people thinking that the above renders look too noisy for their uses.. then I would just change the noise threshold from 0.01 to something lower. The renders are just for comparison purposes. When I do high res renders, like over 5k, I sometimes even increase the noise threshold to 0.02. I never do animation work so have no experience with having to output super clean renders so please bear that in mind in the comments. Notes on render times All images here were rendered at 1024 x 576 pixels, but on TWO dual xeon workstations. Addendum 1 Someone on twitter asked me to clarify why I prefer the universal version of the HDR sky render over the irradiance map version.
3ds Max: Working with big scenes. "How to make up a tremendous master plan better"How we do it in Ravelin3D studio (tips and principles).
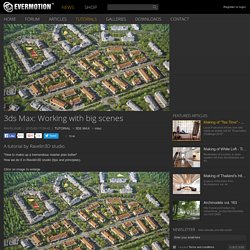
Click on image to enlarge Introduction Based on the statistics on our site the visualization we make is more often designed for big residential complexes and villa communities. Sometimes these projects consist of dozens of multistory blocks, and the 3D-scenes include great number of greenery, automobiles, people and other objects of fillings. Most of all, our clients don’t have the ultimate version of materials and that is why we have to make such-like projects upon the conditions of numerous corrections and alterations.
The most frequent question we’re asked: "How do you render such tremendous scenes? The answer is: No, the hardware we have is common as dirt. We do not work on anything that cannot be seen by camera in the sceneWe organize our projects and workflow. After reading this article, it can seem to you that these rules just slow down the work. Hardware configuration. V-Ray Render Optimization. Intro This tutorial attempts to cover the process of optimizing your V-Ray render settings to get the best possible render quality and fastest render time for a given scene.
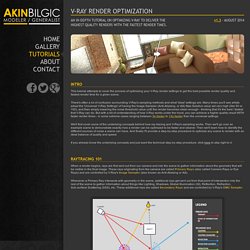
There's often a lot of confusion surrounding V-Ray's sampling methods and what 'ideal' settings are. Many times you'll see artists adopt the 'Universal V-Ray Settings' of having the Image Sampler (Anti-Aliasing, or AA) Max Subdivs value set very high (like 50 or 100), and then simply lowering the noise threshold value until the render becomes clean enough - thinking that it's the best / fastest that V-Ray can do. But with a bit of understanding of how V-Ray works under the hood, you can achieve a higher quality result WITH faster render times - in some extreme cases ranging between 3x faster to 13x faster than the universal settings.
We'll first cover some of the underlying concepts behind how ray tracing and V-Ray's sampling works. Raytracing 101 Figure 01 So to recap the important terms: Figure 02 Figure 03 Figure 04. Blog. Unwrap Techniques. Keyboard shortcuts for 3ds Max. Tutorial / Random object visibility in 3dsmax with MaterialByElement & Opacity. Zip file with illustrations & max 7.0 files can be downloaded here.
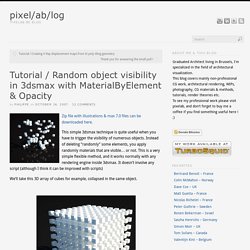
This simple 3dsmax technique is quite useful when you have to trigger the visibility of numerous objects. Instead of deleting “randomly” some elements, you apply randomly materials that are visible… or not. This is a very simple flexible method, and it works normally with any rendering engine inside 3dsmax. It doesn’t involve any script (although I think it can be improved with scripts) We’ll take this 3D array of cubes for example, collapsed in the same object. First we appy on it a Multi/Sub-Object material composed of 1) whatever base material you like and 2) a material with a plain black color in the opacity slot (We do it in the example with VrayMaterial + VrayColor but it normally works with any material with an opactiy slot) Then you apply a MaterialByElement on the array and you choose the This is very flexible because you can choose directly in your viewport the distribution and the frequency of the voids.
Rendu Animation. FStormRender. Mass FX. Fog & Snow. Modeling.