
WiFi Nano TP-Link TL-WN725N. Linux does not include a driver for the version of wifi adapter you have so you will need to download it from the internet.
If you are able to make a connection to your router using a network cable that would be the easiest way. If you can't connect your Pi to the internet with a network cable then you can download it to another machine and then copy it to the SD card to install it. First let's set up the files needed for the wifi configuration. First check file /etc/network.interfaces - use the command cat /etc/network/interfaces. The default setup should look like :- Code: Select all auto lo iface lo inet loopbackiface eth0 inet dhcp allow-hotplug wlan0iface wlan0 inet manualwpa-roam /etc/wpa_supplicant/wpa_supplicant.confiface default inet dhcp You will now need to edit the file /etc/wpa_supplicant/wpa_supplicant.conf to include the info about your wifi network name and password.
Ctrl_interface=DIR=/var/run/wpa_supplicant GROUP=netdevupdate_config=1 sudo mv /boot/8188eu-20130209.tar.gz . Find out more about Win32 Disk Imager. Raspberry Pi als Downloadserver mit pyLoad. In diesem Tutorial wollte ich euch eigentlich erklären, wie man jDownloader mit Webinterface installiert, doch dabei bin ich jedoch auf den schnellen und gegenüber von Java sehr ressourcensparenden Download-Manager pyLoad gestoßen.
PyLoad ist in eine Core- und mehrere Client-Einheiten unterteilt, was ihn perfekt für Fernzugriff macht ! Im Moment gibt es hierfür das Webinterface, Command Line Interface, GUI oder einen Android Client. Ich entschied mich in diesem Tutorial für das Webinterface, da dieses einfach von jedem anderen PC aus zu bedienen ist. 1. Paketlisten aktualisieren Sofern nicht bereits geschehen sudo apt-get update && sudo apt-get upgrade 2. Jdownloder/pyLoad installieren für Dumme. Hey Slimberryslim, den Anwendungsfall wollte ich auch mal ausprobieren und habe es mir wie folgt eingerichtet: ∙Soft-float 2012-08-08-wheezy-armel Image und Oracle JVM (Installation siehe (How-To siehe apt-get install Folgendes installiert:-unrar (das mit JDownloader gebundelte unrar läuft nicht (auf Arm?))
-fuse und exfat-fuse (optional, ich speichere meine Downloads auf einer exFAT-formatierten USB-Platte) Der einzige Haken: JDownloader lässt sich nur starten mit Code: Select all sudo java -jar /opt/jdownloader/JDownloader.jar nicht per Doppelklick auf das Icon und nicht ohne sudo. Zur Performance: Es ist nicht gerade "snappy" aber durchaus benutzbar. Ein testweise entpacktes RAR-Archiv mit drei Parts und 244 MB Größe, lies sich auf der Kommandozeile mit unrar in 2:15 min entpacken.
Ich hab's gerade erst aufgesetzt und noch keine längeren Erfahrungen. Grüßehimbeer3komma14159. Shrink Your Raspberry Pi With MicroSD Card Slot. The Raspberry Pi itself is about the size of a credit card, but it only has a standard full sized SD card slot.
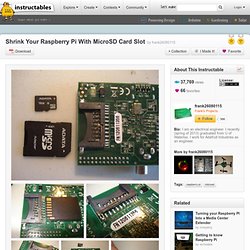
When you plug in a standard full sized SD card into it, the card sticks out of the outline of the Raspberry Pi, making the overall size slightly larger. My solution is to add a microSD card slot to the Raspberry Pi permanently, and in a location that does not stick out of the original Raspberry Pi outline. There are two solutions that I have done. One is easy, the other requires slightly more soldering skills. For the first easy method, you need a microSD card to full sized SD card adapter, some solid core insulated wire that is thinner than 24 gauge, and some solder plus equipment.
Using this method, the overall thickness of the Raspberry Pi does not increase at all. For the second slightly harder method, a Molex brand surface mounted microSD card slot is used, part number is 502702-0891. RaspbAIRy - the RaspberryPi-based Airplay speaker. LapPi - A Raspberry Pi Netbook. OK, so we need to fix the sound, add batteries, replace the insufficient LDO with a DC-DC converter, and plug in the USB devices. 1 | We will be using an RKAmp1 stereo amplifier from RK Education.
The amp comes in kit form, so the first thing to do is to put it together. 2 | Remove the old LDO from above the USB Hub. Compared to the 15w DC-DC converter the LDO is quite small, even with the heat-sink attached. 3 | Find a spare place for the Converter. 4 | There is space on the underside of the lowercase to mount the amp. 5 | Run power to the amp, and connect in the speakers. It has been mentioned in the comments the need to take the lower case apart to charge/change the batteries. 6 | Make a mount for a DTDP switch, this switch will sit near the DC socket so check available space before committing yourself. The Raspberry Pi - Lapdock Connection. LiPo to MicroUSB adapter.