

Bottle Lamp. Vintage Projector Lamp. Back when I purchased THESE nesting tables, the girl who sold them to me asked if I wanted to buy an old projector she had as well.
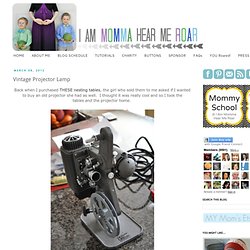
I thought it was really cool and so I took the tables and the projector home. I thought it would look pretty in my craft area and then a couple months later my sister found this lamp on the Anthropologie web site. Their price? $598 (horrid choking noise) I was enthralled with the idea, though. Industrial Sconce Light Makeover. At the moment I’m helping Mum organise and re-design the little nook (parent’s retreat) off her and Dad’s master bedroom.
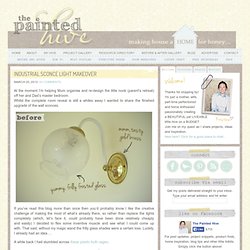
Whilst the complete room reveal is still a whiles away I wanted to share the finished upgrade of the wall sconces. If you’ve read this blog more than once then you’d probably know I like the creative challenge of making the most of what’s already there, so rather than replace the lights completely (which, let’s face it, could probably have been done relatively cheaply and easily) I decided to flex some inventive muscle and see what I could come up with. That said, without my magic wand the frilly glass shades were a certain loss. Convert a Music Tripod into a Lamp. Don’t get me wrong, I love the fact I get to call Australia home, though a word of warning to anyone thinking of moving here (particularly if you’re a home DIY-aholic accustomed to a seemingly endless array of affordable and easily attainable supplies).
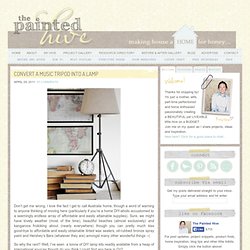
Sure, we might have lovely weather (most of the time), beautiful beaches (almost exclusively) and kangaroos frolicking about (nearly everywhere) though you can pretty much kiss good-bye to affordable and easily obtainable tinted wax sealers, oil-rubbed bronze spray paint and Hershey’s Bars (whatever they are) amongst many other wonderful things :-( So why the rant? Well, I’ve seen a tonne of DIY lamp kits readily available from a heap of international sources though do you think I could find any here in Oz? Course not, though never fear, there’s always a longer, frustrating, more expensive way around these things. Anyways, enough venting and on with the actual project.
Anyhoo, you will need…. Something to form your lamp base. 1. 2. 3. 4. 5. Wind Turbine Light Fixture. I was pretty excited about the Hardware Store Week challenge at So You Think You're Crafty.
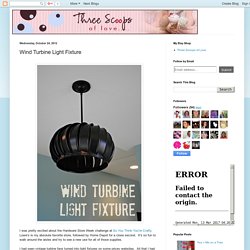
Lowe's is my absolute favorite store, followed by Home Depot for a close second. It's so fun to walk around the aisles and try to see a new use for all of those supplies. I had seen vintage turbine fans turned into light fixtures on some pricey websites. Restoration Hardware Inspired Lamp. <p><strong>This page is having a slideshow that uses Javascript. Your browser either doesn't support Javascript or you have it turned off. To see this page as it is meant to appear please use a Javascript enabled browser. Caged Lamp. Rock + Bowl + Flame. 31 minute project You'll need: Sakrete Quickset Concrete a bunch of rocks (perhaps dug up from your yard) a plastic bowl a large canned good chafing dish gel fuel pack PAM cooking spray newspaper plastic tub for mixing concrete stick to stir concrete You are going to create one of these (which, FYI, Restoration Hardware doesn't sale anymore, hence why we are making our own) In pictures: For the readers: 1. 3. 4. 5.

Mason Jar Light Pendant. Pottery Barn mason jar light pendants Have ya’ll snagged a recent catalogue from Pottery Barn this season?
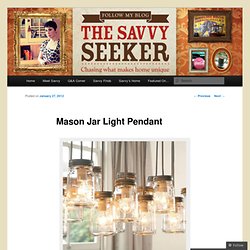
Looks like everything that was out in the barn is now coming inside the home! Lots of rich textures, rusty fixtures and rustic lighting. Bubble Chandelier. At long last we are excited to share the process of how we created the Champagne Bubbles "Frou Frou Chandelier" for our boutique (aka Bubble Chandelier for those of you who want a simpler name for it)!

Instead of paying $3,000-$7,000 for a chandelier, we thought it would be much more rewarding to create our own for just a few hundred dollars. This is a step-by-step guide for how we made the chandelier you see at Faire Frou Frou. Our chandelier measures 2'x4' which we needed to make large enough to make a statement in our boutique. Of course you can create any size or shape that you wish. {bubble chandelier} When we first moved into the loft, I thought we would need a large statement light fixture to go above the dining room table.
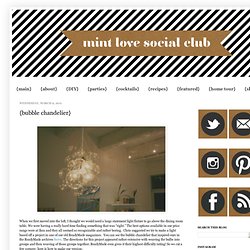
We were having a really hard time finding something that was “right.” The best options available in our price range were at Ikea and they all seemed so recognizable and rather boring. Chris suggested we try to make a light based off a project in one of our old ReadyMade magazines. You can see the bubble chandelier that inspired ours in the ReadyMade archives here. The directions for this project appeared rather extensive with weaving the bulbs into groups and then weaving of those groups together; ReadyMade even gives it their highest difficulty rating!
Wedding High: DIY Cloud Lights. Paper Starburst Pendant Light. So I had a different project that I was going to post today, an update version of my Book Pages Pendant Lantern from Project 19, but then I started working on this light idea, and I am so excited by the results I just couldn’t wait to show you guys!
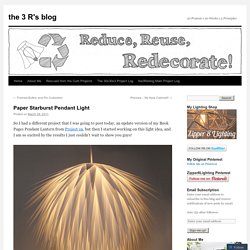
My inspiration and guide was this light from Design*Sponge, that I spotted on Pinterest. I really liked the idea, and I had a roll of white vellum lying around left over from college that I thought would look beautiful. So I started cutting triangles. And then I started glueing. And cutting more and glueing more.
The roll of vellum that I was using was 24 inches long. Photo lampshades. PINTEREST UPDATE: This is a post from 2010.

I do not take custom orders, only the tutorial is available. The lamps have held up wonderfully. As many of you requested, Marie is sharing a little tutorial here on how she made her lampshades. When she made them she was not planning on doing a tutorial for this blog, so be sure to thank her for taking the time to write all this out. Also, for those wondering…Kara will be sharing some tutorials for her book art on her blog soon. Photo Negatives Lamp. CD Stack Lamp. Nighttime City Paper Lamp Shade. 'Stargazin'. Our own Angelica completed a DIY project over the holidays that's positively brilliant. She writes: After a series of failed baking adventures I realized it was time for me to transfer my love for YumSugar and food magazines to CasaSugar and design magazines. Wooden Lamp Shade. Glowing Jar.
Glowing Jar. UPDATE: This post originally ran on March 23 2011, but with summer winding down we wanted to bring it back up for some late summer inspiration! A fellow fp girl sent this to me a couple weeks back and i’ve been thinking about it ever since! I can think of a million reasons why these would be awesome… as apartment décor, as outdoor party décor, and – wouldn’t they be the best thing EVER for camping in general or at a festival? Just let them sit in the sun all day, and they’ll last all night! I am absolutely going to make some to bring with me to bonnaroo this year. Mason Jar Chandelier. After living for close to two years without enough live/work light I decided to make a lighting fixture. One that would meet my specific needs without costing an arm and a leg. I had long thought of putting light bulbs in the hundreds of peanut butter and applesauce jars that I had eaten my way through.
I had also collected my fair share of mason jars and thought that they too could make for an inexpensive solution. In the end I chose the mason jars as they don't come with sticky and hard to remove manufactures' labels and I wouldn't have to wait until I ate my way through ten jars of Crazy Richard's chunky peanut butter. Tetris Lamp. Kitchen Cutlery Chandelier. Buy three x 1 metre strips of aluminium flat bar 2 mm thick by 25 mm wide to make the three rings of the chandelier. For the large ring, use the whole metre. For the medium ring, use a length of 75 cms and the small ring, use a length of 55 cms. Bend each length into an individual circle. Then, screw four metal brackets into your workbench to hold the size of hoop you want to weld.
Weld together the two ends of the hoop using the Dremel Versaflame. Expedit 4x4 mood light. Fire & Ice Lanterns. The old becomes new: A new variation on the outdoor lantern. Soda Can Tab Small Diagonal Pendant Light.