
Thinking Cap With Working Light. My oldest son just started kindergarten and really loves it.

Everyday he tells me that everything is so much fun but when I ask him what he actually did he says he can’t remember. At least I’m getting a positive reaction! Although he likes it he is still trying to figure the whole thing out – I think! I vividly remember my kindergarten teacher, Mrs. Jersey Yarn Rug / Home Decor. I was excited by the challenge to use nothing but a pair of my favorite orange handled scissors for this project.

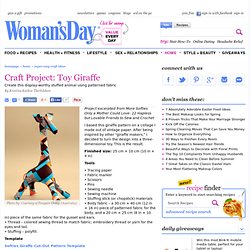
I knew immediately that I wanted to use them to cut lengths of t-shirt weight jersey knit to make my own balls of yarn as I have been wanting to start on a large scale crochet project for a while. Having been inspired by some lovely area rugs online and in stores, but knowing that purchasing enough yarn to complete such a project would be cost prohibitive, I decided to make my own! Raised fishbone stitch. Cloth Stitched. Learn How to Sew a Giraffe Doll at WomansDay.com - Free Craft Ideas. Project excerpted from More Softies Only a Mother Could Love: 22 Hapless but Lovable Friends to Sew and Crochet I based this giraffe pattern on a collage I made out of vintage paper.

After being inspired by other "giraffe makers,” I decided to turn the design into a three-dimensional toy. Nine Patch Lattice Quilt Pattern. This is a super-simple nine-patch baby quilt (38" x 53") that you can make with 9 fat quarters and 2-5/8 yards of a neutral solid background fabric for both the front and back.

I used Kona Coal for the background solid and Kona Grass Green for the binding. The quilt back is a little quieter, and features four "floating" blocks. If you would like to make one, you can download the pattern right here! Blossoms Baby Quilt. Stitched in Color: *Inspiration* Value Quilts. Today I discovered a common thread.

I've been loving quilts with a certain look... lots of color, contrast and an emerging design. Turns out I love value quilts. A value quilt is a design that plays on value - the lightness or darkness of a fabric, regardless of color. Here's one of my favorite examples. It's by Naptime Quilter: Her quilt reminds me of my Colorbrick Quilt. The world's best sewing tutorials in no particular order. Alina's Adventures sew everything A P indicates a printable tutorial or pdf pattern.

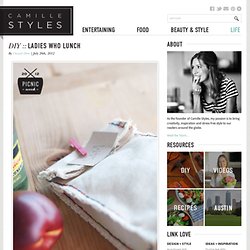
Tutorials. Tutorials. Ladies Who Lunch. All my closest friends know that I (Chanel) am forever on the search for the perfect, chic lunch box.

And believe it or not, a lot of the prettiest and well-designed carriers out there are super expensive. So with this personal challenge in mind and with Picnic Week in the air, I was inspired to create my very own reusable lunch bag. Taking my pattern directly from the handy-dandy, classic paper lunch sacks that I predict will be around forever and ever, I put together this canvas version that’s reusable, washable and most of all, super pretty. There was a lot of hand-stitiching involved, but it wasn’t difficult at all and I’m head-over-heels in love with the final product.
Joining Yarn - Russian Join - Knitting Community. This is an easy join and works well on those yarns that cannot be felted.

It requires a yarn needle. It can make things easier if you use a small needle and break the yarn end instead of cutting it. When you break the yarn, the tapered end it creates allows the tail to pass more smoothly through the shaft of the yarn. First, thread one of your yarn ends on a yarn needle. Insert the needle back into the strand of yarn and draw it through about two inches worth (depending on how slippery the yarn is you can increase or decrease this measurement), making sure to keep it inside the wound plies. Pull the needle and yarn tail out along the strand of yarn, leaving a loop at the end. Thread the other piece of yarn on the needle and pass it through the loop you created with the first length of yarn. Run this yarn back along itself as you did with the first. Tug on the yarn ends to tighten the loops. Trim the remaining excess yarn. How to Cable Without a Cable Needle. November 7th, 2011 by Jess.

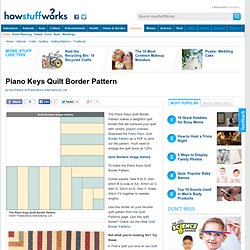
Lion Brand Yarn. Knitted wreath - cocoknits by julie weisenberger. How To Insert Thrums: Knitting. Piano Keys Quilt Border Pattern" The Piano Keys Quilt Border Pattern makes a delightful quilt border that will surround your quilt with vibrant, playful contrast.

Download the Piano Keys Quilt Border Pattern as a PDF to print out the pattern. You'll need to enlarge the quilt block at 125%. Entrelac Pattern. When I first saw this pattern…. wow, this woven knit strips pattern is so beautiful!!! I definitely want to make this, but how? Thanks to the modern technology of internet, I searched through the web and found some videos that taught about it. I like Planet Purl’s video the most, not only that it is easy to understand, Beth Moriarty has every stitch covered and explained. I am able to cast on and start knitting after the first or 2nd views of the video tutorial. Please stay tuned to see what will this piece of entrelac knit turn into….