Random Tutorial Generator. Pearls. Handmade Ideas. Make: Online. Lorrie Popow. AlinaBoloban. This Glue Chart Guides You Through Which Glue to Use Where. Gustamontón. Most favorited all-time. D.I.Y Shrink Plastic. Cupboard Distributing - Woodworking, Decorative Painting, Fine Art Supplies, Craft Supplies, Scrapbook Supplies & Wood Products. Day 3: Sparkle Headbands - a diy headband tutorial. Theses headbands I want to keep for myself.
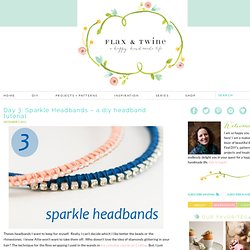
Really, I can’t decide which I like better the beads or the rhinestones. I know Allie won’t want to take them off. Who doesn’t love the idea of diamonds glittering in your hair? The technique for the floss wrapping I used in the wands in my costume course on Craftsy. But, I just adore the added bling. Really you can do this technique with most trimmed beads. I fell in love with the idea of the rhinestones after seeing Green Eyed Monster’s Rhinstone bangles - love these.
Material: Plastic headband DMC Pearl Cotton Embroidery Thread Approx. 18″ of beaded trim with attachments in between each stone or bead (rhinestones, crystal beads, etc) Craft glue or hot glue gun Time: 1 hour Attach beginning of floss to inside of headband with craft glue or hot glue gun. Wrap floss around headband beginning at one end. You can wrap a number of times (5-7) quickly and then push strands together snugly, careful not to overlap the strands. Let it dry. Finis! Workshops, Patterns, Tutorials - StumbleUpon. Paper Illustrations, Gift boxes,... - StumbleUpon. View Projects By Season : Project Inspiration : Hobby Lobby - Hobby Lobby. Craft Klatch. Wind-up paper butterflies are my fave (guest post from amelia) I had a baby so I’ve invited some fave guests to take over for me while I spend time with the little guy.
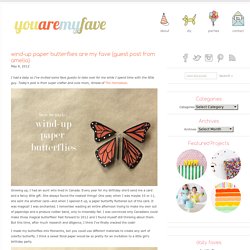
Today’s post is from super crafter and cute mom, Amelia of The Homebook. Growing up, I had an aunt who lived in Canada. Every year for my birthday she’d send me a card and a fancy little gift. She always found the neatest things! One year, when I was maybe 10 or 11, she sent me another card—and when I opened it up, a paper butterfly fluttered out of the card.
I made my butterflies into Monarchs, but you could use different materials to create any sort of colorful butterfly. Materials: You’ll need heavy cardstock, 24 gauge wire, silicone rubber bands (I found mine in the hair aisle at Walgreens) needle-nose pliers, scissors, tape, a paintbrush, a black marker, and a white ink pen. Step 1: Measure and cut your wire. Step 2: Find the center of the longer wire. Step 5: Find the center of the shorter wire, and wrap it around the base of the paintbrush. Top 100 Tutorials of 2010 - StumbleUpon. I Love Sharpies: 20 Great Ideas & Projects! Happiness is Homemade creative fun for the entire family!
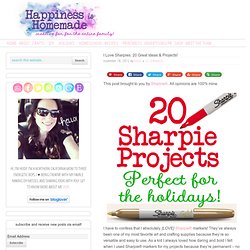
I Love Sharpies: 20 Great Ideas & Projects! November 18, 2012 by Heidi 32 Comments This post brought to you by Sharpie®. All opinions are 100% mine. I have to confess that I absolutely {LOVE} Sharpie® markers! If you think that Sharpie® markers are just for drawing and writing, you’ll definitely want to check out these amazing projects from some talented bloggers and artists that would be perfect for holiday gifting and decorating. 15-Minute Gift Idea: Sharpie Candles.
Origaminizing. 1001 Free Fonts - Download Free Fonts for Windows and Macintosh. How To Make A Stylish Photo Frame For Several Photos. Here is a simple yet stylish photo frame that can accomodate quite many photos at once. The idea is very simple. Fasten twines on the empty frame and hang photos using clothes pins on them.
You can use a frame you bought or a frame you made by yourself. To make it you just need to find some wood strips, sand them, paint or stain them and fasten together with the staples and nails. Yes, everything is as simple as it sounds. Docrafts - your source of creative inspiration for crafting. Home Ec Online.