
The Project Gutenberg eBook of Encyclopedia of Needlework, by Thérèse De Dillmont. Best indie rock songs, popular bands, top rock music, top ten songs, indie videos. Stream and download the best songs of 2013 from new single, EP and album releases by popular, signed bands, as well as lesser known DIY and small label bands and artists. In case you’ve missed any new or recent releases, this page offers quick clicks to the most recent playlists of singles and albums, as well as other recent posts that you may have missed. Get free MP3s (to stream or download) of the top indie rock songs from the best albums of 2013, featuring many great artists – from the biggest names in alternative and indie rock to talented unsigned and small label bands.
Follow us on Facebook and Twitter to get more goodies every day, including the Song of the Day, playlists, new band profiles, cool links, flashback tracks, artists to watch, the Top 10, album reviews, and much more. Best New Album Releases of 2013 June 2013 Top Releases May 2013 Top New Releases The second full week of May 2013 kicked off with an overview and playlist of the BFD Music Festival in Mt. See. Spider Stitch. It has been so long since I’ve done my stitch-of-the-week.
I’ve been keeping up with it as far as trying a new stitch, taking pics, etc., but haven’t had time to post them. I’ll try to be better about it now that the baby is getting a little bit older. Here’s the newest one. Lost & Found Lane: Crocodile Stitch The Easy Way. I was very frustrated when searching the internet for a free pattern to learn the Crocodile Stitch.
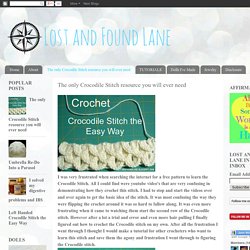
All I could find were youtube video's that are very confusing in demonstrating how they crochet this stitch. I had to stop and start the videos over and over again to get the basic idea of the stitch. It was most confusing the way they were flipping the crochet around it was so hard to fallow along. It was even more frustrating when it came to watching them start the second row of the Crocodile stitch.
However after a lot a trial and error and even more hair pulling I finally figured out how to crochet the Crocodile stitch on my own. If you would like a copy of the common crochet abbreviations I have created a "Crochet Abbreviations" reference sheet. Thank you so much for all your support and all your lovely comments. Keep smiling and Keep Crocheting! Do you mind if i knit: Sewing up knitting or crochet with an invisible stitch. Hello!
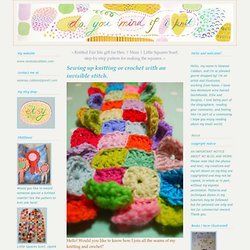
Would you like to know how I join all the seams of my knitting and crochet? You would?! That's great. I hope the following instructions are clear enough, and that they help you. The invisible stitch I am using, is also known as the 'ladder stitch', because the line of yarn joining your work, looks like a ladder, before it has been pulled taught. Crochet Patterns: Oak, Birch, and Elm Leaves. A while back, I designed three different leaf crochet patterns.
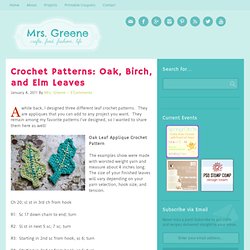
They are appliques that you can add to any project you want. They remain among my favorite patterns I’ve designed, so I wanted to share them here as well! Oak Leaf Applique Crochet Pattern The examples show were made with worsted weight yarn and measure about 4 inches long. The size of your finished leaves will vary depending on your yarn selection, hook size, and tension. Ch 20; sl st in 3rd ch from hook R1: Sc 17 down chain to end; turn R2: Sl st in next 5 sc; 7 sc; turn R3: Starting in 2nd sc from hook, sc 6; turn R4: Starting in 2nd sc from hook, sc 5; turn R5: Starting in 2nd sc from hook, sc 4; turn R6: Starting in 2nd sc from hook, sc 3; sl st down the side of R2-5. How to Crochet: The Magic Adjustable Ring. By Alicia Kachmar – 53 Comments One way of crocheting in the round is to chain 2 and then make a certain number of stitches into the 2nd chain from the hook (you can do so with any kind of crochet stitch–sc, hdc, dc, etc.
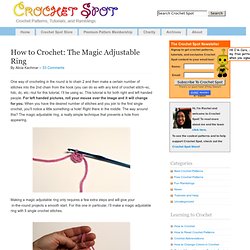
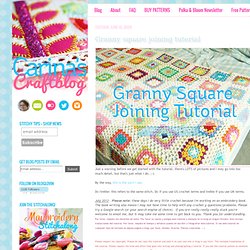
–but for this tutorial, I’ll be using sc. This tutorial is for both right and left handed people. Anleitung: Sunburst Flower Granny Square haekeln ? Kasa Amend. GET SQUARED · Crochet. Carina's Craftblog: Granny square joining tutorial. Just a warning before we get started with the tutorial, there's LOTS of pictures and I may go into too much detail, but that's just what I do. ;-) By the way, this is the yarn I use.
Dc/treble: this refers to the same stitch. Dc if you use US crochet terms and treble if you use UK terms. July 2012 - Please note: these days I do very little crochet because I'm working on an embroidery book. The book writing also means I may not have time to help with any crochet-y questions/problems. The sloppy slip knot: how to work in the round with no hole If you're new here, you may want to subscribe to my RSS feed.

Thanks for visiting! The typical way of starting to work in the round is less than ideal for amigurumi. The standard way is to make a slip knot, chain 2, and then single crochet six times into the first stitch. Why isn’t this the best? It leaves an icky hole that lets stuffing poke through, as shown in the photo above. A number of ways have been devised to solve this problem, one of which is the magic ring. To begin, don’t make a slip knot. Now, continue on as usual. Here’s the magic part. It’s easy! Guess what? Carina's Craftblog: Crochet magic ring tutorial. Mmm... happy colours!
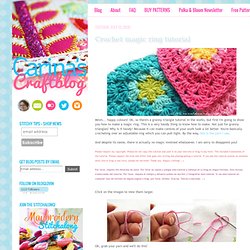
Ok, so there's a granny triangle tutorial in the works, but first I'm going to show you how to make a magic ring. This is a very handy thing to know how to make. Not just for granny triangles!