
Nema 17 Stepper Motor Bipolar L=48mm w/ Gear Ratio 5:1 Planetary ... Digital Fast Write / Read for Encoder and interrupt processing. Quadrature Encoder too Fast for Arduino (with Solution) – Dr Rainer Hessmer. Encoder for Pololu Wheel 42x19mm. Discontinuation notice: We have released a newer encoder solution for our micro metal gearmotors that provides many more counts per revolution and does not put any restrictions on the gearbox output shaft.
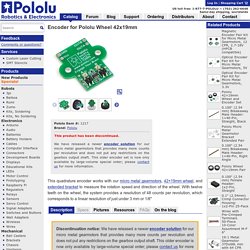
This older encoder is now only available by large-volume special order; please contact us for more information. Overview This quadrature encoder board is designed to work with Pololu micro metal gearmotors by holding two infrared reflectance sensors inside the hub of a Pololu 42×19mm wheel and measuring the movement of the twelve teeth along the wheel’s rim. The two sensors are spaced to provide waveforms approximately 90 degrees out of phase, allowing the direction of rotation to be determined and providing four counts per tooth for a resolution of 48 counts per wheel rotation.
Each analog sensor signal is fed to a comparator with hysteresis to provide glitch-free digital outputs. Example code for the encoders is provided with the Pololu AVR Library. Feature summary Using the Encoder. Mega 2560 Interrupt and Timer Control. Arduino 101: Timers and Interrupts - Let's Make Robots / Tutorials - RobotShop Community. Arduino101-Timers.zip 93 (33689Bytes)ArduinoTimer101.zip 67 (2802Bytes) Update 07/24/2013 04/24/2013 Example 3 has been updated to work with Arduino v1.x.Added ArduinoTimer101.zip examples source code for Arduino v1.x .
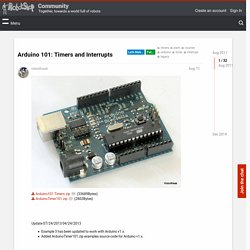
This tutorial shows the use of timers and interrupts for Arduino boards. As Arduino programmer you will have used timers and interrupts without knowledge, bcause all the low level hardware stuff is hidden by the Arduino API. Many Arduino functions uses timers, for example the time functions: delay() 34, millis() 65 and micros() 32 and delayMicroseconds() 12. Using the Hardware Quadrature Encoder Channel on the DUE - Page 4. Its a six month old thread, but I wanted to try digging it back up...
I have the code working in post #32 and post #42 - thank you. Reading the SAM3X manual ( page 891 section 37.6.14.5, it looks like this can be put into a Speed Measurement Mode rather than a Position Measurement Mode, allowing you to grab the speed directly, rather than having to calculate it (e.g. in theory it should give an answer similar to post #42 except more work is offloaded and I suspect no interrupts are required). However, this is not my area of expertise; I've tried to understand the code so far combined with the docs, but have got well and truly lost. Interrupt rate .. and DUE having hardware. Maximum Interrupt Frequency Due. #if defined(ARDUINO) && ARDUINO >= 100 #include "Arduino.h" #else #include "WProgram.h" #endif#include <Wire.h>//#include <Servo.h>#include <digitalWriteFast.h> // library for high performance reads and writes by jrraines // see // and // It turns out that the regular digitalRead() calls are too slow and bring the arduino down when// I use them in the interrupt routines while the motor runs at full speed creating more than// 40000 encoder ticks per second per motor. // Quadrature encoders// Left encoder#define c_LeftEncoderInterrupt 4#define c_LeftEncoderPinA 19#define c_LeftEncoderPinB 25//#define LeftEncoderIsReversedvolatile bool _LeftEncoderBSet;volatile long _LeftEncoderTicks = 0; // Right encoder#define c_RightEncoderInterrupt 5#define c_RightEncoderPinA 18#define c_RightEncoderPinB 24volatile bool _RightEncoderBSet;volatile long _RightEncoderTicks = 0;
HS-785HB Servo. SparkFun Servo Trigger - Continuous Rotation - WIG-13872. SparkFun AutoDriver - Stepper Motor Driver (v13) - BOB-13752. Alternative Servo Lib. XYZ Positioning Using Arduino Uno f. This project is about implementing a short and relatively easy Arduino sketch to provide XYZ inverse kinematic positioning.
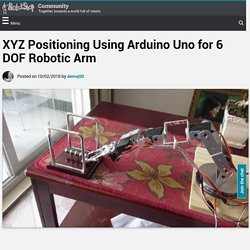
I had built a 6 servo robotic arm but when it came to finding software to run it, there wasn't much out there except for custom programs running on custom servo shields like the SSC-32(U) or other programs and apps that were complicated to install and communicate with the arm. Then I found Oleg Mazurov's most excellent "Robotic Arm Inverse Kinematics on Arduino" where he implemented inverse kinematics in a simple Arduino sketch.
I made two modifications to adapt his code: 1. I used the VarSpeedServo library in place of his custom servo shield library because I could then control the speed of the servos and I wouldn't have to use the servo shield he used. 2. The code works great and allows you to operate the arm by using a single function in which you pass the x,y,x and speed parameters. RobotShop Community. How Do I Interpret DC Motor Specifi. Choosing the right DC Motor (or DC gear motor) for a specific application can be a daunting task and many manufacturers only provide basic motor specifications.
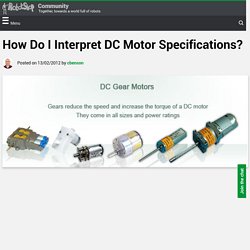
These basic specifications might not be sufficient for your needs. Listed below are ideal motor specifications and whenever possible, ways to approximate values. Below is a list of the most common specifications a DC motor manufacturer might list. For most hobbyists the basic information is enough to make an informed decision about which motor to purchase. How to Make a Drone / UAV – Lesson. How to Make a Drone / UAV - Lesson 1: TerminologyHow to Make a Drone / UAV - Lesson 2: The FrameHow to Make a Drone / UAV - Lesson 3: PropulsionHow to Make a Drone / UAV - Lesson 4: Flight controllerHow to Make a Drone / UAV - Lesson 5: AssemblyHow to Make a Drone / UAV - Lesson 6: Get it all working togetherHow to Make a Drone / UAV - Lesson 7: FPV & Long-rangeHow to Make a Drone / UAV - Lesson 8: Aircraft Now that you have either chosen or built a frame, the next step is to choose the right propulsion system.

A complete propulsion system includes motors, propellers, ESCs and a battery. Almost all small multi-rotor drones / UAVs are electric, with almost none being gas-powered. For this reason, we will focus on implementing an electric propulsion using brushless DC motors. 1. The motors you use will have a huge impact on the payload (or maximum load) which your UAV can support, as well as the flight time. Brushed vs Brushless. Drive Motor Sizing Tool. Drive Motor Sizing Tutorial. Drive Motor Sizing Tutorial. Simple UART communication protocol in XOD – Max Danilin. Greetings, XODers!
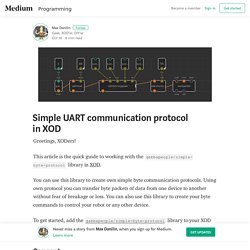
This article is the quick guide to working with the gabbapeople/simple-byte-protocol library in XOD. You can use this library to create own simple byte communication protocols. Using own protocol you can transfer byte packets of data from one device to another without fear of breakage or loss. You can also use this library to create your byte commands to control your robot or any other device. XOD and PID powered self-balancing mBot – XODlang. Hi, everybody!
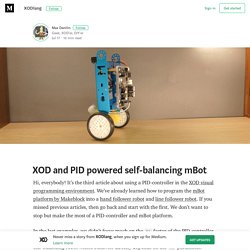
It’s the third article about using a PID-controller in the XOD visual programming environment. We’ve already learned how to program the mBot platform by Makeblock into a hand follower robot and line follower robot. If you missed previous articles, then go back and start with the first. We don’t want to stop but make the most of a PID-controller and mBot platform.
In the last examples, we didn’t focus much on the Ki factor of the PID-controller. As before, we’ve updated the gabbapeople/mbot-lib with the new nodes and patches. XOD. Getting Started with XOD for Arduino. Introduction to XOD Today we will take a look at XOD (pronounced “zod”), a free open-source visual programming environment that allows you to program an Arduino without writing any code.

Using the XOD IDE you manipulate objects called “nodes” in a working area that is called a “patch”. A XOD program can consist of one or more patches. Once your program is done you deploy it to the Arduino just as you would using the Arduino IDE. XOD allows you to rapidly develop Arduino projects without worrying about writing code, perfect for when you have a concept in mind and don’t want to be stuck writing the software.
I recently was contacted by the developers of XOD and was asked if I would be interested in doing a video about the product. Now I’m not saying that XOD is a complete replacement for the Arduino IDE, nor am I suggesting that learning to program in the Arduino’s C++ type language is no longer required. XOD is a tool, just as the Arduino IDE and other development environments are. Getting Moving with XOD – Robot Car Part 1. Introduction Welcome to the second article on our series on XOD, a graphical programming IDE that allows you to rapidly develop software for the Arduino without writing any code. Today we’ll expand upon our XOD skills and learn how to deal with projects that require nodes that don’t exist.
I’ll show you how you can add XOD libraries to your IDE and also how to create your own custom nodes.
Learning. Shops. Extra info. Parts. How to control servo using MPU6050 Gyroscope with Arduino. TT Geared Motor with Encoder (6V 160RPM 120:1 L Shape)-DFRobot. This is the DFRobot TT Micro DC geared motor with encoder. It is a motor with a 120:1 gearbox and an integrated quadrature encoder that provides a resolution of 16 pulse single per round giving a maximum output of 1920 within one round.
With an Arduino controller and motor driver, applications for this include a closed-loop PID control or PWM motor speed control. This motor is an ideal option for mobile robot projects. The copper output shaft, embedded thread and reinforced connector greatly extends the motor's service life. The encoder interface is compatible with DFRobot's Gravity interface. Gear ratio: 120:1 No-load speed @ 6V: 160 rpm No-load speed @ 3V: 60 rpm No-load current @ 6V: 0.17A No-load current @ 3V: 0.14A Max Stall current: 2.8A Max Stall torque: 0.8kgf.cm Rated Torque: 0.2kgf.cm Encoder Operating Voltage: 4.5~7.5V Motor Operating Voltage: 3~7.5V (Rated voltage 6V) Operating Ambient Temperature: -10~+60℃ Weight: 50g.
Micro DC Motor with Encoder-SJ02 SKU: FIT0458 - DFRobot Electronic Product Wiki and Tutorial: Arduino and Robot Wiki-DFRobot.com. Introduction This is the DFRobot Micro DC geared motor with encoder. It is a motor with a 120:1 gearbox and an integrated quadrature encoder that provides a resolution of 16 pulse single per round giving a maximum output of 1920 within one round. Controlling a dc motor via pid and rpm sensor. #include <PID_v1.h> //Define Variables we'll be connecting todouble Setpoint, Input, Output; //Specify the links and initial tuning parametersPID myPID(&Input, &Output, &Setpoint, 2, 5, 1, DIRECT);
Soft Starter code using PWM to control DC Motor. Hey guys, I'm pretty new at programming but I heard an Arduino is a great micro controller to help me get started. I need the proper PWM code to implement a soft starter to control a DC motor. An SCR configuration will be used to drive the motor, but I need to use my Arduino Uno to adjust the duty cycle in order to control the phase angle of the SCR. I have been playing with a general PWM code shown below: #include "SoftPWM.h" Micro DC Motor with Encoder-SJ01 SKU: FIT0450 - DFRobot Electronic Product Wiki and Tutorial: Arduino and Robot Wiki-DFRobot.com. Introduction. Micro DC Motor with Encoder-SJ01 SKU: FIT0450 - DFRobot Electronic Product Wiki and Tutorial: Arduino and Robot Wiki-DFRobot.com. PWM Motor Drive - Mark Gurries. PWM stands for Pulse Width Modulation. Pixy2 Camera – Simple Object Recognition. Introduction. Pixy2 Camera – Simple Object Recognition.
Using Servo Motors with the Arduino. What is a Servo Motor? We have built a few projects that have used motors to make things move and along the way we have looked at some of the different types of motors that we can control with our Arduino and Raspberry Pi projects. Stepper Motors with Arduino. Learn how to control bipolar and unipolar stepper motors with an Arduino using drivers like ULN2003, L298N and A4988. Using Servo Motors with the Arduino. A Drone you Can Program – Introducing PlutoX. Build your own Electronics, IoT, Drones and Robots – Welcome to the Workshop!
What is the difference between DC motor with encoder and DC with out encoder? - Robotics Stack Exchange. As @szczepan mentions, the difference is one of feedback. Programming Remote Control - Robotics with Python Raspberry Pi and GoPiGo p.4. What's The Difference Between DC, Servo & Stepper Motors? Object Follower Robot (with MBot + Pixy): 5 Steps. AdWords We use AdWords to deploy digital advertising on sites supported by AdWords.
Parts & Accessories - Raspberry Pi in Canada. SG5010 TowerPro Torque Coreless Servo 180 Degrees - Raspberry Pi in Canada. Modifying a Servo Motor for Analog Feedback – Alec Lombardo. 322HD Standard Servo. Servo Feedback Hack (free): 8 Steps. Analog Feedback Servo - Elmwood Electronics. Websites for Robotics + Electronics. Arduino Shields for Raspberry Pi B+/2B/3B/3B+ Quality Arduino Robot IOT DIY Electronic Kit. Sunfounder - Starter Kits, Robots DIY Electronic Kits for STEM Education.
Lego. 3 Creative ideas with Arduino. IR Transmitter mbot - mBot - Makeblock Forum. Makeblock projects. How I Hacked The mBot Ranger Kit For Autonomous Driving Capabilities. How to Make a Ball-Picking Car Based on MBot: 14 Steps. Raspberry Pi Servo Motor control. ClearPath - Teknic.