
42 of the Most Useful Raspberry Pi Commands. Sometimes it’s hard to keep track of all the Raspberry Pi commands you use, so I created a list of some of the most useful and important ones that will make using Linux on the Raspberry Pi a lot easier.
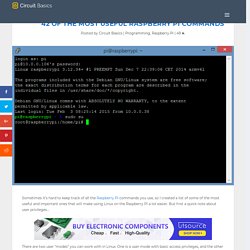
But first a quick note about user privileges… There are two user “modes” you can work with in Linux. How to Access the Raspberry Pi GUI with a Remote Desktop Connection. In the previous post, we learned how to set up a WiFi dongle and access the Raspbian command prompt via an SSH client called PuTTY.

PuTTY is a great application for accessing the command line in Raspbian from another computer, but you can’t use it to access the Raspbian desktop (GUI). In order to access the Raspbian GUI from another computer, we need to configure it to work with a remote desktop application. This will allow us to access our Raspberry Pi desktop (or the command line) from anywhere in the world as long as we have a computer with an internet connection. To do this, we must first install a service on the Raspberry Pi called xrdp. Log into your Raspberry Pi with PuTTY, and enter sudo apt-get install xrdp to install the xrdp service: That is all we need to do on the Raspberry Pi side. Click connect, and you will be connected to the xrdp login screen for the Raspberry Pi: Once you are inside your router’s configuration menu, look for an option for “Port Forwarding”.
How to Write and Run a Shell Script on the Raspberry Pi. In this post I’ll discuss the basics of what a shell script is, what they are commonly used for, and finally, how to write and run a shell script on the Raspberry Pi.
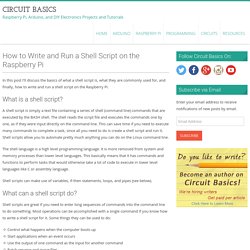
What is a shell script? A shell script is simply a text file containing a series of shell (command line) commands that are executed by the BASH shell. The shell reads the script file and executes the commands one by one, as if they were input directly on the command line. How to Write and Run a C Program on the Raspberry Pi. In this brief tutorial, I’ll discuss what a C program is, what C programming is used for, and finally, how to write and run a C program on the Raspberry Pi.
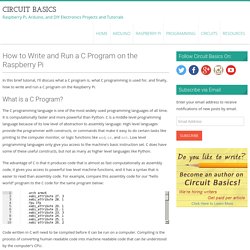
What is a C Program? The C programming language is one of the most widely used programming languages of all time. It is computationally faster and more powerful than Python. C is a middle level programming language because of its low level of abstraction to assembly language. High level languages provide the programmer with constructs, or commands that make it easy to do certain tasks like printing to the computer monitor, or logic functions like and, or, and not. The advantage of C is that it produces code that is almost as fast computationally as assembly code, it gives you access to powerful low level machine functions, and it has a syntax that is easier to read than assembly code.
How to Write and Run a Python Program on the Raspberry Pi. In this post, I’ll give you a quick overview of what a Python program is, what Python programs can be used for, and how to write and run a simple Python program on the Raspberry Pi.
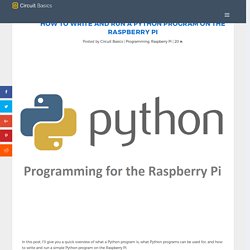
What is a Python Program? Python is a very useful programming language that has an easy to read syntax, and allows programmers to use fewer lines of code than would be possible in languages such as assembly, C, or Java. The Python programming language actually started as a scripting language for Linux. Python programs are similar to shell scripts in that the files contain a series of commands that the computer executes from top to bottom. Compare a “hello world” program written in C to the same program written in Python: Unlike C programs, Python programs don’t need to be compiled before running them. It is possible to run Python programs without the Python interpreter installed though.
What Can a Python Program Do? Web applicationsDesktop applications and utilitiesSpecial GUIsSmall databases2D games . How to Make a Custom PCB - Circuit Basics. Breadboards are great for prototyping circuits, but they aren’t so good for actually using the thing you’re building.
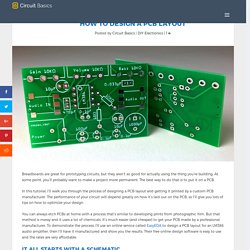
At some point, you’ll probably want to make a project more permanent. The best way to do that is to put it on a PCB. In this tutorial, I’ll walk you through the process of designing a PCB layout and getting it printed by a custom PCB manufacturer. The performance of your circuit will depend greatly on how it’s laid out on the PCB, so I’ll give you lots of tips on how to optimize your design. You can always etch PCBs at home with a process that’s similar to developing prints from photographic film. Basics of the I2C Communication Protocol. So far, we’ve talked about the basics of SPI communication and UART communication, so now let’s go into the final protocol of this series, the Inter-Integrated Circuit, or I2C.
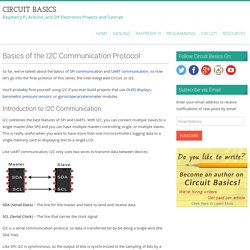
You’ll probably find yourself using I2C if you ever build projects that use OLED displays, barometric pressure sensors, or gyroscope/accelerometer modules. Introduction to I2C Communication I2C combines the best features of SPI and UARTs. Basics of UART Communication. Remember when printers, mice, and modems had thick cables with those huge clunky connectors?
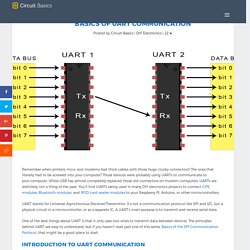
The ones that literally had to be screwed into your computer? Those devices were probably using UARTs to communicate to your computer. While USB has almost completely replaced those old connectors on modern computers, UARTs are definitely not a thing of the past. You’ll find UARTs being used in many DIY electronics projects to connect GPS modules, Bluetooth modules, and RFID card reader modules to your Raspberry Pi, Arduino, or other microcontrollers. UART stands for Universal Asynchronous Receiver/Transmitter. One of the best things about UART is that it only uses two wires to transmit data between devices.
Basics of the SPI Communication Protocol. When you connect a microcontroller to a sensor, display, or other module, do you ever think about how the two devices talk to each other?
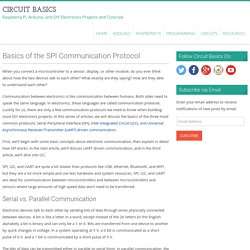
What exactly are they saying? How are they able to understand each other? Communication between electronics is like communication between humans. Both sides need to speak the same language. In electronics, these languages are called communication protocols. First, we’ll begin with some basic concepts about electronic communication, then explain in detail how SPI works.