
Il Fabrique un Miroir Connecté avec Contrôle Vocal sous Raspberry Pi (Video) Inspiré par le travail de Michael Teeuw et Hannah Mitt, Evan Cohen vient de réaliser Smart Mirror, un miroir connecté sous Raspberry Pi.
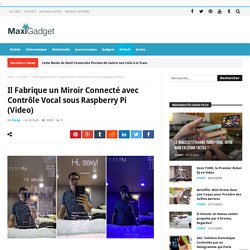
Ce modèle intelligent est entièrement contrôlé par commande vocale. Il peut donner la météo, des informations, la localisation, mais surtout allumer ou éteindre la lumière de la chambre avec ajustement de la couleur. Regardez la démonstration vidéo, c’est plutôt convaincant. Si vous souhaitez en savoir plus sur la conception du Smart Mirror , direction le site GitHub. source Requetes sur le meme sujet: Light, Fan, and Dimmer Control With ESP8266 and Cayenne. The previous owner of my house installed remote controlled ceiling lights in all the bedrooms.
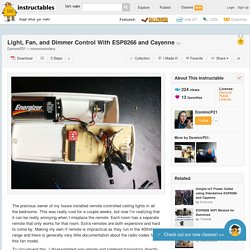
This was really cool for a couple weeks, but now I’m realizing that it can be really annoying when I misplace the remote. Each room has a separate remote that only works for that room. Extra remotes are both expensive and hard to come by. Making my own rf remote is impractical as they run in the 400mhz range and there is generally very little documentation about the radio codes for this fan model. Arduino Nano: HMC5883 Compass With Visuino. HMC5883L are popular Compass sensors.
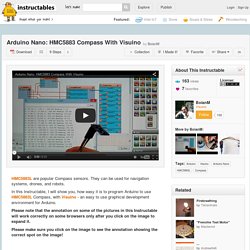
They can be used for navigation systems, drones, and robots. In this Instructable, I will show you, how easy it is to program Arduino to use HMC5883L Compass, with Visuino - an easy to use graphical development environment for Arduino. Please note that the annotation on some of the pictures in this Instructable will work correctly on some browsers only after you click on the image to expand it. Please make sure you click on the image to see the annotation showing the correct spot on the image! Relayr for Developers. We support a variety of platforms for creating your IoT project.
Whether you create your own hardware and connect it to the relayr cloud, or make use of our own connected out of the box sensors, relayr is the simplest way to realize your IoT dreams. You can start programming in: Why WunderBar? Get Started Immediately There’s never been a faster way to enter into the world of the Internet of Things.
HomeKit and Particle Photon - Particle Projects. Introduction After viewing this great example by Nikita Leonov, I decided to work on HomeKit and Particle Photon.
I decided to simulate Temperature, Humidity and Luminosity sensor and one Light. Send Arduino data to Iphone -HID - Magic MonitorX. Pebble/pebblejs. Processing Pebble Accelerometer Data - Strap. Our data science intern, Heng Li, obliged our begging and wrote a blog post about what he’s been working on for us this winter.
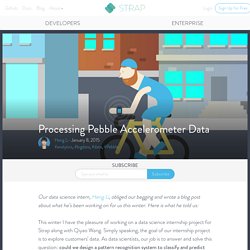
Here is what he told us: This winter I have the pleasure of working on a data science internship project for Strap along with Qiyao Wang. Simply speaking, the goal of our internship project is to explore customers’ data. As data scientists, our job is to answer and solve this question: could we design a pattern recognition system to classify and predict customer’s movements into different activity groups, such as running, walking, sitting and so forth, to further refine the way we can classify Strap’s data?
The first thing we did was extract and clean the messy data from our platform database. Caco3/pebble-simplef. Cktben's Gists. Streaming Pebble Accelerometer Data. Updates– 30/3/14 – Added links to source code It’s been a long term aim of mine to try and speed up AppMessage as fast as I can, in order to transfer more than mere signal messages between the phone and the watch.
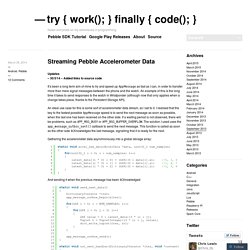
An example of this is the long time it takes to send responses to the watch in Wristponder (although now that only applies when a change takes place, thanks to the Persistent Storage API). An ideal use case for this is some sort of accelerometer data stream, so I set to it. I realised that the key to the fastest possible AppMessage speed is to send the next message as soon as possible, when the last one has been received on the other side. If a waiting period is not observed, there will be problems, such as APP_MSG_BUSY or APP_BSG_BUFFER_OVERFLOW. Support - ThingSpeak. Reacts allow you to trigger a ThingHTTP request or send a tweet using ThingTweet when your ThingSpeak Channel meets a certain condition.
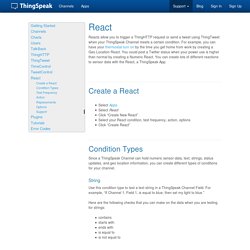
For example, you can have your thermostat turn on by the time you get home from work by creating a Geo Location React. You could post a Twitter status when your power use is higher than normal by creating a Numeric React. You can create lots of different reactions to sensor data with the React, a ThingSpeak App. Sans titre. I don't subscribe to cable and get most of my video content from Netflix, Hulu and YouTube which is consumed through an Apple TV or Chromecast.
This means I can mostly control my TV from my phone, which is always by my side. Unfortunately, changing the input, volume or powering on my TV means I have to use the provided remote. This is a massive pain because I'm constantly losing the device. I end up tearing my living room apart to often find it left in the bathroom or some other random location. After the umpteenth time I decided I was going to do something about it. Materials Spark Core IR Led Kit Breadboard and various hookup wires iOS device Basic Television (mine is an Insignia) How it works. Qwertzguy/Spark-Core-IRremote. Spark Core Read-a-Tweet (spark.io) You can obviously skip this step if you've already set up your Spark Core.
If you haven't set it up yet, here's how to do it! First off put your Spark Core on the breadboard (see image). Then plug the USB cable into your Core and computer. The Core should start blinking blue. Projects - Page 4 - Spark Projects. Example: Logging and graphing data from your Spark Core using Google - Project Share - Spark.
Like many other people, one of the more fun things to get your :spark: Core to do is interact with the real-world with sensors. The beauty of the Core, perhaps over the arduino, is the ability to access this sensor-read data from anywhere without the need for additional Shields / punching holes in NAT-routers etc etc. Spark Wake-on-LAN - Spark Projects. Every now and then I need to have my machine wake up while I'm away from home, either to quickly remote desktop into it, or to access my Plex library on the go. Unfortunately, quite a few routers block magic packets coming from the WAN altogether, without giving a possibility to disable that behavior, thus effectivelly rendering useless all of the existing Wake-on-LAN mobile apps.
I decided this would be a great opportunity for a small first IoT project, where the goal would be to expose a web hook to a mobile application which would then cause the micro-controller to send the magic packets to a given machine from inside the home network. For the specific needs of this project I wanted a very simple yet easy to program platform, and I found that in the spark.io Core micro-controller.
Pebble-hacks/pebble-spark-servo. Linking Pebble and Spark Core. Note: This post assumes basic knowledge of Pebble AppMessage, PebbleKit JS, jQuery $.ajax(), Spark.function() and similar API calls. Also, the JS code may only work on Android devices. Introduction A major appeal of the Pebble smartwatch is its potential both as a data display and a data input device. The addition of PebbleKit JS in SDK 2.0 allows a watchapp to connect to the internet and download data.
Through the use of jQuery data can be requested, and with the EventSource object data can be listened for asynchronously. C-D-Lewis/pebble-tinker. PushingBox-for-Spark-Core/PushingBox-for-Spark.ino at master · Clement87/PushingBox-for-Spark-Core. LIRC - Serial Port Receivers. The following page will show you how to build your own infrared receiver for the serial port. Please note that the serial port driver in the LIRC package only supports 8250 compatible UARTs (this includes the most common 16450 and 16550A types). That means that it won't work with exotic multi-port cards that need a special driver. From my own experience, the hardest thing in building your receiver hardware is getting a suitable infrared receiver IC. Hence, here is a list of ICs that have been successfully used to build a serial port receiver. But be aware that not all of them have the same pin-out! Vishay TSOP 1738 (available in the US at Newark Electronics) Vishay TSOP 1838 Vishay TSOP 11.. series Siemens SFH 506 (not produced any more) Siemens SFH 5110 (successor of SFH 506) discontinued: Radio Shack 276-0137 (other Radio Shack part numbers) Radio Shack 276-640 Warning: There have been reports that the signal quality these receivers produce is very unstable.
Spark/core. SIS-2.pdf. Eflynch/sparkcoreiremitter. Spark-core Smart Air Conditioner - Hackster.io. IR Control Kit Hookup Guide. Favorited Favorite 0 After you’ve gotten the remote and receiver working, it’s time to add some IR transmission to the setup. For this example, we’ll set up an infrared data relay using both the receiver and an IR LED to transmit data. IR codes received by the Arduino can be sent out the LED by the press of a button. Setting Up the Hardware On the hardware level, using the IRremote library, there’s only one pin we can use to transmit IR data: pin 3. We’ll also be adding a button to this circuit. Adding Code Once you’ve got the hardware all wired up, copy and paste the code below. To use the sketch, you’ll still need an IR remote.