
Untitled. DIY Quiet Book With A Free Pattern. Anyone with little ones can relate to the struggle to keep toddler hands busy and out of trouble in situations where they need to keep their energy contained!

It’s so easy nowadays to turn to technology in such moments, but I always welcome any screen-free helps, and today’s project is just what curious little minds and fingers need! Hi, I’m Abby of Sew Much Ado and today I’m sharing a Quiet Book Tutorial, with free pattern templates that you can download and print at home.
This quiet book has six different activity pages, including a family photo page, unicorn braid page, shoe tying page, apple tree page, closures page, and a shapes page. The instructions below are divided up into each page – let’s get to work! Click HERE to download quiet book templates. Before You Begin: • Use wool felt whenever possible. Title Page 1. 2. 3. 4. 5. 6. Page 1 – Family Photo Supplies: • 9×9” felt for page • Felt pieces cut from templates • 4 1/4×6 1/4” clear vinyl • Tissue paper • Wonder Tape 1. 2. 3. 4.
Patchwork-cube-tutorial. I was wandering in a shop in XinTianDi one day and saw the cutest stuffed patchwork cube.
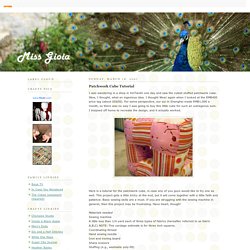
Wow, I thought, what an ingenious idea. I thought Wow! Again when I looked at the RMB400 price tag (about US$50). For some perspective, our ayi in Shanghai made RMB1,000 a month, so there was no way I was going to buy this little cube for such an outrageous sum. I traipsed off home to recreate the design, and it actually worked. Here is a tutorial for the patchwork cube, in case any of you guys would like to try one as well.
Materials neededSewing machineA little less than 1/4 yard each of three types of fabrics (hereafter referred to as fabric A,B,C) NOTE: This yardage estimate is for three inch squares.Coordinating threadHand sewing needleIron and ironing boardSharp scissorsStuffing (e.g., washable poly-fill) Step 1: Preparation Begin by cutting out 24 squares each of fabric A,B and C for a total of 72 squares. Of course, you can do whatever you like. Step 2: Foundation Blocks. 3 Hour Baby Rag Quilt. Need a last second baby shower gift?
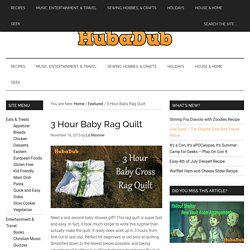
This rag quilt is super fast and easy. In fact, it took much longer to write this tutorial than actually make the quilt. It really does work up in 3 hours from first cut to last clip. Perfect for beginners or old pros at quilting. Simplified down to the fewest pieces possible, and taking advantage of traditional quilting technique to enhance the look of larger pieces, this 3 hour rag quilt pattern makes a crib size quilt and is sure to be a welcome gift. Non-Fabric Supplies Basic sewing machineScissorsRag Quilt Scissors (optional but very helpful) Sewing machine thread (white is fine or you can use a contrasting thread of your choice) Pins and/or clipsRotary CutterStraight Edge (I use a metal TSquare I removed the bar from because it is heavier than craft products and doesn’t slip.)Cutting MatIron Fabric Supplies Contrasting Cotton Fabric (Yardage depends on the width of your fabric.) 1 Piece 9″ x 9″ 3 Pieces 9″ x 16″ 1 Piece 9″ x 32″ Vintage Shabby Chic Style Cross Rag Quilt Tutorial.
Rag quilts remind me of vintage bedspreads that had exposed seams.
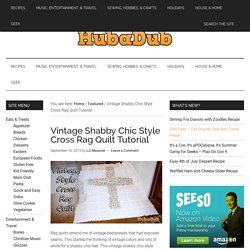
This started me thinking of vintage colors and lots of white for a shabby chic feel. This vintage shabby chic style cross rag quilt was originally made for an elderly church member who had to move into a nursing home. DIY BABY SHOES IDEAS. Hey moms, I have wonderful collection of DIY BABY SHOES IDEAS for you today!

I hope this article will be useful and will help you and inspire you to craft something for your little baby! Even if your child ins’t born yet, you should be prepared and you should put a pair of shoes in your closet. And yeah, I think that there isn’t anything more cuter than baby’s little feet. Yesterday I tried to DIY some of these wonderful baby shoes and it was really fun. Erickson and Co.: {Tutorial} How to Sew Newborn Inserts for Cloth Diapers. This tutorial is designed so that you can sew your own newborn inserts for cloth diapers spending the least amount of money possible.
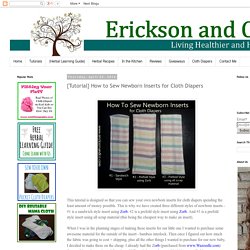
This is why we have created three different styles of newborn inserts - #1 is a sandwich style insert using Zorb. #2 is a prefold style insert using Zorb. And #3 is a prefold style insert using all scrap material (this being the cheapest way to make an insert). When I was in the planning stages of making these inserts for our little one I wanted to purchase some awesome material for the outside of the insert - bamboo interlock.
Then once I figured out how much the fabric was going to cost + shipping, plus all the other things I wanted to purchase for our new baby, I decided to make these on the cheap. I already had the Zorb (purchased from www.Wazoodle.com) from making other projects. This tutorial is going to be a tad different from ones that I have posted in the past. I have included some pictures that match up with the steps in my notes. <br /> <b>Deprecated</b>: Function ereg_replace() is deprecated in <b>/home/celticcl/public_html/enc/metatitle.php</b> on line <b>6</b><br /> All in One Diaper Pattern.
Make your own diapers and save!
This pattern is quick and easy. Developed to be used by novice sewers and experts alike. Plain language directions and simple step by step layout. Bear: Tutorial and Pattern. NykiBaby Online Shop.