
Joining Granny Squares. When I join my Granny Squares together I always choose to crochet them rather than stitch them.
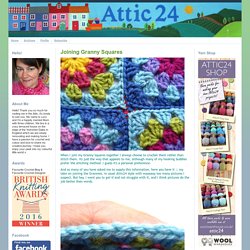
Its just the way that appeals to me, although many of my hooking buddies prefer the stitching method. I guess it's a personal preference. And as many of you have asked me to supply this information, here you have it :: my take on joining the Grannies, in usual Attic24 style with waaaaay too many pictures I suspect. But hey, I want you to get it and not struggle with it, and I think pictures do the job better than words. Ok, firstly put your two squares together, Right Sides together. So your hook goes through the outside loop of the square nearest to you.... ...then through the outside loop of the square farthest away. Start at the right hand corner, you are working right to left.
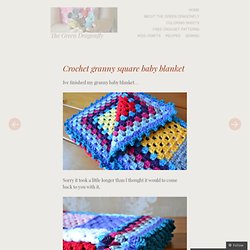
Put hook through OUTSIDE LOOPS of the corner stitches, and hook your yarn through both loops. (Note :: I am using a contrasting red yarn here to join so you can see it easily, but best to use a matching colour. Granny Square Pattern/Join-as-you-go Method. Ive finished my granny baby blanket…
Crochet techniques. Bonita Hat pattern by Rebecca Averill. Crochet Abbreviations Chart. Crochet Stitch Chart Symbols. Crochet-Symbols-Chart1.pdf. Finish work and how to Weave in Ends. It's Friday, it's Friday!
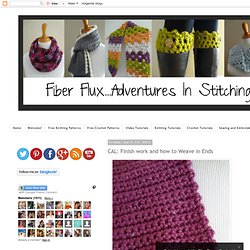
Time to get back to our CAL, I hope you are having as much fun as I am. We have reached the last day of crocheting our cowls together...my how time flies. Next week I will be creating a gallery post on Friday to share with you all of the beautiful photos that have been coming in...so pretty! Please be sure to send us a photo of yours too when you are finished if you haven't already: Today we'll be sharing some ideas on finishing your piece. If you desire, you can block your project. Here's a little tip too...no need for expensive blocking mats, click here and use these instead.Now it's time to seam the cowl and weave in in the ends.
Now run the needle through a few of the stitches along the bottom edge. Next, run the needle back the other way through the stitches...and pull the needle all the way through. Magic Ring. I've been making a lot of circular motifs, and finding the sliding ring/magic loop technique has become my favourite method to start in the round.
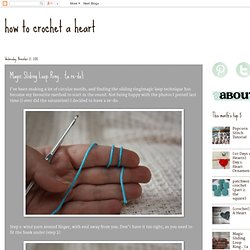
Not being happy with the photos I posted last time (I over did the saturation) I decided to have a re-do. Step 1: wind yarn around finger, with end away from you. Don't have it too tight, as you need to fit the hook under (step 2) Step 3: bring yarn through both loops Step 4: remove from finger Step 5: chain (I'm using US dc, so 3 chains. Step 6: complete 1st row (my pattern is for 23dc + 3ch for 24 stitches) Crochet Tutorial Series: Magic Circle, Color Change & Invisible Join. Reading Crochet: How to Count Chains and Stitches and Where to Put Your Hook. Crochet School Lesson 21: Reading Crochet Charts. Remember in the last lesson where I said that the simpler the pattern the better?

Well how's this for simple? (hover your mouse over to see the difference between the square and the chart overlay) Links To Learn Crochet Stitches Techniques Step By Step With Photos Or Diagrams. Crocheting For Dummies Cheat Sheet. Cheat Sheet You’re never too old or too young to discover crochet.
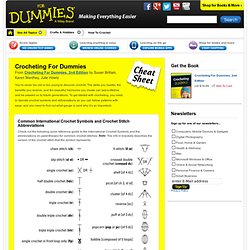
The skills you master, the benefits you receive, and the beautiful heirlooms you create can last a lifetime and be passed on to future generations. Standing Double Crochet - Joining Without the Slip Stitch and Chain! The Standing Double Crochet stitch is one I came to late – and I wish I’d known about it years earlier!
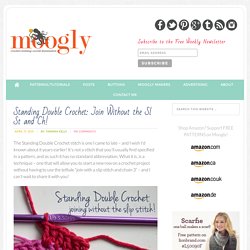
It’s not a stitch that you’ll usually find specified in a pattern, and as such it has no standard abbreviation. Free Crochet Pattern: Knock Around Hat - Crochet Zone. It seems everywhere I look these days someone is doing a “knit look” crochet pattern.
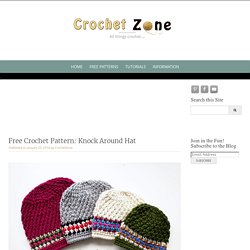
I do knit, but crochet is so much faster and so these patterns are very welcome indeed! Most of the stitching looks like the traditional garter and stockinette stitches which are lovely, but I wanted to try my hand at something that looked a little more textured. The Knock Around Hat is a basic beanie sized from newborn to adult, that has a texture similar to a knitted embossed or moss stitch and the band is reminiscent of fair isle. I hope you enjoy making it and will share your finished pictures on my Facebook page. This post contains affiliate links Knock Around Hat!
Size: 3 Month to Adult Materials: • Light Worsted Weight yarn • Main color (Color 1): 80 – 150 yards • 3 Contrast colors (Color 1; 2; 3): small amount of each • Hook: I/5.50 mm; J/6.00 mm • Yarn needle for weaving ends. Crocheted Puffy Slouchy Hat Pattern. Understanding Instructions. Learning about crochet is like immersing yourself in a foreign culture where another language is spoken and written, and where there are unfamiliar rules and customs.
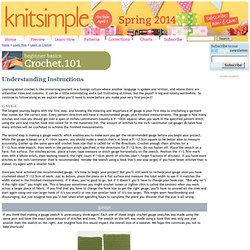
It can be a little intimidating and a tad frustrating at times, but the payoff is big and totally worthwhile.