
KY039 Arduino Heart rate code - Page 2. How to make Mini CNC plotter machine at home using Arduino, L293d Motor shield & old DVD drive. Creating G-Code from Images and Letters in Inkscape. Arduino CNC Shield – 100% GRBL Compatable. Do it yourself CNC projects are popping up everywhere and we decided that we wanted to contribute to the growth.
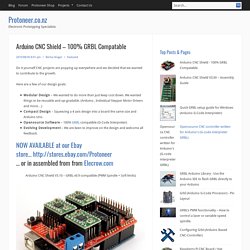
Here are a few of our design goals: Modular Design – We wanted to do more than just keep cost down. We wanted things to be reusable and up-gradable. (Arduino , Individual Stepper Motor Drivers and more…)Compact Design – Squeezing a 4 axis design into a board the same size and Arduino Uno.Opensource Software – 100% GRBL compatible (G-Code Interpreter)Evolving Development – We are keen to improve on the design and welcome all feedback. A4988 Stepper Motor Driver Carrier. Overview This product is a carrier board or breakout board for Allegro’s A4988 DMOS Microstepping Driver with Translator and Overcurrent Protection; we therefore recommend careful reading of the A4988 datasheet (1MB pdf) before using this product.
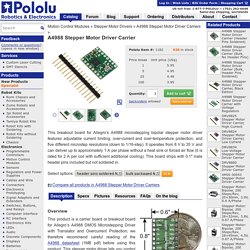
This stepper motor driver lets you control one bipolar stepper motor at up to 2 A output current per coil (see the Power Dissipation Considerations section below for more information). Here are some of the driver’s key features: This product ships with all surface-mount components—including the A4988 driver IC—installed as shown in the product picture. This product ships individually packaged with 0.1″ male header pins included but not soldered in; we also carry a version with male header pins already soldered in.
GRBL Arduino Uno et CNC Shield. GRBL Arduino Uno et CNC Shield Heuh....
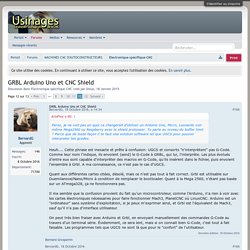
Cette phrase est inexacte et prête à confusion: UGCS et consorts "n'interprètent" pas G-Code. Comme leur nom l'indique, ils envoient (send) le G-Code à GRBL, qui lui, l'interprète. Les plus évolués d'entre eux sont capable d'interpréter des macros en G-Code, qu'ils insèrent dans le fichier, puis envoient l'ensemble à Grbl. Inkscape CNC (G-Code) tutorial. Grbl Controller Main Screen Options. Port name This drop down will be populated by candidate serial ports.
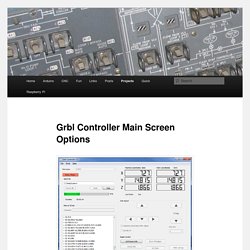
Only certain ports are actual serial ports connected to Grbl/Arduino. The easiest way to tell is to look at the list before you plug in your USB connector (presuming you are using USB serial), close Grbl Controller, plug in the USB connector, open Grbl Controller and look at the list again. The item that is new is the desired COM port. Open – Close/Reset Open or close the COM port. Closing the COM port has the effect of stopping the last operation on the Grbl. On some Linux systems, Grbl Controller needs to be started with sudo to get permission to open the COM port. Choose File Brings up a file chooser dialog to pick your file to send to Grbl. Begin Will start sending file as soon as pressed. Stop The file being sent will be stopped mid-stream. If you have enabled aggressive preload in the options, pressing Stop may result in a longer wait for the stopped state due to commands already queued in Grbl. Working on version 1 grbl · vlachoudis/bCNC@f709c14. Piloter une CNC avec Arduino et GRBL.
Dans ce tutoriel, je vais vous expliquer comment piloter très simplement une CNC avec Arduino et GRBL.
Nous verrons comment : Installer GRBLInstaller Universal GCodeSenderPiloter des moteurs pas à pasL’utilité d’un shield CNC. Configuring Grbl v0.9 · grbl/grbl Wiki. Grbl v1.1 has been released at our new site!
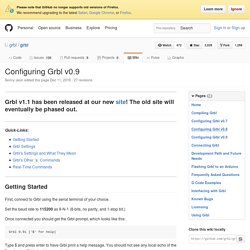
The old site will eventually be phased out. Shield CNC A4988 - GRBL. Mini CNC machine Arduino Based & Adafruit Driver Motor L293D v1 & 2*Mini Stepper CD/DVD player #1 - All. A4988 Arduino CNC shield - ElectroDragon. Arduino CNC Shield PCB 100uF 50v 8mm High Capacitors (493-3289-ND) Jumpers (A26228-ND) 8-Pin Female Headers(S7006-ND) Male Headers(A26514-40-ND) Tactile Switch (450-1650-ND) Screw Terminal 5mm (A97996-ND) Pololu Stepper Drivers .
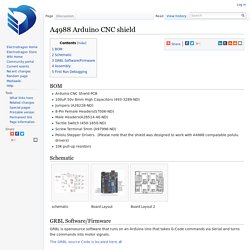
(Please note that the shield was designed to work with A4988 compatable polulu drivers) 10K pull-up resistors Schematic GRBL Software/Firmware GRBL is opensource software that runs on an Arduino Uno that takes G-Code commands via Serial and turns the commands into motor signals. The GRBL source Code is located here.
Assembly For the M0-M2 configuration, set is low when no jumper connected and high when jumper connected, check on A4988 board configuration for this. First Run Debugging. CNC avec Arduino et GRBL. Je vous propose de vous donner quelques tuyaux pour la réalisation d'une CNC avec Arduino et GRBL.
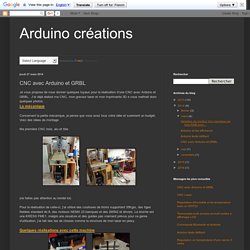
J'ai déjà réalisé ma CNC, mon graveur laser et mon imprimante 3D e vous mettrait donc quelques photos. La mécanique Concernant la partie mécanique, je pense que vous avez tous votre idée et surement un budget. GRBL. "Grbl is a free, open source, high performance CNC milling controller written in optimized C that will run on a straight Arduino.
" Dank GRBL Get this one by downloading the zip file and extracting its contents into a folder of your choosing File:Grblzipold.zip COrrupted. RepRap France: Mini Graveuse Laser DIY PART 1. Bonjour,Ayant vu passé des posts et news concernant des mini machine laser a base de lecteur Cd-rom , me voila a la recherche du Graal .Tout se procurer en séparé demande un minimum de 4 commandes ... alors voila pourquoi je propose ce kit sur La créathèque a 119€ TTC.
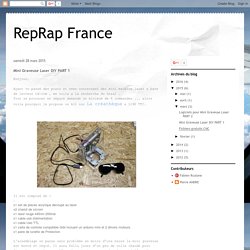
Il est composé de :: x1 set de pièces acrylique découpé au laser x2 chariot de cd-rom x1 laser rouge 445nm 200mw x1 cable usb d'alimentation x1 cable Usb TTL x1 carte de controle compatible Grbl incluant un arduino mini et 2 drivers moteurs. x1 paire de lunette de Protection L'assemblage se passe sans problème en moins d'une heure la mini graveuse est monté et réglé. Il aura fallu jouer d'un peu de colle chaude pour fixer le porte laser a l'axe X , ainsi que pour le plateau à l'axe Y . Aucune soudure n'est nécessaire . Apres le montage on installe le package des Drivers USB pour le Dongle Usb TTL Prolific et le logiciel de Gravure "Mini Larser" qui est en fait une copie de Fire Lite. Basic setup ArduinoUNO + CNC SHIELD + GRBL + 3 X DVD Drive steppers. Mini CNC machine Arduino basé et Adafruit pilote moteur L293D v1 & 2 * Mini Stepper CD/lecteur DVD #1 / Étape 1: La vidéo dans youtube : - tubefr.com. CNC mini traceur - Arduino basé Dans ce projet, je vais vous montrer comment construire facilement vos propres Arduino Mini CNC Plotter de faible coût !
Pour les axes X et Y, nous allons utiliser pas à pas moteurs et rails de deux dvd/cd rom ! Zone d'impression sera max 4x4cm.Parce. Un graveur laser à commande numérique à base de Raspberry Pi - Framboise 314, le Raspberry Pi à la sauce française.... J’ai contacté Daniel pour obtenir son accord afin de traduire son article. Il m’a répondu très rapidement que cela ne posait aucun problème : « Hi François, Sure!
I definitely love to see the project translated to French and have more people get interested in it. Please go ahead and translate it, and fell free to let me know if you have any question. Thanks.Best,Daniel« Comme il est intéressé par cette traduction, je vous propose de découvrir son projet qui est vraiment très intéressant. N’hésitez pas à vous rendre sur cette page qui donne tous les détails de la construction. Recycler 2 lecteurs DVD en Mini Traceur (CNC Plotter) Arduino - Projets DIY. Mini Traceur CNC Arduino Traduction de la configuration du traceur en français et ajout d'une variable "vitesseDeplacement" permettant d'ajuster la vitesse de déplacement des axes X et Y Projets DIY - 02/2016 D'après Mini CNC Plotter firmware, based in TinyCNC Send GCODE to this Sketch using gctrl.pde Convert SVG to GCODE with MakerBot Unicorn plugin for Inkscape available here.
Utilisation d’un moteur pas à pas avec l’Arduino. Accueil > Arduino, Matériel > Utilisation d’un moteur pas à pas avec l’Arduino Je viens de récupérer un moteur pas à pas venant d’un lecteur de disquette. Celui-ci possède 4 broches, j’en déduis donc que c’est un moteur bipolaire; les moteurs bipolaires sont constitués de 2 bobines distinctes. Pour déterminer le brochage, il suffit d’utiliser un Multimètre en position ohmmètre; s’il la résistance est faible entre 2 fils, cela correspond à la même bobine. Voici une photo du moteur en question; j’y ai soudé un petit connecteur équipé de 4 fils : Arduino CNC Shield Instruction. First Run To make sure all parts function as they should, we need to go through a pre-flight checklist.
The most important things: Double check the power input polarity (“+” and “-“)The orientation of stepper drivers. Please note the pot on A4988 and DRV8825 are at the opposite side. To start: Arduino-CNC-Shield-V3-Layout. CNC Shield V3 Expansion Board + 4pcs A4988 Stepper Motor Driver for 3D Printer.