
Moss Graffiti « The Bored Ninja - Fun, Interesting, and Cool Stuff on the Internet. How to Trick Out a Dungeon-Like Dorm Room. - StumbleUpon. {Valentines day} pixel-y popup card. I‘ve been scratching my head trying to come up with a card for my hubby {AKA the non-romantic type}.
I finally decided to make this pixely popup heart card! They are really minimal (which I love) and take about 20 minutes to make (that includes the card, insert and envelope). You can even make some pixely confetti to put inside the card (if you are a big kid like me!). Full instructions and printable templates below! (BTW I remember seeing something similar in a popup book years ago. How to 1. (If you have a cutting machine then see note at end of post!) Cut along the black lines and score the grey lines. 3. 5. 7. Edited to add: The lovely Kayla from saynotsweetanne has send me a .dfx file of the card which you can use if you have a cutting machine.
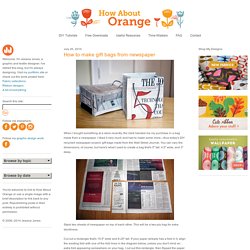
How to make gift bags from newspaper. When I bought something at a store recently, the clerk handed me my purchase in a bag made from a newspaper.

I liked it very much and had to make some more—thus today's DIY recycled newspaper project: gift bags made from the Wall Street Journal. You can vary the dimensions, of course, but here's what I used to create a bag that's 5" tall, 4.5" wide, and 3" deep. Stack two sheets of newspaper on top of each other. This will be a two-ply bag for extra sturdiness. Cut out a rectangle that's 15.5" wide and 8.25" tall. Fold a flap 1.25" down from the top. Cut two pieces of cardstock or chipboard to 4.25" x 1", then glue them on the widest two panels just under the top fold. Put glue on the outside of the 0.5" tab and bring the left-most panel over to form the body of the bag, aligning the cut edge of the panel with the folded edge of the flap.
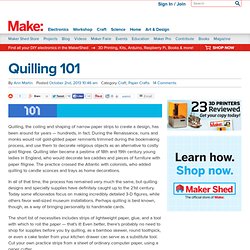
Upend the bag so the 2" flap is now up. Put glue on both flaps and fold them inward to form the bottom of the bag. Craft DIY Projects, Patterns, How-tos, Fashion, Recipes @ Craftzine.com - Felting, Sewing, Knitting, Crocheting, Home & More. Quilling, the coiling and shaping of narrow paper strips to create a design, has been around for years — hundreds, in fact.

During the Renaissance, nuns and monks would roll gold-gilded paper remnants trimmed during the bookmaking process, and use them to decorate religious objects as an alternative to costly gold filigree. Quilling later became a pastime of 18th and 19th century young ladies in England, who would decorate tea caddies and pieces of furniture with paper filigree. The practice crossed the Atlantic with colonists, who added quilling to candle sconces and trays as home decorations.
In all of that time, the process has remained very much the same, but quilling designs and specialty supplies have definitely caught up to the 21st century. Today some aficionados focus on making incredibly detailed 3-D figures, while others favor wall-sized museum installations. Many arts and crafts stores sell basic tools and packages of multicolor paper strips.
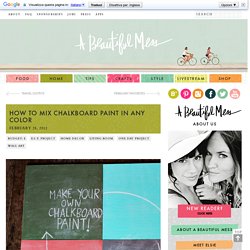
Materials Directions Ann Martin. How To Mix Chalkboard Paint in Any Color. We love using chalkboards as backdrops for displays and parties (like this one here!).

So we were super excited to learn that you can create your own custom colors-and it's really easy! We first learned how from Martha Stewart whose tutorial you can read here. She recommends that you use latex paint, but we tried it out with acrylic paints with much success. Here's how you too can create your own chalkboard paint... Supplies: 1/2 cup acrylic paint (choose any color you like, or mix colors together to make the perfect shade!) 1. 2. Once your chalkboard has fully dried be sure to slate the surface before using it for the first time. Print Hula Hoop Rug Page.
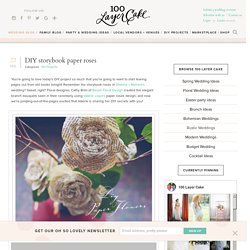
100 Layer Cake - StumbleUpon. DIY storybook paper roses You’re going to love today’s DIY project so much that you’re going to want to start tearing pages out from old books tonight!

Remember the storybook roses in Shanna + Richard’s wedding? Sweet, right? Floral designer, Cathy Brim of Bloom Floral Design created the elegant branch bouquets seen in their ceremony using Valerie Lloyd’s paper roses design, and now we’re jumping-out-of-the-pages excited that Valerie is sharing her DIY secrets with you! <img class="alignnone size-full wp-image-17711" title="diy-paper-flowers-1" src="<a pearltreesdevid="PTD650" rel="nofollow" href=" class="vglnk"><span pearltreesdevid="PTD651">http</span><span pearltreesdevid="PTD653">://</span><span pearltreesdevid="PTD655">www</span><span pearltreesdevid="PTD657">.
Craft Supplies:Paper Grosgrain Ribbon, ½ Width cut to 4 inch lengths 16 Gauge Wire cut to 15 inch lengths Glue Gun Glue Sticks (low temp) Scissors Wire Cutters Step 1: Gather materials. Step 2: Cutting. Step 3: Shaping.