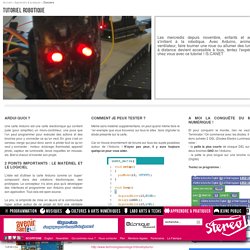

Tutoriel Robotique. Ardui quoi ?

Une carte Arduino est une carte électronique qui contient juste (pour simplifier) un micro-contrôleur, une puce que l’on peut programmer pour exécuter des actions et des broches pour y connecter ce qu’on veut. En gros c’est un cerveau vierge qui peut donc servir à piloter tout ce qu’on veut y connecter : moteur, éclairage, thermostat, appareil photo, capteur de luminosité, lance roquettes en mousse, etc. Bref à chacun d’inventer son projet. 2 points importants : le matériel ET le logiciel L'idée est d'utiliser la carte Arduino comme un ‘super’ composant dans des créations électroniques, des prototypes.
Le prix, la simplicité de mise en œuvre et la communauté hyper active autour de ce projet en font une véritable réussite mondiale. Au départ ce système était destiné principalement, mais pas exclusivement, à la programmation multimédia interactive en vue de spectacle ou d'animations artistiques. Pour débuter La liste est simple - un ordinateur - un câble USB - un accès Internet Stop! G-code. This page tries to describe the flavour of G-codes that the RepRap firmwares use and how they work. The main target is additive fabrication using FFF/FDM processes. Codes for print head movements follow the NIST RS274NGC G-code standard, so RepRap firmwares are quite usable for CNC milling and similar applications, too.
There are a few different ways to prepare GCode for a printer. One is to use a slicer like Skeinforge or Cura. These programs take a CAD model, slice it into layers, and output the GCode required for each layer. As many different firmwares exist and their developers tend to implement new features without discussing strategies or looking what others did before them, a lot of different sub-flavours for the 3D-Printer specific codes developed over the years. Introduction A typical piece of GCode as sent to a RepRap machine might look like this: The meaning of all those symbols and numbers (and more) is explained below. Here means: yes Fully supported. experimental. The Robotics Institute. Robot Voice Generator Circuit Schematic Circuit Diagram. Those of you who imagine that a robot voice generator box would require a whole heap of ICs are mistaken; the ISD2500 ChipCorder family of ICs from Winbond contains almost all the necessary hardware in a single IC to record and playback audio messages.

Included on the IC is a microphone preamp and AGC suitable for a low-cost electret type microphone, an output amplifier to drive a loudspeaker, memory, an oscillator, an A/D and a D/A converter. There are four basic models; 2560, 2575, 2590 and 25120, the numbers following 25 indicate the available recording time in seconds. The memory capacity of each version is actually the same but longer recording times are achieved by using a lower sampling rate.
Électronique - Club Robot Centrale Nantes. Kit de base Matrix Robotics. Robots Dreams - Everything Robot. Robots, Drones et Intelligence Artificielle. Razor Robotics - Robot Guides for Beginners, Educational Resources, Careers Advice and much more! Service Robots for Government and Corporate Use Directory - The Robot Report: tracking the business of robotics. Robot.