

Civade.com .... DIY, cnc, électronique, opensource et musique. Introduction to using openFrameworks with Arduino. Introduction to using openFrameworks with Arduino Skill Level: Intermediate by CTaylor | January 26, 2012 | 1 comment What is openFrameworks?
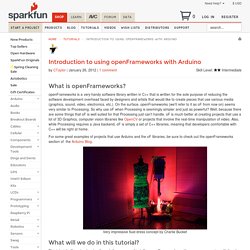
OpenFrameworks is a very handy software library written in C++ that is written for the sole purpose of reducing the software development overhead faced by designers and artists that would like to create pieces that use various media (graphics, sound, video, electronics, etc.). Sneak Preview of Maker Faire Rome Projects - ( Originally published in Make) In early July we spent a couple of days going through all of the submissions received to participate in Maker Faire Rome — the European Edition, taking place Oct. 3-6 in Italy.
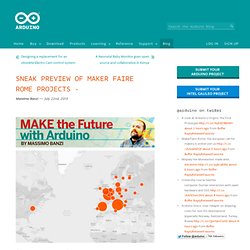
It was a great experience for us to discover makers’ projects from all around Europe, and the MakerTour gave us the chance to meet some of them and to produce 69 video clips to share this experience with all of you. You can watch the videos on the Maker Faire Rome channel on YouTube. Among those is a video of a visit to the Arduino factory in Ivrea. On the blog we said thank you 320 times to everyone who submitted her or his ideas to Maker Faire Rome, and we published a map showing a total of 200 Italian projects and 120 from other countries participating in the Call for Makers, which ended on June 30.
Shhh. Control your HVAC Infrared Devices from the Internet with IR Remote (Arduino / Raspberry Pi Compatible) IR Remote is a small shield that allows you to record any infrared command sent by a remote control and resend it from the Internet.
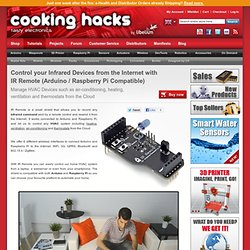
It works connected to Arduino and Raspberry Pi, and let us to control any HVAC system including heating, ventilation, air-conditioning and thermostats from the Cloud. We offer 6 different wireless interfaces to connect Arduino and Raspberry Pi to the Internet: WiFi, 3G, GPRS, Bluetooth and 802.15.4 / ZigBee. With IR Remote you can easily control our home HVAC system from a laptop, a webserver or even from your smartphone. PROJECTS. Microcontrollers as Material We’ve developed a set of tools and techniques that make it easy to use microcontrollers as an art or craft material, embedding them directly into drawings or other artifacts. We use the ATtiny45 from Atmel, a small and cheap (~$1) microcontroller that can be glued directly to paper or other objects. We then construct circuits [...] Codeable Objects Codeable Objects is a library for Processing that enables novice coders, designers and artists to rapidly design, customize and construct an artifact using geometric computation using geometric computation and digital fabrication The programming methods provided by the library allow the user to program a variety of structures and designs with simple code and geometry.
Adam @ Hilltop Cottage › TinyCAD Library for Arduino. Avr. Pic. SoundCipher - Music and sound for Processing - Tutorial. Back to basics: Using 1 shift register. At it's core the 74HC595 shift register is simply a way to turn on 8 signals at one time.

To do this only 5 wires need to be run from the Arduino board. So you save 3 pins, "so what, I have plenty of pins" you ask? While this is true, the magic really happens when you want to use 16 signals, or, even 64 or more. Twitter with Processing test. Processing + EPOC via OSC. Code — OAuth. Blender, burster, arduino, processing, 3d scanning, programming. Arduino to Blender(010; 28.07.2009; arduino, blender) Arduino to Blender 1.0 from MyInventions on Vimeo.
Required: Blender 2.49a ( Python 2.6.2 ( pywin32-214 (pywin32-214.win32-py2.6.exe; pySerial 2.4 (pyserial-2.4.win32.exe ; Pythona 2.6.2 is required for Blender 2.49a. Pywin32 library incerease Python options for Windows. PySerial library let us Serial communication. Reciving informations from serial port in Blender. 01.import serial 03.serialport = serial.Serial('COM4', 9600) Blender, burster, arduino, processing, 3d scanning, programming. Teensy USB Development Board.
The Teensy is a complete USB-based microcontroller development system, in a very small footprint, capable of implementing many types of projects.

All programming is done via the USB port. No special programmer is needed, only a standard "Mini-B" USB cable and a PC or Macintosh with a USB port. Simulator for Arduino. Pro version licence $14.99 (support until Dec2014)
Programming an ATtiny w/ Arduino 1.0. This tutorial shows you how to program an ATtiny45, ATtiny85, ATtiny44 or ATtiny84 microcontroller using the Arduino software. These are small, cheap ($2-3) microcontrollers that are convenient for running simple programs. The ATtiny45 and ATtiny85 have eight legs and are almost identical, except that the ATtiny85 has twice the memory of the ATtiny45 and can therefore hold more complex programs. The ATtiny44 and ATtiny84 have 14-legs and more inputs and outputs. Small, Programmable, Wearable and Cheap - Enjoying the ATTiny85 - Tutorial by @fctry2. Ok, so let’s talk cheap and tiny: programmable computers needn’t be large precious things, they can be tiny things that we can leave behind, let go, abandon to the cruel world.
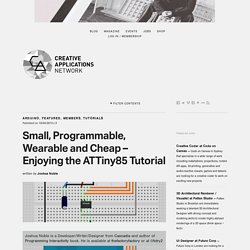
I’m not advocating being overly irresponsible or wasteful, but I do think that the world and the things that you can make in it gets a lot more interesting if you don’t have to worry inordinately about protecting your project. An Arduino or Raspberry Pi, wonderful tools that they are, are not cheap, somewhat demanding of battery life, and as such we usually need to protect our controller and modify our project to fit their form factors. As a teacher, I can’t count the number of times I’ve seen an Arduino used to listen for a button press or wait for a door to open. Wouldn’t it would be nice to have something small, programmable, cheap, and power efficient that could do *some* of what an Arduino can do and had the same easy tools to use with it?
Well there is: the ATTiny85! Faire son propre contrôleur MIDI USB: introduction. Arduino sans Arduino. Cheap Alternative for Hard to Find CDS Light Sensor. CdS (Cadmium Sulfide) photo-resistors are commonly used for detecting light levels.

Their resistance varies considerably depending on the intensity of light striking them. They are common, fairly cheap and easy to use. H-Bridge Electronic Circuits. Thought Process Designs. HOW TO GET WHAT YOU WANT. Welcome to the KOBAKANT DIY Wearable Technology Documentation Workshops least likely scenario This workshop is part of a course at the Ernst Busch Hochschule in Berlin.
It is only open to students in the departments of Spiel&&Objekt. Workshops soft sensors for soft bodies. Light sensor circuit diagrams. Color Sensor from a Reversed LED and Op Amp. One of the first lessons that an electronics student learns is that an LED provides light from current flow. But, did you know that an LED put in backwards provides current flow from light? Yes! It’s true. Don’t believe me? A multimeter in voltage measurement mode detects voltage in a discrete LED when held close to a light source. SPICE Simulation Community - YouSpice. Welcome to the SPICE Simulation Community Welcome to the SPICE community for electronics design and simulation. Register and start now to download free SPICE projects, sale or share your simulated projects.
Circuit Simulator Applet. Christian Tavernier - Programmateur de Microcontrôleurs PIC. Programmateur de PIC universel Schéma du programmateur Mon programmateur se connecte sur le port parallèle du PC et son schéma complet est visible sur la figure ci-dessous. Scotty’s Videos. Le pont en H - Welcome. Receiver Shield for Arduino: 315MHz / 433MHz. Arduino Simulation with Proteus - YouSpice, SPICE simulation community. PSPICE_MOS_TUT5.pdf (Objet application/pdf) PWM - Pulse Width Modulation for DC Motor Speed and LED Brightness.
Les PIC en C. Programmer les PIC en C. Le site de Bigonoff : L'incontournable site sur les microcontroleurs PICs. Ce site est en constante évolution N'hésitez donc pas à le consulter régulièrement. Vous y trouverez entre autres: Des cours sur les microcontrôleurs Pic® , des montages électroniques, des applications complètes et opérationnelles comme un système d'appel infirmières pour maison de repos, un système domotique complet (Domocan), des trucs et astuces, des logiciels gratuits dont un éditeur pour afficheurs LCD graphiques (BigLcd), un programme de réveil à distance de PC via réseau (Easy WakeUp) ou un logiciel de facturation complet (FactuLite).
Mais vous y trouverez également une page politique, car il est important de ne jamais laisser son esprit critique au vestiaire, tout qui ne participe pas à l'histoire la subit. Je vous remercie de votre visite Soyez indulgents, je ne suis pas infographe, ni spécialiste en création de site, ce qui explique le peu de richesse graphique.
Ir Light Dimmer. Studio. La diode zener: transistor ballast série. La diode zener: transistor ballast série De nombreux montages associent diode zener et transistor. Dans tous les cas, le transistor est utilisé pour son gain en courant qui permet d'obtenir un courant de sortie plus important, tout en ayant une tension stabilisée par diode zener. Explore Circuits - Controller1. Bridge circuit. PyroElectro News, Projects & Tutorials. Code.compartmental. 10A H-Bridge Motor Controller - Data. Sound. ArduinoExpertMoteurCCControlerSensRotation. Index(3).pdf (Objet application/pdf) Nature by numbers. The theory behind this movie. Free online paint program.
Interrupteur Relais VS Interrupteur Mosfet. Logiciels: processing. Phishing At The River Of News : Florian Jenett. Le Projet. Pathfinder Library. Résultats Google Recherche d'images correspondant à. Build a 5A H-bridge Motor driver! Old version. Arduino / Sortie analogique(PWM) Blender / Arduino LED Control. Cheap Arduino Wireless Communications. Mini Kit Moteur Hobbyiste. Processing[04][01] = "concept no.1 : les méthodes" ; - Ecole d. Pédagogie. Commande Moteur avec Transitor MOSFET. Videotutorial/s: Data - Display. Anthony Mattox - Interaction Design & Digital Art - page 2. Processing. Processing. Processingas - A port of the Processing programming language to ActionScript. NodeBox. Abstraction Now! - catalogue. Shader recap. ThNdl: Welcome to ThNdl. The Nature of Code. Cours: sommaire. Processing + GSVideo + NyARToolkit on Linux x86_64.