
IoT. How to put RISC OS on the Raspberry Pi. Raspberry PI Community Projects. RISC OS on the Raspberry Pi OK so this isn’t a flavor of Linux it is a great OS We will start with an introduction with the installation instructions from www.pilearn.com Above image © 2011 – 2012 piLEARN Now to explain a bit about RISC OS by looking at www.riscoscode.com and see what they have to say: RISC OS provides an alternative way of controlling a computer.
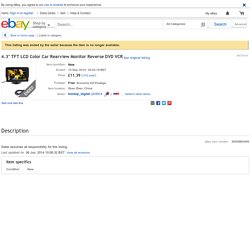
RISC OS works well at different scales. Additional images, text and file downloads (c) 2008 – 2012, RISCOScode. Raspberry Pi Connected To Mini Composite Monitor. 4.3" TFT LCD Color Car Rearview Monitor Reverse DVD VCR. Please read the full listing.
By clicking Confirm bid you commit to buy this item from the seller if you are the winning bidder. You will enter a binding contract. Submit bid Review and confirm your bid Bid confirmation d h m s day. Industries blog. Amazon.co. Bought for Raspberry PI.

The power-socket will accept a standard 12v transformer plug 5mmx 2.5 plug (or CCTV socket), but it does come with an additional male socket with open ended red/black wires to connect to a 12v supply power supply, although you would have to supply your own in-line 1amp holder and glass fuse. I used a 12v 2amp transformer I had from an old USB disk drive. The TV consumes 3 watts (250ma). The RPi does overlap the screen slighltly and the fonts are like some MS word at point 6. NTSC/PAL TFTs. 4.3" TFT LCD Color Car Reverse Rear View Monitor for DVD VCR Camera UK Stock. Please read the full listing.
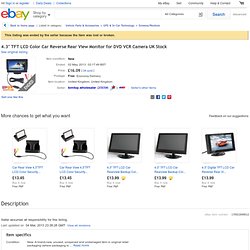
By clicking Confirm bid you commit to buy this item from the seller if you are the winning bidder. You will enter a binding contract. Place bid Review and confirm your bid Bid confirmation d h m s day hour hours Free P&P See item description (Approximately ##1##) (Enter ##1## or more) Raspberry Pi with I2C-Arduino-Slave. Since Raspberry Pi has only about 8 GPIO’s (or up to 17 if you reconfigure UART, SPI and I2C as GPIO) or for some other reasons, it may be helpful to combine Raspberry Pi with another μC or PIC (or even a ready-to-use μC-/PIC-Board like Arduino, Netduino or Pinguino) e.g. to get more I/O’s or just to seperate two different application areas.
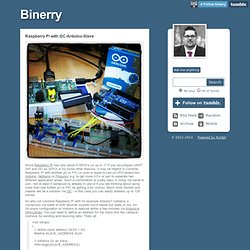
Such a combination is surely easy to setup via serial or usb - but at least if serial/usb is already in use or if you are thinking about using more than one further μC or PIC its getting a bit clumsy. Much more flexible and cleaner will be a solution via I2C - in this case you can easily address up to 128 slaves. So why not combine Raspberry Pi with for example Arduino? Certainly a connection via serial of both devices sounds much easier but really is not. Bcm2835: C library for Broadcom BCM 2835 as used in Raspberry Pi. This is a C library for Raspberry Pi (RPi).
It provides access to GPIO and other IO functions on the Broadcom BCM 2835 chip, as used in the RaspberryPi, allowing access to the GPIO pins on the 26 pin IDE plug on the RPi board so you can control and interface with various external devices. It provides functions for reading digital inputs and setting digital outputs, using SPI and I2C, and for accessing the system timers. Pin event detection is supported by polling (interrupts are not supported). It is C++ compatible, and installs as a header file and non-shared library on any Linux-based distro (but clearly is no use except on Raspberry Pi or another board with BCM 2835). The version of the package that this documentation refers to can be downloaded from You can find the latest version at Several example programs are provided. Based on data in and and. Gaining low-level SPI access on the Raspberry Pi.
Hardware SPI with Python on a Raspberry Pi. How to Run Raspberry Pi with No Monitor or Network. I went to the 4th Milton Keynes Raspberry Jam on Sunday.
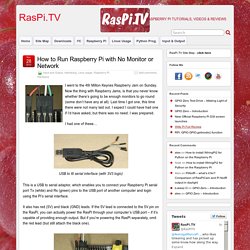
Now the thing with Raspberry Jams, is that you never know whether there’s going to be enough monitors to go round (some don’t have any at all). Last time I got one, this time there were not many laid out. I expect I could have had one if I’d have asked, but there was no need. I was prepared. Index of /soundfx/sirens. Amazon.co. PowerGen Mobile Juice Pack Ultra is produced with the quality in mind!
It utilizes top notch chips to provide the highest efficiency, top quality cells to assure you a long life cycle! Specs: - Average Charging time for iPhones 1.5 hrs - Input Charging Time 5 - 6 hrs - Life Cycle > 500 Times - Input: DC 5V / 1000mA - Output: DC 5.3V / 1000mA - Dimension: 93*43*22mm / 3.66x1.69x0.87 inch. Amazon.co. I tested this product, with an iPhone 4S, an iPad gen 1, and a blackberry.Upon opening the product, I was pleasantly surprised to find an iPhone/iPad connector, which it says it doesn't come with.
So that was an added bonus. Build quality is excellent, it feels very sturdy and solid, yet not too heavy. It even comes with a built-in torch, which is surprisingly powerful.Using the juice pack is simple. There's a micro USB port on the side labelled "IN" which you use to charge it. Tutorials. Just a quick shout-out to the Royston Crow who have featured Amaideo Page-John (aka Crazy Squeak) and his programming work that has been launched into space with Tim Peake.

The 10-year old, from Royston, was one of the lucky entrants in the Astro… Read more → Just found a new blog: Guy Carpenter writes about creating custom gauges and gadgets using the Pi and the Arduino. I’ve added it to my regular feed and so look out for new posts from Guy in the future. RasPi.TV. An ARM GNU/Linux box for $25. Take a byte! The MagPi.
Adapt your Raspberry Pi Camera for close-up use. The Raspberry Pi Camera is a fixed focus module, so that anything from about 0.5m to infinity is acceptably sharp. This has strengths and weaknesses, as with every design decision. The weakness in this case is that if you want to film or photograph anything closer than about 50-75cm it will be out of focus. With large SLR cameras, what people do is change the lens for a macro or close-up lens. We can’t do that easily. The other (cheaper, but generally less good) option photographers use is to add a small, screw-in, close-up magnifying lens in front of the existing lens which allows closer focus. “Proper” +2D camera optic. Streaming Raspberry Pi Camera H264 into HTML over RTMP. Time-lapse Photography with the Raspberry Pi Camera.
A simple time-lapse photography project using the new Raspberry Pi Camera with a Raspberry Pi Model A and a battery pack. I'd long wanted to try my hand at time-lapse photography and for one reason or another had never got round to doing anything about it, but when I was fortunate enough to be given a pre-production Raspberry Pi camera I no longer had any excuse! Configuring Raspbian Since network access was required for software configuration this was carried out using a Raspberry Pi Model B, although a Model A could have been used with a USB network adapter. With Raspbian installed on a 32GB SD card I went through the usual process of upgrading packages to the latest versions and upgrading the firmware. To enable support for the Camera it was necessary to add two lines to /boot/config.txt: start_file=start_x.elf fixup_file=fixup_x.dat.
Camera board.