
Arbaro - tree generation for povray. Modeling - How can I create a hollow sphere with regularly spaced holes? - Blender Stack Exchange. Instead of the shrinkwrap, there's an older but more precise tool to turn verts into a sphere.
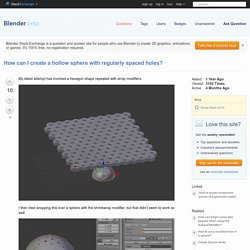
Put the 3D-Cursor where the center of your sphere whould beSelect all vertsHit Space, type 'to sphere' or press AltShiftS, select that tool and hit 1, Return to make it completely spherical. Most subsurfed spheres aren't really precise, so this tool changes that. Here's my approach to this: Create a mesh that has faces where you want the holes to be (I). Parent a Cylinder to the Sphere and enable Duplifaces for the sphere (II)Scale the Cylinder to the desired widthSelect the sphere and hit CtrlShiftA to make the duplis real.Select all Duplis and Shift-Select the middle one, then hit CtrlJ to join them into one single meshMake a sphere to your liking.
The advantage is that it works with irregular shapes too. Blender / Corona Renderer. Corona Standalone + Blender. Итак, это свершилось, я перешел на темную сторону Блендера.
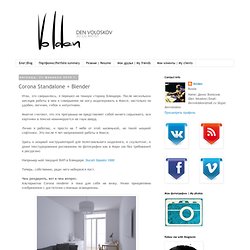
После нескольких месяцев работы в нем я совершенно не могу моделировать в Максе, настолько он удобен, логичен, гибок и интуитивен. Многие считают, что эта программа не представляет собой ничего серьезного, все картинки в поиске номинируются на гнум авард. Лично я работаю, и просто на 7 небе от этой маленькой, но такой мощной софтинки. Это после 4 лет напряженной работы в Максе. Здесь и мощный инструментарий для полигонального моделинга, и скульптинг, и даже текстурирование рисованием по фотографии как в Мари (но без требований к ресурсам) Например мой текущий ВИП в Блендере: Ducati biposto 1000.
Mitsuba - physically based renderer. Облачная платформа Lagoa для 3D-рендеринга. 14 апреля 2013 в 14:06 Рендеринг интерьера и освещения с помощью движка Lagoa.

Tulpan_0006_b. Ray bounce experiment. Modo-style Theme. GLG – Giuseppe La Greca – 3D Modeler / CG Artist. Onno van Braam - Tutorials » Depth of Field. This tutorial will describe how to use the Lens Blur filter in PhotoShop on your renders, using a ZDepth pass.
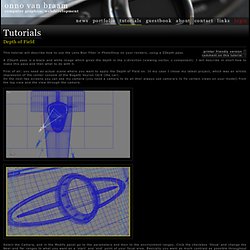
A ZDepth pass is a black and white image which gives the depth in the z-direction (viewing vector, z component). B°wide NodePack – for Blender. Here is my hand picked selection of NodeGroups i’ve created over the past 2-3 years.
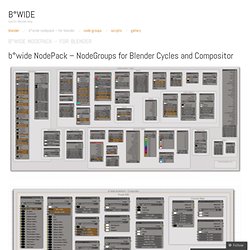
There’s everything, from simple little Tools, Materials, UberShaders to Compositing. Some are made quickly, on some i spent countless hours. With this first release i’ve put together some information about every NodeGroup. Not too much, but mainly what the NodeGroup is supposed to do. Blender Lessons's Videos. The Collection, Lincoln & Oliver Laric. Modeling with the Poke Tool. Blender tutorials. CYCLES / Object Info Node. Создание сайтов. VFX / Advance Trail Effects with bTrace. Blender has a powerful UV Editor and 3D Painting built in tool sets that can be quite easily overlooked.
I feel like to write something about it. Keep in mind that I am fairly new to Blender way of doing UV and painting, basically learning and discovering thing along the way. I will add and refine this "study note". PS: While writing this, I want to write in the style for total beginner of 3D. I will describe every step in details, hopefully easy to follow.
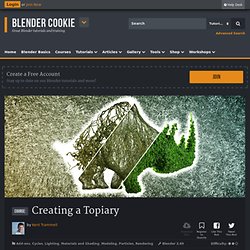
Creating a Topiary. As a follow up to the Topiary Exercise from last week, this is a short course explaining my process for creating a detailed rhinoceros topiary like the one below.
Ref. Blendgraph Font Repeater Node (Blender 2.69) Blender Addon List. Scripts-254_p. External Paint Autorefresh - pointatstuffweb. External Paint Autorefresh Addon that synchronizes Blender with GIMP and Photoshop for texture painting of 3d objects External Paint Autorefresh is free and open source under the MIT license Have you ever worked on a 3d model in Blender, and created a texture for it in GIMP or Photoshop?
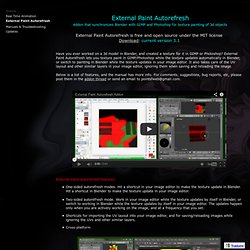
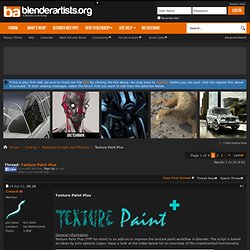
External Paint Autorefresh lets you texture paint in GIMP/Photoshop while the texture updates automatically in Blender, or switch to painting in Blender while the texture updates in your image editor. It also takes care of the UV layout and other similar layers in your image editor, ignoring them when saving and reloading the image. Texture Paint Plus. Development on this addon has continued, based on input by Julio Iglesias Lopez, and it's now time to release version 1.19.New features - Many new speed hotkeys - Display of brush settings in the 3d-view - Expanding or contracting of face selection, while in texture paint mode - Reload all images in the file, with a single hotkey - Highlighting of UV selection in the 3d-view - Added options to snap and select mode menus - Mass appending of objectsFor the full list, including an overview of the hotkeys, take a look at the convenient tables in the documentation.Download You can find the add-on, along with the full documentation on this webpage.
Fiber Mesh Emulation. Hi All,I ran across this neat C4D freebie file and wondered how can we achieve that look in Blender?

The C4D file is using a python script and a ray caster to bounce around inside the model creating a spline as a result.I setup a similar approach in Blender using the particle system inside the mesh. I have inverted the mesh normals and turned it into a collision object. The particles do bounce around inside the mesh. Then I ran the bTrace AddOn to trace out the particle paths. Addon: Pie Menu. Follow Path Array. More Like First Smoke Tutorial by Boyiri. Tube – Epic Production Notes. Well, as you might have guessed, caustics converge very slowly in cycles- meaning, if you want them to look good, you will need many samples to get rid of fireflies. Clearly this is why the ‘no caustics’ button is available in the renderer- a must if you’re using cycles for animation. But: shadows from e.g. a glass monkey look awfully dark without caustics. Witness here: So what to do? An ‘obvious’ trick is to use the incredible ‘light path’ node in the material node editor.
But, in the back of our minds, we all really regret missing those caustics. Pretty good looking. 3d:cycles:blender-cycles-noise-paper [wiki] Version Française: Cycles: Le grain de l'image et les caustiques If you already used Cycles, the photo-realistic render engine of Blender, you know that you have just to increase gradually the number of iterations for removing the noise. Unfortunately, increase this number will increase also the time for the rendering. The goal of this article is to test the ability of Cycles to render the caustics. Caustics are these artifacts of light which actually require a lot of computing time if you want to see them without noise. The noise When you create static images, the rendering time problem is of secondary importance in most situations. Here is the same image calculated with different numbers of iterations:
Сосуды с жидкостью - призрачные игры - Рендер Cycles - Страница 2 из 3 - Форум о Blender 3D. За ради интереса зарядил пару брюликов в циклах дабы показать дисперсию и каустики (ИМХО все там путем и с тем и с другим)как отрендерятся - выложу. я не спорю, может быть в люксе есть какие-то ништяки, но мне непонятны они.