

Crafty Links. A ModernTake on the Doily – $850 Lamp for less than $50. A Modern Take on the Doily $850 Lamp for less than $50?

Yes Please! Hello Pretty people! We are so excited to share a project we did this past weekend. A few months ago, I came across a ceiling lamp, I absolutely loved. It was $850, and I just couldn’t justify the spend, being it was simply made of doilies. To get started, you are going to need a few things to make this project successful. Corn starchballoon (we used a 40” blown up until completely round, as pictured)upholstery thread (but any thread will do)twinedrop clothschool gluecheap paintbrushpetroleum jellylamp kit24+ doiliesstiff stuff We sewed the doilies around the balloon with the upholstery thread, very carefully.
Make sure to create a space to place your bulb socket. Once you have sewn about ¾ of your balloon, stop and do the last ¼ separately. Lay down your tarp and hang your balloon from some twine above the tarp. Rub the balloon down with the petroleum jelly. Paper Flower Key Holder / Mark Montano. Difficulty Rating: Beginner Tags If you need a quick 'just because' gift for someone, this is it!
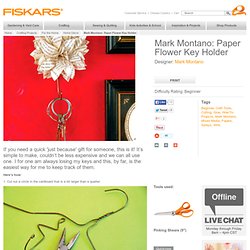
It’s simple to make, couldn’t be less expensive and we can all use one. I for one am always losing my keys and this, by far, is the easiest way for me to keep track of them. How to make wrapped leather bracelets « Rings and Things. Triple-wrap leather bracelet with blue tigereye beads Let me begin by stating the obvious – this style of wrapped leather bracelet is EVERYWHERE this season.
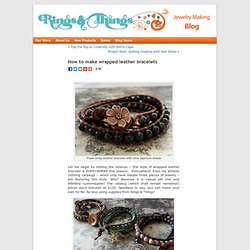
Everywhere! Even my athletic clothing catalogs – which only have maybe three pieces of jewelry – are featuring this style. Why? Because it is casual yet chic and infinitely customizable! Five different leather wrapped gemstone bracelets designs: green opal, mookaite, African turquoise, hematite and rhodonite The supply list is pretty short: 4-6mm round beads We used gemstone beads, but glass, crystal beads or pearls would also be lovely. Wrapped bracelet made with green opal gemstone beads and natural Greek leather. The technique: Choose your bracelet length and cut your leather. If your button has a small loop, you might need to miter (angle) the leather end and pull it through with pliers. Stuff to Make in my Old Age.
V and Co how to: jersey knit bracelet. I don't know what it is about this time of year that makes me just want to have my bare feet in the sand, be watching the sun setting into the ocean, and breathing in the warm salty air of the beach...as i get older, more and more i find myself missing that place i used to go to almost every.single.day. as a teen.
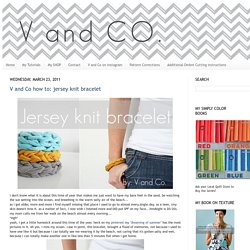
(my skin doesn't miss it. as a matter of fact, i now wish i listened more and DID put SPF on my face...hindsight is 20/20). my mom calls me from her walk on the beach almost every morning... Tutorial: Homemade Sidewalk Chalk. By Michelle Vackar, Modern Handmade Child One of our favorite outside activities at our home is drawing with chalk on the driveway.

You can play hopscotch, four-square, and of course draw and create silly stories. My daughters and I were talking one day as we played hopscotch about how to make chalk and I thought to myself, let’s try it! It ended up being quite a lot of fun. What you will need: • Toilet paper or paper towel tubes • Scissors • Duct tape • Wax paper • Small bucket or disposable container to make the recipe • ¾ cup of warm water • 1 ½ cups Plaster of Paris • 2-3 tablespoons of tempera paint • Paper bag or a “mess mat” ** we made six tubes of chalk – we simply doubled the above recipe Step 1: If you are using paper towel tubes, cut each tube in half, so it is roughly the length of a toilet paper roll tube. Craftiness.
Recommended Reading: 65 Craft Blogs We Love. It's April, which means it's officially stashbusting month!
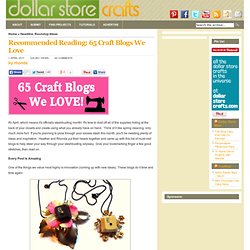
It's time to dust off all of the supplies hiding at the back of your closets and create using what you already have on hand. Think of it like spring cleaning, only much more fun! If you're planning to plow through your excess stash this month, you'll be needing plenty of ideas and inspiration. Heather and Rhonda put their heads together and came up with this list of must-visit blogs to help steer your way through your stashbusting odyssey. Give your bookmarking finger a few good stretches, then read on. Every Post is Amazing One of the things we value most highly is innovation (coming up with new ideas).
[Recycled Keyboard Letter Necklaces by Mich L in L.A.] 1. Lackadaisy Expressions. Boy, I didn't know what I was getting myself into when I started this.
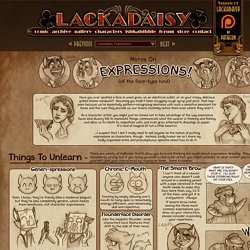
I've had requests for some sort of expressions tutorial dating back a while now, so I figured, "Sure! I can explain expression drawing...and it'll be way better than all those tutorials out there that are nothing but charts of generic expressions. Yeah! Just give me a day or two to whip something up... " Um. {every}nothing wonderful: Tutorial: Repurposed Envelopes (From Magazines to Mailing) Note: If you like this idea, be sure to check out how to make paper ruffles to add to your envelopes!
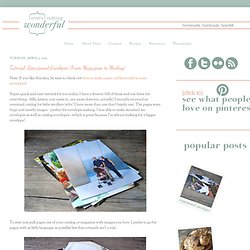
Super quick and easy tutorial for you today. I have a drawer full of these and use them for everything - bills, letters, you name it...my mom does too, actually! I recently received an oversized catalog for baby strollers (why? I have more than one that I barely use). The pages were huge and mostly images - perfect for envelope making. To start just pull pages out of your catalog or magazine with images you love. Unbelievable Paper Transformer. How to make roses from maple leaves. Marble magnets.
I finally gave in and made marble magnets.
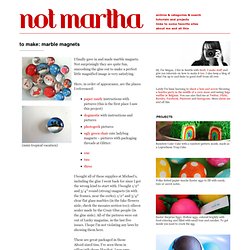
Not surprisingly they are quite fun, smooshing the glue out to make a perfect little magnified image is very satisfying. Here, in order of appearance, are the places I referenced: Most favorited all-time. Crafts by Carolyn - Exploding Box.