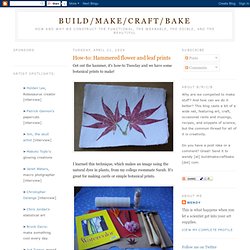

Build/Make/Craft/Bake: How-to: Hammered flower and leaf prints. Get out the hammer, it's how-to Tuesday and we have some botanical prints to make!

I learned this technique, which makes an image using the natural dyes in plants, from my college roommate Sarah. It's great for making cards or simple botanical prints. Actually, you'll need a little more than just a hammer. Rusty Rooster Vintage. Book page flower wreath. To see the tutorial for the book page flower click here to make the wreath you need a wire coat hanger, and then you need to pull it and make it into a circle shape. then following my other tutorial make 8 flowers and cut 8 pieces of felt {you can use tape if you want} then use a glue gun to attach them to the coat hanger using the felt this is the back of the wreath when you are done now its finished, use the hanger bit of the coat hanger to hang were ever you want.

BirdJournal - inside backcover. My {travel} Journal for Venice. I´m going to Venice and this time it´s not a class it´s for real In one week, on April 22th I´m flying in.

Christmas Gift Bag Tutorial. Hello my friends, hope you are all well.

The ArtsyGirl Connection: A Special Christmas Soiree...{1st Feature *Ornament*} Hello artsy friends stopping in today.

I am very excited to officially jump into Christmas crafts starting TODAY!! The ArtsyGirl Connection: Vintage Bottle ... {I'm Playing Dress Up....} Join Me! Happiest Of day's to you all stopping in today...

It's been such a beautiful day here in Boston.. It's almost scary.. "Calm Before The Storm"...I've been busy on pinterest lately looking for fun crafty inspiration from YOU.. Creativity and shared inspired features, how else will pinterest function and go on..? Came across this beautiful burlap lace dressed up bottle that TOTALLY inspired my featured item here today.. *Vintage Dressed Up Bottle* The ArtsyGirl Connection: Light Bulb Vases... {Upcycled Delicate Decor} Good morning friends stopping in today..

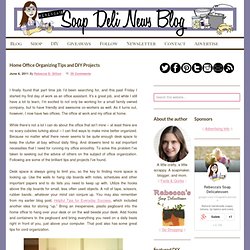
Hope you are having a lovely start to your 1st weekend of 2012! The ArtsyGirl Connection. {it's in the news} Tub Teas. Home Office Organizing Tips and DIY Projects. I finally found that part time job I’d been searching for, and this past Friday I started my first day of work as an office assistant.

It’s a great job, and while I still have a lot to learn, I’m excited to not only be working for a small family owned company, but to have friendly and awesome co-workers as well. As it turns out, however, I now have two offices. The office at work and my office at home. While there’s not a lot I can do about the office that isn’t mine – at least there are no scary cubicles lurking about – I can find ways to make mine better organized. Because no matter what there never seems to be quite enough desk space to keep the clutter at bay without daily filing. Desk space is always going to limit you, so the key to finding more space is looking up.
Again, if your short on desk space then you don’t want bins stacking up for incoming and outgoing mail. Again, if you’re looking to create more desk space, look up, and organize with a wine rack.
Socks for Sandals and Clogs Download for Free. Socks for Sandals and Clogs Publisher: Fields Books | ISBN: 0976106418 | edition 2004 | JPG | 48 pages | 10,9 mbA new edition of Socks for Sandals and Clogs combines the original poster socks and instructions in a single book, along with new instructions for free sole socks. Mirror. Inexpensive Home Decor Download for Free. Inexpensive Home Decor Publisher: Prime Publishing LLC | ISBN: N\A | edition 2009 | File type: PDF | 107 pages | 13,9 mbSpring is a great time to rid your home of winter clutter and spruce things up a bit.
But with everyone looking for ways to save money these days, it can be tough to find cheap and easy ways to redecorate and redesign. That’s why we’ve put together these 46 thrifty ideas for decorating on a budget. You’ll findDIY decor ideas for every room of the house, including the kitchen, living room, bathroom and kids room. We even have a great selection of wall art ideas that you can hang just about anywhere. Mirror Download free ebooks, Inexpensive Home Decor free ebooks, Inexpensive Home Decor ebooks download, cool Inexpensive ebooks, free ebooks download Inexpensive Home Decor free download.
Low Cost Kitchen Craft Download for Free. Low Cost Kitchen Craft Publisher: Prime Publishing LLC | ISBN: N\A | edition 2009 | File type: PDF | 84 pages | 14,1 mbFor many people, the kitchen is the room in the house that they spend the most time, whether cooking, eating or interacting with friends and family. We all want to have a kitchen in which we feel comfortable and which reflects our personalities. Luckily, decorating the kitchen does not have to be expensive. TheFaveCrafts editors have put together this collection of low©\cost crafts just for the kitchen, including kitchen crochet patterns, easy kitchen painting projects and even some fridge magnet crafts for that dose of fun.
Many of these projects double as functional kitchen items, including hot pads, trivets and clocks. We even have a section for decorative kitchen storage. Crea con fimo. Amasar, modelar, hornear Download for Free. Point lace book Download for Free. Creare con le Perline Download for Free. Bird Houses 2 – Painted Wood Download for Free. 100 flowers to knitamp; crochet Download for Free. Wood or Nature Crafting. Crafting. How to Make Leaf Skeletons. I wanted to share with you a project from one of my readers who shares with us how to make leaf skeletons.

I LOVE this! I have several leafs in various forms displayed in my home and knew I needed to make some of her leaf skeletons to add to my decor. I love how a pattern of leaves can enhance the beauty in your home. So I asked Heather if she would mind sharing her project with you. You can find more great projects from Heather at her blog The Other White House. I have spent hours and tried various ways of making these. You need washing soda, not baking soda! Gather your leaves. Washing soda is a strong base so you may want to wear gloves when handling the leaves. You will add 3/4 cup of washing soda and 4 cups of water to your pot of leaves. Keep going, you will need to add more water so your pan doesn’t dry out. When 1.75 hours are up fill a glass baking dish with cool water. 101 Crafty Gifts.
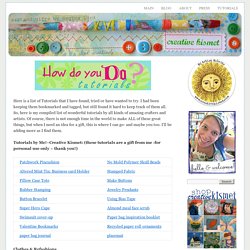
Creative Kismet » DIY ideas. Here is a list of Tutorials that I have found, tried or have wanted to try.

I had been keeping them bookmarked and tagged, but still found it hard to keep track of them all. So, here is my compiled list of wonderful tutorials by all kinds of amazing crafters and artists. Of course, there is not enough time in the world to make ALL of these great things, but when I need an idea for a gift, this is where I can go- and maybe you too. 52 Weeks Project. Crafts. GoOrigami. No-interfacing Storage Basket Tutorial. As promised, a recipe for making washable stand-up storage baskets: You'll need to cut 2 of each of these pieces (click on the pic to enlarge it to a readable size). The measurements are in centimetres because that's the way I was brought up (sorry). A seam allowance of 1cm is included in these measurements. This basket's base is 15cm wide, but you could make any size using this slightly haphazard formula, where x is the width of the base and y is the height of the basket.
And 2 is cm and seam allowance. Pieces cut, sew right sides together along these seams: Sew the boxed corners of the linings by folding the pieces open, matching the side seams with the bottom seams, and stitching across: Zig-zag the top edge of the smaller lining piece. Hem the bottom edge of the outer sleeve piece, turning up 1cm all round and stitching it down. Turn the lining pieces so that their right side faces out, and slide the outer sleeve over. Almost done, except for the fiddly part!