
Open Source Linear Bearing System. The MakeSlide Project. MakerSlide Camera Slider Control Program at Buildlog.Net Blog. December 14th, 2011 by bdring There has been a ton of interest in camera slider applications for MakerSlide.

A while ago I decided to make a very simple reference design for a motorized slider. This design only required fabrication of one part. The rest of the parts are existing components. DPTnT - Digital Photography Tips and Techniques. FocalBlade - Tutorials. Welcome to optikVerve Labs - Home of virtualPhotographer. TimeTraveler. Fotoopa's unbelievable Nikon custom rig for capturing insects in flight. I have covered Flickr member Fotoopa and his custom made Nikon rig for capturing insects in flight in the past.
He now has an improved monster machine. The main camera is a Nikon D300 + 105mm f/2.8D lens but there is an external shutter Uniblitz VS14 between the camera and the lens that reduces the shutter lag from 52 msec to 3.3 msec. The rig has two SB-80 flashes and a SB-29 ring flash. Focusing is done with... IR lasers that are pointed at the virtual focus point of the camera. Here is a list of used equipment and settings: The results are stunning: Do bugs get red eyes :) More photographs can be found here. All images © Fotoopa. Merlin-Style DIY Camera Stabilizer/Steadicam Build Tutorial. DIY Steadicam by StudioAmarelo.
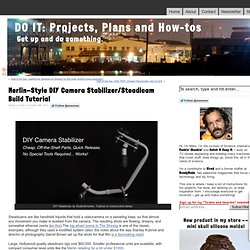
Tutorial on construction below. Steadicams are like handheld tripods that hold a videocamera on a swiveling base, so that almost any movement you make is isolated from the camera. The resulting shots are flowing, dreamy, and somewhat ethereal (sorta like this).The big wheel scene in The Shining is one of the classic examples, although they used a modified system (also: the notes about the way Stanley Kubrick and director of photography Garret Brown set up the shots for that film is a fascinating read) Large, Hollywood-quality steadicam rigs cost $60,000. Smaller professional units are available, with compact consumer level units like the Merlin retailing for a bit under $1000. For many hobbyists, even the consumer price is beyond their budget.
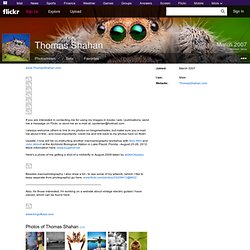
The gimbal is a key part to the movement that defines steadicams–it’s basically the pivot point that allows the handle of the system to move separately from the camera it’s connected to. Related posts: Thomas Shahan. Www.ThomasShahan.com If you are interested in contacting me for using my images in books / ads / publications, send me a message on Flickr, or send me an e-mail at: opoterser@hotmail.com I always welcome others to link to my photos on blogs/websites, but make sure you e-mail me about it first - and most importantly: credit me and link back to my photos here on flickr!
Update: I now will be co-instructing another macrophtography workshop with Alex Wild and John Abbott at the Archbold Biological Station in Lake Placid, Florida - August 23-26, 2012. Drop By Drop. Cowboystudio Macro Focusing Rail Set with 4 Way, Fine Control and Camera Focusing Rail for Macro Photography: Camera & Photo. The Comprehensive Guide To Macro Photography. When we photograph something very small we call it a macro photography.
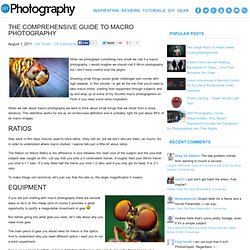
I would imagine we should call it Micro photography, but I don’t have control over the jargon. Shooting small things poses great challenges and comes with high rewards. In this tutorial I to get all the info that you’d need to take macro shots. starting from equipment through subjects and tip and wrap up of some of my favorite macro photographers on Flickr if you need some extra inspiration. When we talk about macro photography we tend to think about small things that we shoot from a close distance. This definition works for me as an on-the-nose definition and is probably right for just about 95% of all macro images. Three Super Macro Rigs You Can Build At Home. After posting the big Macro tutorial, I thought it would be interesting to see what extreme macroists (yea, it’s a new word) use to get those super detailed shots.
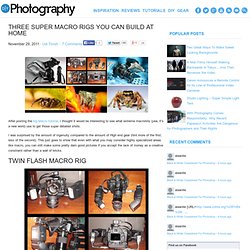
I was surprised by the amount of ingenuity compared to the amount of High end gear (hint more of the first, less of the second). This just goes to show that even with what you may consider highly specialized areas like macro, you can still make some pretty darn good pictures if you accept the lack of money as a creative constraint rather than a wall of bricks. RED Camera Keeper. How To Build A Beautiful Camera Stabilizer. A few day ago we featured the EZ-Steady as a smart camera stabilizer.
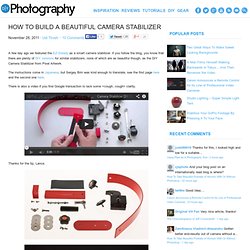
If you follow the blog, you know that there are plenty of DIY versions for similar stabilizers, none of which are as beautiful though, as the DIY Camera Stabilizer from Pixel Artwork. The instructions come in Japanese, but Sergey Brin was kind enough to translate, see the first page here and the second one here. There is also a video if you find Google transaction to lack some <cough, cough> clarity.
Thanks for the tip, Lance. Polaroid Automatic Motorized Pan Head With Wireless Remote Control For SLR Cameras & Camcorders: Camera & Photo. Polaroid Wireless Motorized Pan Tilt For SLR.
Arduino Pan&Tilt-System. Wall (mains) Power for an Olympus E-510. Learn how to build an AC/DC interface for an Olympus E-510.
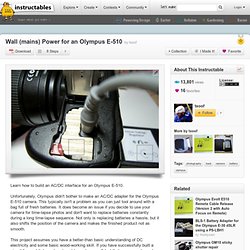
Unfortunately, Olympus didn't bother to make an AC/DC adapter for the Olympus E-510 camera. This typically isn't a problem as you can just tool around with a bag full of fresh batteries. The EZ-Steady Is One Smooth Camera Stabilizer.