
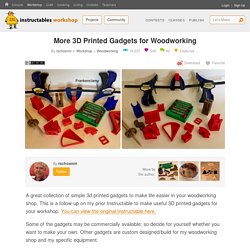
Plotclock by joo. MakerBot account. La Poste ・ Télécharger des modèles 3D gratuits pour imprimante 3D. More 3D Printed Gadgets for Woodworking: 15 Steps. AdWords We use AdWords to deploy digital advertising on sites supported by AdWords.
Ads are based on both AdWords data and behavioral data that we collect while you’re on our sites. The data we collect may include pages you’ve visited, trials you’ve initiated, videos you’ve played, purchases you’ve made, and your IP address or device ID. This information may be combined with data that AdWords has collected from you. We use the data that we provide to AdWords to better customize your digital advertising experience and present you with more relevant ads. LiveRamp We use LiveRamp to deploy digital advertising on sites supported by LiveRamp. M3 screw knob (parametric) by plaztech.
Adding 3D Printer Power and Light Control to OctoPrint. OctoPrint is a great way to monitor your printer, especially with the addition of a webcam.

Using a tablet or mobile phone, you can keep an eye on what the printer is doing from anywhere in the house (or world, if you take the proper precautions), saving you from having to sit with the printer as if it’s an infant. But simply watching your printer do its thing is only a small slice of the functionality offered by OctoPrint’s vast plugin community. As [Jeremy S Cook] demonstrates, it’s fairly easy to add power control for the printer and auxiliary lighting to your OctoPrint setup. Being able to flick the lights on over the print bed is obviously a big help when monitoring it via webcam, and the ability to turn the printer off can provide some peace of mind after the print has completed.
Marlin Firmware. Sun, Earth and Moon Model (Tellurion / Orrery) With 3D Printed Parts: 7 Steps (with Pictures) The most important part of tellurion design is working out what all the gear ratios should be to reflect accurately the motions of the heavenly bodies.
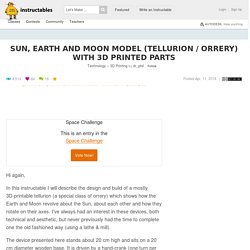
Superficially this is quite easy, but there is a trap for the unwary (which I fell into twice!). It arises because the axes of the gears modelling the earth and moon motions revolve once around the sun axis in one 'year', thus the attached celestial bodies will experience one rotation with respect to the sun even in the absence of those same gears. It's well worth doing your research thoroughly and not believing the first thing you read.
The majority of the moving parts in this model are mounted on a single curved 'orbit' arm tethered to the sun axis. (this being a throwback to the school project). The hand-crank turns a pair of bevel gears which drive all the motions of the tellurion via a 10 tooth gear. Earth's rotation on its axis is one turn per turn of the crank, so the overall gear ratio is 1:1. 3D Models for Professionals. 3D Printed Mechanical Iris Dome All-One-Piece. It’s that time of year when we think about gift giving.
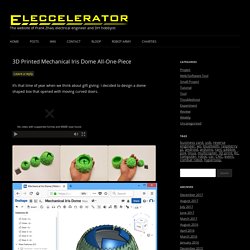
I decided to design a dome shaped box that opened with moving curved doors. (dear iPhone users, sorry if the videos don’t work for you, please consider upgrading) Keep reading for more pictures and a full tutorial teaching you how to create this in CAD. What makes this extra cool is that all of this is 3D printed as one piece, there is no assembly required! I will show you how I designed this, step by step (plus why I did it that way), using a mechanical 3D modelling CAD tool called Onshape. First, take a good look at the animation of how this box actually works. Modeling a Printable Stackable Hexagon Model in SelfCAD: 12 Steps (with Pictures) After creating the solid hexagon box Now we need to subtract one box from the other but before we do that, we have to scale one of them to be smaller than the other one to shape and create the void space inside the box to become a tube that we can use to put drawer inside it.To scale one of them select only one of them and choose the Scale Tool from transformations section in the toolbar or press L in your keyboard.To have a better vision and see the two objects clearly while scaling, make the appearance of them in wireframe mode selecting wireframe option on the left hand-side as shown in the first image above.Now let’s scale.
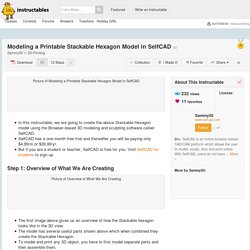
Drag from the center scale point to scale in the 3 dimensions and to scale the object overallAnd then drag the upper point to scale in Y dimension or to scale vertically.And now let's use mesh and wireframe together. La référence dans l'univers de l'impression 3D en France. Forum de discussion sur les imprimantes 3D et l'impression 3D. Forum pour l'impression 3D et les imprimantes 3D. MyMiniFactory - Guaranteed 3D Printable Designs. 3D Printable Phone and Tablet stand by Kirby Downey. Installation d’Octoprint pour une DiscoEasy 200 – Dagoma'niack, le blog.
Vous aussi, vous lancez une impression avant de partir au travail ou de faire les courses ?
Vous vous rongez les ongles de ne pas voir ce qu’il se passe et espérez que l’impression se passe bien ? Le pire c’est qu’en cas de raté, vous ne saurez pas pourquoi ! Mais vous avez entendu un jour parler d’Octoprint qui s’installe sur un Raspberry PI et tout ça vous semble trop compliqué. Je vous montre comment installer Octoprint, un serveur d’impression pour nos machines avec une fonction de Streaming Vidéo particulièrement utile.
I – Ce qu’il nous faut Il vous faudra plusieurs choses pour mener à bien l’installation d’Octoprint : – Un Raspberry, J’ai un Raspberry Type B depuis 3 ans et ça fonctionne – Une Carte SD, Je ferais le tuto avec une Carte SD 8Go. – Du réseau Wifi ou câblé. En Option : – Une caméra USB ou Picam pour la fonctionnalitée du streaming. Faites attention lors de l’achat de votre Raspberry, les nouveaux modèles prennent uniquement les Cartes Micro-SD. Vous aimez ? Contrôlez votre imprimante avec Pronterface - Dagoma.fr. Using Blender for 3D Printing : Knowledge Base. Blender is one of the most powerful 3D modeling applications freely available for open source.
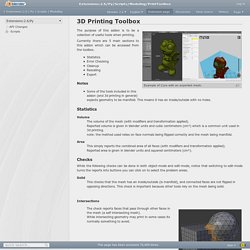
It has an insane number of features, but unfortunately the interface has a mixed reputation. Although more recent versions have made huge strides in improving this, it still can be a bit overwhelming for the beginner, especially if you're only looking for the features that are relevant for 3D printing. This tutorial should get you started, Getting Started: Installation and Setup Blender is available at blender.org in the download section. Also, after 2.6 the 3D Print Toolbox became available. Extensions:2.6/Py/Scripts/Modeling/PrintToolbox. From BlenderWiki Example of Cura with an exported mesh.
The purpose of this addon is to be a collection of useful tools when printing. Currently there are 5 main sections to this addon which can be accessed from the toolbox. Statistics Error Checking Cleanup Rescaling Export Notes Some of the tools included in this addon (and 3d printing in general) expects geometry to be manifold. Statistics Volume. Introduction / Blender pour l'impression 3D. Imprimante 3D DiscoEasy200 en kit - Dagoma.fr.