background preloader

Pauliip9

Facebook Twitter

Paulina

Niños y redes sociales en internet | Alerta en Línea. Los adolescentes y preadolescentes socializan en línea a través de sitios de redes sociales, salas de chateo, mundos virtuales y blogs; es importante que ayude a su hijo a aprender a navegar por estos lugares de manera segura. Entre los peligros que acarrea socializar en internet se pueden mencionar el hecho de compartir demasiada información, o publicar comentarios, fotos o videos que pueden dañar la reputación o herir los sentimientos de otra persona.

Aplicar el mismo criterio que se aplica en la vida real puede ayudar a minimizar esos riesgos. Recuérdeles a los chicos que sus acciones en internet tienen consecuencias Las palabras que escriben los niños y las imágenes que suben a los sitios tienen consecuencias fuera de internet. Los chicos deben publicar sólo aquello que no les moleste que sea visto por otras personas. Una parte del perfil de su hijo puede ser vista por un público más numeroso de lo que usted o él desean, incluso si las funciones de seguridad están en nivel alto. Mom’s Red Cowl [ Knitting Pattern ] | Knit and Bake.

Prime Rib / Brioche Stitch Demonstration. Diy. When I was in China last summer, I remember noticing that most girls had ponytails tied with a scrunchie with bunny ears. I could never pull this off, but thought it was adorable, and kept it in mind for an Easter DIY. It's a great way to use fabric scraps, a simple accessory to wear at an Easter party, and a sweet Easter gift for a little girl. When I was done with the DIY, I saw that there was a similar one on YouTube. Since it's done, I'm still posting my version, but if you would rather follow video instructions, then just hop on over to Ann Le's video tutorial.

Also, I wanted to take a picture on myself to show the final result, but I really REALLY look awful these days, as a result of that never-ending sickness and tiredness. Okay, on to the DIY! Supplies needed:Fabric, about 1/8 yardFabric glue (or a sewing machine if you prefer to sew)Elastic (I used the 0.25 wide one), about 9"ScissorsPencilSafety pin Start by cutting a 18" x 3" piece of fabric. Cut a 12" x 5" piece of fabric. How to Make Paper Flowers. Remember those adorable paper flowers from the Valentine’s Day Soiree? Well… we have the diy on how to make them. Absolutely perfect for any soiree you might be planning, including your wedding. You can really can do so many things with these paper flowers. You can make a flower wall backdrop for your candy table, corsages or boutonnieres for guests, the list is really endless, go nuts.

Read on to learn how to make paper flowers. A special thanks to Christa Kimble Photography and Cotton and Brass for being so crafty. Christa Kimble Photography is one of our exclusive The Hand-Picked Vendors. Event Designer: Cotton and Brass Supplies: Pretty Paper Circle Cutter – I used a 1″ circle Scissors Glue Gun School Glue Glitter Step 1: Cut circles from the paper using the circle cutter. Brownie: por fin llegó el día del brownie ! Brownie en cáscara de huevo No hace falta que os diga que me gusta bromear. Ya os conté las bromas que les gastábamos a los porteros en la residencia universitaria. Allí también hacíamos otra travesura con los servilleteros, esos que son de plástico rojo y vas sacando unas servilletas de papel transparente que ni limpian ni nada… Pues los desmontábamos y escribíamos mensajes en las servilletas: “Te estamos vigilando”, “Sabemos lo que hiciste”, y cosas así… Luego volvíamos a montar los servilleteros, y nos sentábamos a jugar al mus y a esperar a las “víctimas”… Era un poema ver las caras de la gente cuando sacaba las servilletas con mensaje!

Como muchas de las ideas que se me ocurren, resulta que ya se le había ocurrido a alguien antes, y al hacer una búsqueda en google encontré muchos ejemplos de bizcochos horneados en cáscara de huevo. Ya está a la venta mi libro “Las recetas de la felicidad” con un montón de recetas inéditas! Puedes ver en vídeo cómo preparo esta receta aquí {Brownie} Brownie en 5 minutos: bizcocho de nutella y caramelo en taza. La semana pasada me ofrecieron la posibilidad de compartir una receta en la radio, en el espacio que I love aceite tiene los viernes en Cadena Ser Jaén. Podéis escuchar el audio pinchando en este enlace, y desde aquí quiero dar las gracias a Lola y a Fernando por darme la oportunidad de colaborar en este espacio.

Para esta ocasión, me apetecía elegir una receta que pudiese preparar cualquiera: sin conocimientos de cocina, sin moldes, sin báscula, y sin necesidad de ningún equipamiento especial. Así que elegí esta idea sencilla, rápida, y resultona: un bizcocho tipo brownie que se prepara en 5 minutos, y sin tener que encender el horno, ya que se hace en microondas.

Es una variación de una receta que circula por internet desde hace tiempo… pero sinceramente creo que es una versión muy mejorada, al menos a mí la receta original me resultó muy seca incluso en caliente… y cuando se enfriaba directamente incomestible. Preparación: 5 min Cocción: 5 min Raciones: 2 Valoración 5 sobre 1 Ingredientes. No Heat SJP BIG CURLS w/ Twisted Buns ...also known as Bantu Knots. If you follow me on Instagram you already know about this because I shared it there see photos below but the other night I slept on twisted buns to get these BIG CURLS just to switch it up a little which the husband LOVES. In fact he said “You know, you could do that MORE OFTEN if you wanted to”. Big curls are a BIG hit around here In 2009 I did a quick video demonstrating how I twist my hair into the little buns whilst singing to Lady Gaga – but I only did a photo tutorial of how to get the finished look.

So the other morning before I left for the gallery I filmed it for you and hopefully answered all the questions I’ve gotten about this easy little tutorial. Enjoy… The first and last photos were taken at around 5:30pm in the afternoon so you can see how the curls fall a little and become big waves, though my hair doesn’t get any smaller. . * CLICK HERE for outfit photos and details. Video of me removing the bantu knots and styling my hair… Have Fun! Find all my Hair Tutorials Here. Www.ddooss.org/libros/John_Milton_El_Paraiso_Perdido.pdf. The Upcycled ruffles dress tutorial. So this past week was pretty bad blog-wise, my blog and website got attacked with malware.

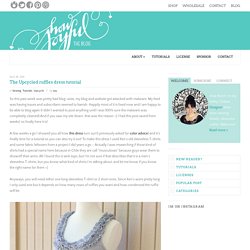
My feed was having issues and subscribers seemed to banish. Happily most of it is fixed now and I am happy to be able to blog again (I didn’t wanted to post anything until I was 100% sure the malware was completely cleaned) And if you saw my site down, that was the reason =] I had this post saved from weeks! So finally here it is! A few weeks a go I showed you all how this dress turn out (I previously asked for color advice) and it’s finally time for a tutorial so you can also try it out!

To make this dress I used Ken’s old sleeveless T-shirts and some fabric leftovers from a project I did years a go – Actually I was researching if those kind of shirts had a special name here because in Chile they are call “musculosas” because guys wear them to showoff their arms. Anyways, you will need either one long sleeveless T-shirt or 2 short ones. [Click on images to enlarge] How to Make a Paper Rose. Paper roses are one of my favorite paper crafts. 
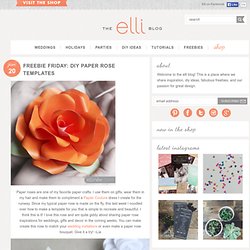
I use them on gifts, wear them in my hair and make them to compliment a Papier Couture dress I create for the runway.

Since my typical paper rose is made on the fly, this last week I noodled over how to make a template for you that is simple to recreate and beautiful. I think this is it! I love this rose and am quite giddy about sharing paper rose inspirations for weddings, gifts and decor in the coming weeks. {for a printable PDF version of these instructions, click here} Carambola (Carmen Sprung): Instructions in German.

50 Photoshop Text Effect. Gift Ideas for poor creative souls (6) You know how it goes, a friend calls you and invites you to dinner at the last minute. OMG! What gift can you take?! You scrabble around the cupboards trying to find a box of chocolates or a bottle of wine but find that most of the chocolates have been eaten and the wine has gone. I thought this was a wonderful idea. Supplies : Patterned paper-one 12 x 12" sheet. These directions will give you one flower. 1. 4. 5.

Tip: For single sided paper. 6. Note: Florist tape is stretchy, just play with it and pull gently but firmly as you move down the stem. 7. Note, you will have to play around with the height of the petals, and where on the petal you start your tape. 8. 9. 10. 11. 12. For tutorials on how to market yourself online, go here. The LIFE LESSONS blog {things crafty, thrifty, family, yummy & rambly): Lesson# 144 The Best Gifts are Homemade {Natural Chapstick} After searching FAR AND WIDE for an awesome Christmas gift for my girlfriends this year... 
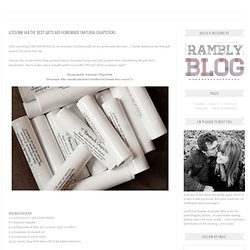
I finally landed on the best gift project I'm made thus far. I mean, this is way better than painted frames, decorated mugs and puff painted totes.

Introducing the gift that's inexpensive, fun to make, and is actually useful in real life! WOAH! What a concept, right? Homemade Natural Chapstick (because who needs another crocheted tissue box cover?) 1.5 oz beeswax (1 and a half tablets) 6 vitamin E capsules 2-3 tablespoons of olive oil (2=more rigid, 3=softer) 2-3 teaspoons of coconut oil 2-3 teaspoons of cocoa butter 25-30 empty chap stick tubes OR 15 lip balm containers DIRECTIONS 1. Where I found my ingredients: Organic olive oil (local health food store) Organic coconut oil (local health food store) Vitamin E tablets (local health food store) Empty chap stick tubes (ebay and a few pill boxes) clear printer labels (walmart) Aren't they adorable? Be Brave and EXPERIMENT! Dress 'em Up! Enjoy the download! - maggie makes.

How to Crochet - Broomstick Lace Scarf. How to make the contortionist crochet cuff... | kootoyoo. Summer bracelets DIY. When M. came home from her camp with school, she showed me this yellow bracelet she made with 'scoubidoo' strings. One of her friends taught her how to make these and of course I wanted to have a go at it too. Instead of scoubidou string I used strips of fabric for one and leather - what did you think?! - shoelaces in offsetting colors for another one. I believe both resulting bracelets look really nice. The possibilities in terms of material to braid with are endless. How about tall beach grass or just hemp cord? So, in case you 're in need of a fun summer project here's a how-to in 16 pictures with a short description below.

This is what you'll need for an adult size leather bracelet. Steps: 1. This is the kind of craft you could easily do with kids - have them cut strips of fabric, no need to worry about the strips being straight and regular, and teach them how to braid. With special thanks to my little girl M. for teaching me how to make these... Inspiration : bird tattoos + DIY temporary tattoos. I've been having a love affair with bird motifs since many years now, so my heart skipped a beat when I saw a flock of birds' tattoo for the first time. I've been collecting them since then. I know bird tattoos are currently super trendy, but I love them anyway! As far as I'm concerned, I'm not ready for a tattoo (I have a VERY low tolerance to pain), so as an alternative, I opted for temporary transfer tattoos!

Yes, just like those we found as inserts in bubble gums when we were kids. You need : 1. 2. 3. 1. 2. 3. It can last up to 7 days, but mine started cracking after 4 days, so I dissolved it with baby oil. I felt like a little girl, and it was super fun! How to Make Wrap Bracelets - AuntiesBeads.com. Accessories Index. DIY Circle Scarf | If you’re one of those people who needs a last minute Christmas present, a friend’s birthday is coming up, or you just would love a circle scarf, this tutorial might be awesome for you! I was so surprised when I went into American Apparel and saw their circle scarves for $34! I decided to figure out how to make one for way less, because I knew it would be super easy.

One thing different from the regular tutorials out there is that I doubled up the fabric on my scarves. First I did this because I was using a very thin polyester material, but then I continued using it even though I had a t-shirt material. I found that it gave the scarf a fullness and made it a lot thicker! Step 1 First begin with a rectangular piece of material (40 inches x 70 inches). Fold it over lengthwise, so the right sides are facing each other, and then sew along the lengthwise opening. Step 2 Next, reach one arm all the way through the tube at the seam, and grab a hold of the end. Step 3 Step 4 Like this: Like Loading... Elevator rapist pwned by a kid_oops!! :P.

Pearltrees videos

Getting started.