
Easy Fall Tree Activity for Toddlers. We love creating sticky walls and using contact paper for crafting.
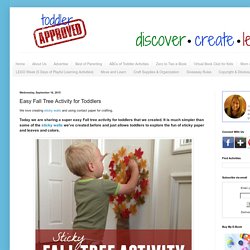
Today we are sharing a super easy Fall tree activity for toddlers that we created. It is much simpler than some of the sticky walls we've created before and just allows toddlers to explore the fun of sticky paper and leaves and colors. clear contact paperfabric leavesclear tapebrown paper bag (cut up to look like a tree trunk)scissors To create the Fall tree you first need to make a tree trunk out of brown paper and adhere it to the wall. Next you need to cut out a large oval from the clear contact paper and attach it to the wall (sticky side out) so that it fits above the trunk like a treetop. Lastly, lay out your fabric Fall leaves on the floor and encourage your child to add and remove Fall leaves from the Fall tree. We took breaks in between sticking the leaves on the tree to just throw the leaves and make them fall all over his face.
Need any more Fall activities? How To Make Magic Mud - From a Potato! Science Activity for Kids: Lemon Volcano. Now what kid (or adult for that matter) can resist an oozing, colorful, erupting, oh and did I mention aromatic science activity?
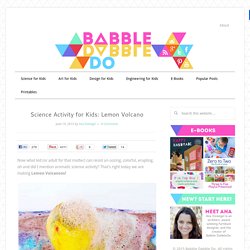
That’s right today we are making Lemon Volcanoes! I’m back with our STEAM Summer Camp series and today’s topic is SMELL. While Lemon Volcanoes are indirectly related to smell, it’s not the primary focus of the project, they certainly are one of the nicest smelling volcanoes we’ve ever played with! It makes for an extra special sensory experience. Before we get started let me offer a quick disclaimer- these are not giant volcanic eruptions but rather bubbly small eruptions you can make harnessing the chemical reaction of citric acid, found in citrus fruits, and baking soda.
Want more science? This post contains affiliate links to products I love and recommend to my readers, plus it keeps this little blog o’mine afloat! Materials Lemons I recommend 2 lemons per volcanoBaking SodaLiquid Watercolors/ Food ColoringCraft StickDish soapTrayCup & Spoons Instructions. Build A Living Kid's Playhouse That Brings Them Back To NatureHealthy Holistic Living.
When we were young, outside wasn’t just the best option, it was the only option.
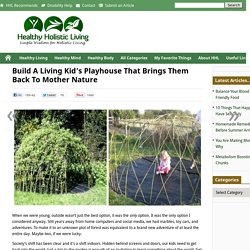
It was the only option I considered anyway. Still years away from home computers and social media, we had marbles, toy cars, and adventures. Vegetable growing cheat sheet. Spring Activities: Cress Heads. Rainbow Roses. So here is a great idea: create your own rainbow roses.
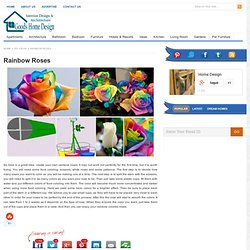
It may not work out perfectly for the first time, but it is worth trying. You will need some food coloring, scissors, white roses and some patience. The first step is to decide how many roses you want to color as you will be making one at a time. The next step is to split the stem with the scissors, you will need to split it in as many colors as you want your rose to be. Then just take some plastic cups, fill them with water and put different colors of food coloring into them.
DIY Unique Christmas Candle. You can’t imagine a complete New Year’s Eve holiday without a decorative candle.
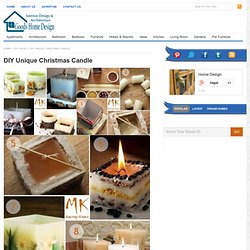
You can choose from the many versions the downtown shops or malls offer, but they often lack the spirit and personality of a homemade one. So, make your afternoon a little bit more entertaining with this DIY candle. The end-result will be much more pleasing to your household and overall Christmas holiday decoration. And if you don’t feel like having it as your decoration, you can easily make it a gift to your friends or loved ones. First of all, you will need: • white candles, not flavored ones; • a wick; • a glass or cardboard form, depending on what type of candle you are going to do; • additional materials, such as coffee beans, shells, cinnamon rolls, dried flowers and leaves, different cereals, dried lemon or orange slices, dried lavender;
DIY Autumn Leaf Bowls. As we mentioned before, this is our favorite time of year for DIY decor.
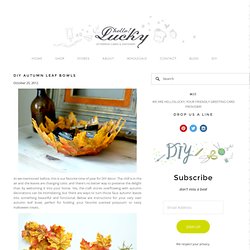
The chill is in the air and the leaves are changing color, and there's no better way to preserve the delight than by welcoming it into your home. Yes, the craft stores overflowing with autumn decorations can be intimidating, but there are ways to turn those faux autumn leaves into something beautiful and functional. Below are instructions for your very own autumn leaf bowl, perfect for holding your favorite scented potpourri or tasty Halloween treats. Materials: Craft store leaf garland, Mod Podge (matte finish), Foam Brush, Balloon, Scissors, Mixing bowl *Tip: try to find thin, paper-like leaves for your garland. Wind-up paper butterflies are my fave (guest post from amelia) I had a baby so I’ve invited some fave guests to take over for me while I spend time with the little guy.
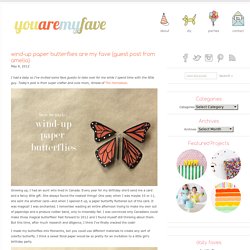
Today’s post is from super crafter and cute mom, Amelia of The Homebook. Growing up, I had an aunt who lived in Canada. Every year for my birthday she’d send me a card and a fancy little gift. Name Activities for Preschoolers. I am taking some time over our break to adjust some of the activities in our daily schedule.
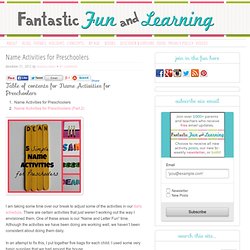
There are certain activities that just weren’t working out the way I envisioned them. One of these areas is our “Name and Letter Fun” time. Although the activities we have been doing are working well, we haven’t been consistent about doing them daily. In an attempt to fix this, I put together five bags for each child. I used some very basic supplies that we had around the house. The kids will do each activity once per week. Start To Grow: Milk Container Gardening. For almost a year and a half now, my husband has been increasingly making more homemade cheeses.
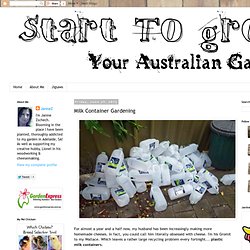
In fact, you could call him literally obsessed with cheese. Caixa de compostagem. Pauzinhos decorados. Cabeça de capim. Segunda semana das férias escolares do meu Tecnobaby JG e ele já apresenta estresse por falta de novas atividades.
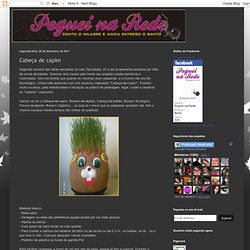
Teremos dois meses pela frente que exigirão muuita paciência e criatividade. Isso me lembra que quando as meninas eram pequenas, e o mundo não era tão tecnológico, minha mãe apareceu com uns bonecos chamados "Cabeça-de-Capim". Fizeram muito sucesso, pela interatividade e iniciação na prática da jardinagem: regar, cuidar e observar os "cabelos" crescerem.
Vamos ver se o Cabeça-de-capim, Boneco-de-alpiste, Cabeça-de-batata, Boneco Ecológico, Peruca-de-alpiste, Boneco Orgânico... ou seja lá o nome que os pequenos quiserem dar, fará o mesmo sucesso nestes tempos tão cheios de Ipadtudo. Material básico: - Meia-calça - Serragem ou areia (de preferência aquela lavada por ser mais grossa) - Alpiste ou painço - Cola (pode ser para tecido ou cola quente) - Para montar a carinha use retalhos de feltro ou de tecido ou de E.V.A.; ou botões; ou lã... ou o que tiver à mão.