
Read serial file /dev/ttyACM0 best way. In the command prompt, you can use stty to view and alter settings on your port, however data rate does not matter, even if it accepts it or shows it, this is straight USB not serial USB.
A good setting to use is -raw to make the port raw and turn off local echo and other properties which are invasive to what you want to see. If whatever you're attaching too talks all the time, you can see the output of /dev/ttyACM0 using the cat command and you can send "type-able" data to it using the echo, just not control characters, or not easily. Examples: Code: cat /dev/ttyACM0 echo run > /dev/ttyACM0 I have posted some blog entries about this topic, including C code examples, the first is an example how to parse GPS data through a serial USB connection: /> /> The next on is using select() to check for data from multiple descriptors.
Pro Micro & Fio V3 Hookup Guide. Favorited Favorite 4 Introduction Welcome to the new frontier of Arduino-compatible boards, made possible by the ATmega32U4.
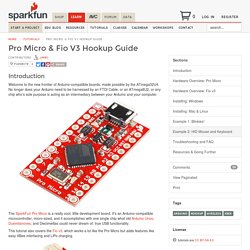
No longer does your Arduino need to be harnessed by an FTDI Cable, or an ATmega8U2, or any chip who’s sole purpose is acting as an intermediary between your Arduino and your computer. The SparkFun Pro Micro is a really cool, little development board. It’s an Arduino-compatible microcontroller, micro-sized, and it accomplishes with one single chip what old Arduino Unos, Duemilanoves, and Diecimeillas could never dream of: true USB functionality.
This tutorial also covers the Fio v3, which works a lot like the Pro Micro but adds features like easy XBee interfacing and LiPo charging. Set up and Installation Instructions for the Arduino Pro Micro - All. Pro Micro & Fio V3 Hookup Guide. MySensors - Create your own Connected Home Experience. In some cases, newer water meters are equipped with a pulse output.
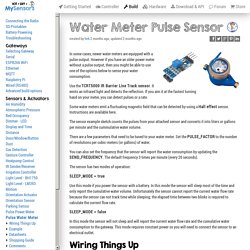
However if you have an older power meter without a pulse output, then you might be able to use one of the options below to sense your water consumption. Use the TCRT5000 IR Barrier Line Track sensor. It emits an infrared light and detects the reflection. If you aim it at the fastest turning hand on your meter, you can detect pulses or a rate. MySensors - Create your own Connected Home Experience. The LM393 is a simple photo-resistor light sensor that has both analog and digital outputs.
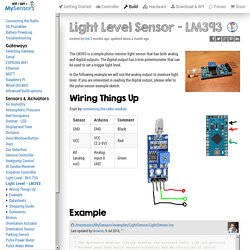
The digital output has a trim potentiometer that can be used to set a trigger light level. In the following example we will use the analog output to measure light level. If you are interested in reading the digital output, please refer to the pulse sensor example sketch. Wiring Things Up. How to measure temperature with your Arduino and a DS18B20. In this example project we will be combining an Arduino and a DS18B20 temperature sensor.
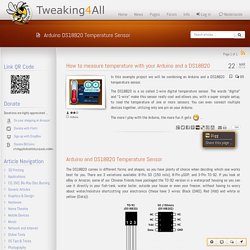
The DS18B20 is a so called 1-wire digital temperature sensor. The words “digital” and “1-wire” make this sensor really cool and allows you, with a super simple setup, to read the temperature of one or more sensors. You can even connect multiple devices together, utilizing only one pin on your Arduino. The more I play with the Arduino, the more fun it gets Arduino and DS18B20 Temperature Sensor The DS18B20 comes in different forms and shapes, so you have plenty of choice when deciding which one works best for you.
DS18b20 – Available Packages DS18B20 in a waterproof casing The DS18B20 is quite versatile. Another cool feature is that you can connect up to 127 of these sensors in parallel, and read each individual temperature. Arduino-info.wikispaces. Temperature Sensor DS18B20 Electronic Brick, Waterproof and other Versions NOTE: There are different-appearing versions but they work the same.
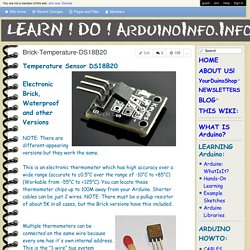
This is an electronic thermometer which has high accuracy over a wide range (accurate to ±0.5°C over the range of -10°C to +85°C) (Workable from -55°C to +125°C). You can locate these thermometer chips up to 100M away from your Arduino. Shorter cables can be just 2 wires. Multiple thermometers can be connected on the same wire because every one has it's own internal address. Using A Flow Sensor With Arduino. Liquid Flow Meter - Plastic 1/2" NPT Threaded. Measure liquid/water flow for your solar, computer cooling, or gardening project using this handy basic flow meter.
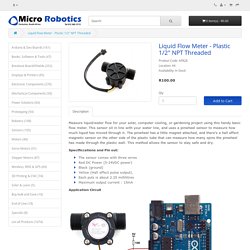
This sensor sit in line with your water line, and uses a pinwheel sensor to measure how much liquid has moved through it. The pinwheel has a little magnet attached, and there's a hall effect magnetic sensor on the other side of the plastic tube that can measure how many spins the pinwheel has made through the plastic wall. This method allows the sensor to stay safe and dry. Specificcations and Pin out: The sensor comes with three wires Red DC Power (5-24VDC power) Black (ground) Yellow (Hall effect pulse output). Application Circuit. Using the Arduino Pro Mini 3.3V. Favorited Favorite 3 Introduction The original, true-blue Arduino is open-source hardware, which means anyone is free to download the design files and spin their own version of the popular development board.
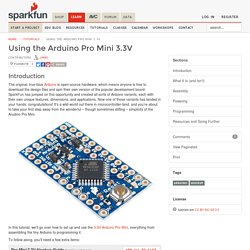
SparkFun has jumped on this opportunity and created all sorts of Arduino variants, each with their own unique features, dimensions, and applications. Now one of those variants has landed in your hands; congratulations! It’s a wild world out there in microcontroller-land, and you’re about to take your first step away from the wonderful – though sometimes stifling – simplicity of the Arudino Pro Mini. In this tutorial, we’ll go over how to set up and use the 3.3V Arduino Pro Mini, everything from assembling the tiny Arduino to programming it.
To follow along, you’ll need a few extra items: