
How to Make Chocolate Ice-cream Cups Using Balloons - Funny Mike. How to Make a Cake with Zebra Stripes on the Inside! & MyCakeSchool Blog. Hi everyone!

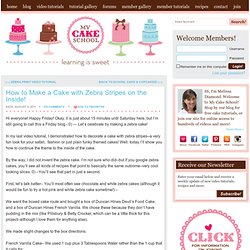
Happy Friday! Okay, it is just about 15 minutes until Saturday here, but I’m still going to call this a Friday blog -:0) — Let’s celebrate by making a zebra cake! In my last video tutorial, I demonstrated how to decorate a cake with zebra stripes–a very fun look for your safari, fashion or just plain funky themed cakes! Well, today I’ll show you how to continue the theme to the inside of the cake. By the way, I did not invent the zebra cake. First, let’s talk batter– You’ll most often see chocolate and white zebra cakes (although it would be fun to try a hot pink and white zebra cake sometime!) We went the boxed cake route and bought a box of Duncan Hines Devil’s Food Cake, and a box of Duncan Hines French Vanilla.
We made slight changes to the box directions: French Vanilla Cake– We used 1 cup plus 3 Tablespoons Water rather than the 1 cup that it calls for. That’s it! Let’s get started! Two bowls of batter…. Continue the process until your pans are approx 2/3 full. I can teach my child!: DIY Lick-and-Stick Stickers. Create * Sell * Buy * Share - Buy Handmade Paper Crafts and Paper ... Finally, as promised, the tutorial!

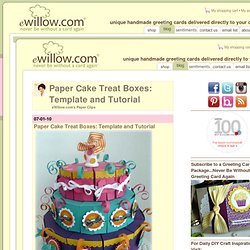
Yes, it really did take me two days to get this ready. I hope you enjoy it. Be sure to create a FREE studio on eWillow.com and upload photos of your cakes when you are finished. You can even sell them, too! Click HERE for more details. Also, to help spread the word about eWillow.com and to build our community, please link to this tutorial and share the news that eWillow.com is FREE to use. Now, on to the tutorial! Supplies Download the Template (Print the template directly onto the cardstock.
If you have a Cricut machine, click HERE for the template Scissors Hole Punch Bone Folder for Scoring Double-Sided Tape Assorted Cardstock, Ribbons, Punches, & Embellishments Instructions 1) Remember, to make it easier, print templates directly onto cardstock **Please note that you need ELEVEN of each piece** 2) Cut out cake pieces on solid lines and score on dotted lines 3) Apply double-sided tape to pointy flap and adhere as shown below. How to Create a Backyard Movie Screen.
Watching a favorite movie outdoors is a fun and special warm–weather activity for kids and parents alike.

And all it takes are some simple materials — plus a little creativity — to transform your backyard into an outdoor theatre. Setting Up Your Outdoor Screen What you need: 2 thick, white queen–size ironed flat sheets Top pole 1.5" diameter x 10' long Bottom pole 3" diameter x 10' long Rope — 2 different thicknesses Step 1. Start with two queen–size ironed flat sheets. Sew them together with white thread so the long sides are joined creating a tube.
Once your screen is set up, create a casual, comfortable seating arrangement using plush cushions covered in fade–proof fabrics and soft, moisture–resistant pillows. How to make Gak (Slime) We had a few days of rain around here so we made some slime to occupy our time inside.

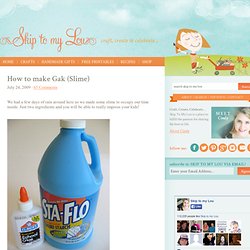
Just two ingredients and you will be able to really impress your kids! To make simply mix equal parts of liquid starch and glue together. We placed 1/4 cup liquid starch into a sandwich bag and added about 3 drops of green food coloring. Next add in 1/4 cup glue Mix well. Take it out of the bag and have fun! Looking for more ways to impress your kids? Need a way to use up the rest of the starch? You will find other rainy day activities here. Ice cream party. At the end of last summer, we hosted a back-to-school ice cream party for the kids (remember the ice cream scoop invitations?) I wanted to share all the fun we had with you all so that you can host your own ice cream party this summer!
We had games and prizes and of course, lots and lots of ice cream! The most fun decorations we made for the party were giant ice cream cones made from balloons and paper. I had a very specific use for them (you’ll see later), but they are great all-around decorations for any ice cream-themed party. Let me show you how easy they were to make! First, you will need to cut out a cone shape from some light brown paper. Roll your cone shape up and secure with a piece of tape.