
Videojug - Get Good At Life. The world’s best how to videos plus free expert advice and tutorials. Art & Craft - how to video tutorials Origami, Painting & Drawing, Creative Crafts (Most viewed) Page 8. Bottle Cap Table with Poured Resin Surface. DIY Doily Light: Simple Suspended-Sphere Lace Lamp Shade. So simple a child could make it – and have fun in the process, too.

And the result? A shining example of how light and shadow can work together to brighten up a room. Swedish craftswoman Isabelle Dos started with a simple party-shop balloon, blown up big and wrapped in white lace place settings painted with wallpaper glue. The soaked material sticks readily to the sides of the inflated sphere, overlapping to form a contiguous shell, suspended and left to dry overnight like a plaster cast.
Page 2. How To Turn Old Books Into New Furniture. Most Popular Repurposing Tricks of 2011. 7710_32da.jpeg (JPEG Image, 435 × 3307 pixels) Gift Ideas for Poor Creative Souls (12) Posted by: Cathy on Jun 03, 2012 Tagged in: Untagged Summer Lights Garland I loved this idea and who would not love to receive this pretty gift.
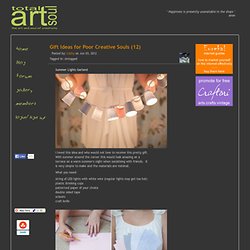
With summer around the corner this would look amazing on a terrace on a warm summer's night when socialising with friends. It is very simple to make and the materials are minimal. What you need: string of LED lights with white wire (regular lights may get too hot) plastic drinking cups patterned paper of your choice double sided tape scissors craft knife. Home. Easy and Unique DIY Vases. Everyone loves vases, but it’s difficult to find one that is unique and not the same old run of the mill vase you’ve seen 1000 times before.
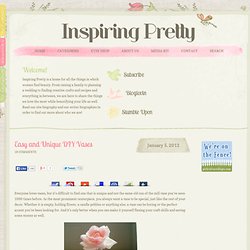
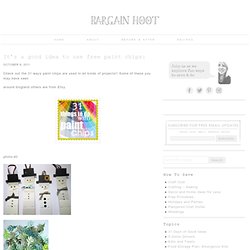
As the most prominent centerpiece, you always want a vase to be special, just like the rest of your decor. Whether it is empty, holding flower, a candle pebbles or anything else, a vase can be boring or the perfect accent you’ve been looking for. And it’s only better when you can make it yourself flexing your craft skills and saving some money as well. 95 Incredibly Creative Things. It’s a good idea to use free paint chips: Check out the 31 ways paint chips are used in all kinds of projects!!
Some of these you may have seen around blogland others are from Etsy. 1.PaintswatchWall2.SnowmanOrnaments3.cut leaves. Gifts to Make for Your Man. Jellyvampire-1304892000.jpg (JPEG Image, 750 × 12291 pixels) - Scaled (5%) You knew i was going to make one. They are all over pinterest....
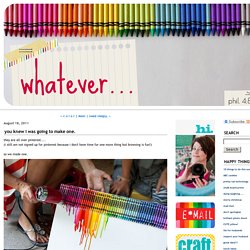
(i still am not signed up for pinterest because i don't have time for one more thing but browsing is fun!) So we made one. i took a box of 64 crayons and took out the blacks and browns.i used another small box and doubled up on the good colors i liked and hot glued them to the top of our canvas. then we turned our blow dryer to hot on high. not long after you set the hair dryer by the crayons they get shiny and then the wax starts to melt! Most gawked all-time. Craft DIY Projects, Patterns, How-tos, Fashion, Recipes @ Craftzine.com - Felting, Sewing, Knitting, Crocheting, Home & More.
DiY crafts, free sewing patterns & sewing tutorials – WhatTheCraft.com. Build a Thumb Piano - Step-by-Step Guides for Offbeat DIY Projects. Lollies - a little ART CAN'T HURT. A perfect rainy day thing to do!
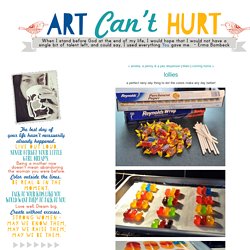
The colors make any day better! How to make LOLLIESyou will need: jolly ranchers, candy sticks, parchment paper, foil & a cookie sheet 1) lay a piece of foil on cookie sheet. cover foil with a piece of parchment paper.2) unwrap candies and place side by side on parchment paper in your choice of color & flavor combinations. use three candies together for extra large lollies, and only two candies together for regular lollies.3) heat candies in oven for about 5 minutes at 200 degrees. keep a close eye on the candies and take them out as soon as they've barely melted together. if you leave them in too long they will melt too much and you won't be able to put a stick into the lollie. alter the cook time accordingly.4) carefully take cookie sheet out of oven. immediately lay candy sticks into place on melted candies. slowly twirl in melted candy to coat the stick and so it will hold in the lollie. they're hot! How to Make Leaf Skeletons.
I wanted to share with you a project from one of my readers who shares with us how to make leaf skeletons.

I LOVE this! I have several leafs in various forms displayed in my home and knew I needed to make some of her leaf skeletons to add to my decor. I love how a pattern of leaves can enhance the beauty in your home. So I asked Heather if she would mind sharing her project with you. You can find more great projects from Heather at her blog The Other White House. I have spent hours and tried various ways of making these. You need washing soda, not baking soda!